
Static IP addresses ensure that the computer’s hostname aligns with the designated IP address in Penn’s DNS service. To configure properly, one will need the correct IP address, correct subnet mask, default gateway, and two addresses for Penn’s DNS servers. All of those items can be had for the asking. DO NOT make any configuration changes without having all of the correct values described above. Local administrative privileges will also be needed to do this.
Windows 10 offers two ways to configure a static IP address through the GUI . The first way is with the new System application. Second is through the traditional Control Panel (control.exe). The first way is problematic and never saves any manually entered configuration. Don’t use it. Instead, this tutorial will focus on configuring a static IP address through the Control Panel.
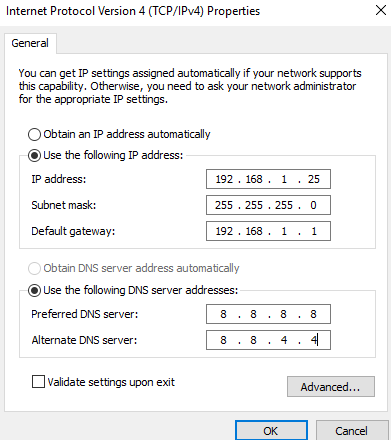
We’ll configure the following values for example.
IP address: 192.168.1.25
Subnet mask: 255.255.255.0
Default gateway: 192.168.1.1
DNS 1 & 2: 8.8.8.8, 8.8.4.4
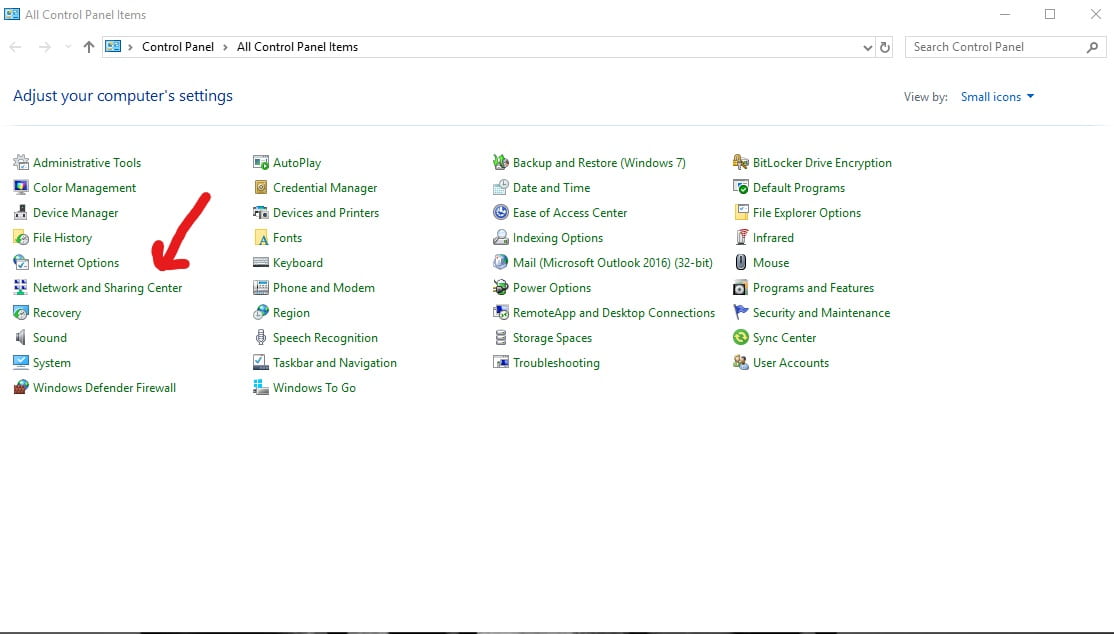
1. To start, search for “control.exe.”
2. Select (click) the “Network and Sharing Center” applet.
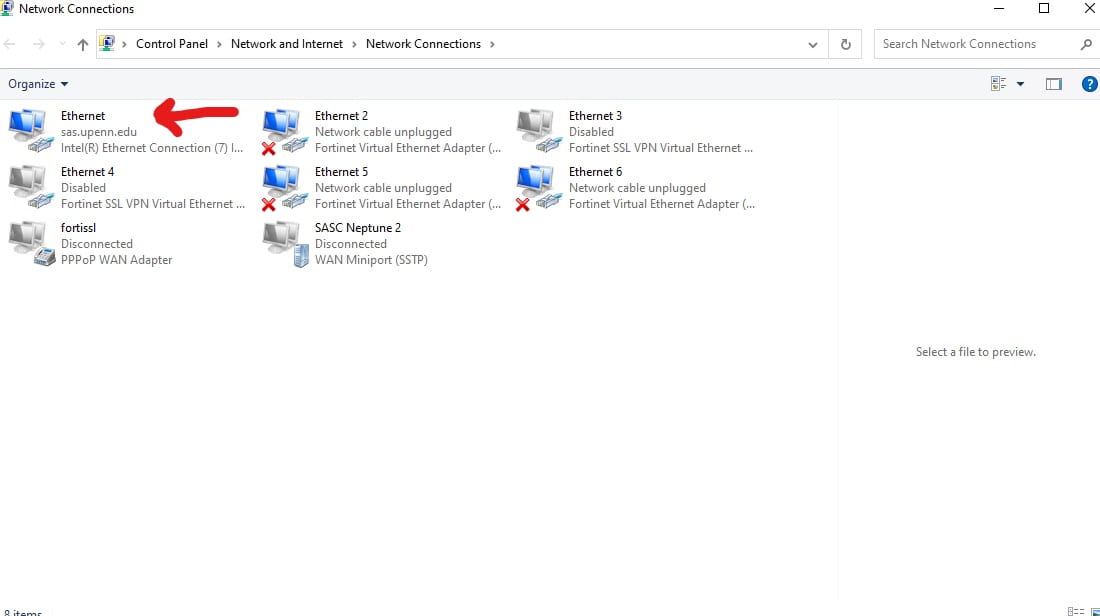
3. From the top-left, select the “Change adapter settings” link (under the “Control Panel Home” link).

4. A new window will appear, showing all installed network adapters. Double-click the adapter titled “Ethernet.”
5. Click the “Properties” button. Admin username and password will be needed.
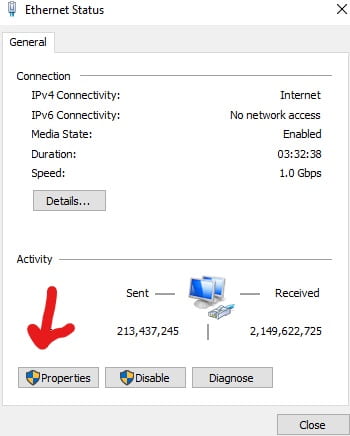
6. Next, click the “Internet Protocol Version 4 (TCP/IPv4)” item and then click “Properties.”

7. Fill-in the blanks in the resulting window and click “OK” to close the dialog boxes and save the new settings.
Just like houses on a street, no two can have the same address. The same goes for IP addresses. If two computers have the same IP address, neither will remain online. Make sure the IP information being entered is correct before proceeding.