Building an image of Windows 10 for mass-distribution

Hello,

This post is a follow-up or compliment to creating an image of Windows for mass-distribution (Windows 7). On that note as well, the folks over at Deployment Research have a great post on creating an updated Windows 7 master image with MDT, very helpful.

This summer, Windows 10 is upon us, and we have already begun slowly transitioning some areas to Microsoft’s ultimate operating system. Largely, the process of making an image for Windows 10 is the same that is was for Windows 7 with a few twists.

Tools…

I like to build my images in a virtual machine. This approach allows me to create an image that is truly hardware-neutral. Using actual hardware could work, but there still may be remnants of that hardware that sysprep does not generalize, and could potentially make it into production. The actual hardware approach worked for Ghost, but it is not necessary anymore with MDT. Choose whatever virtualization tool out there, they all work very well, some are even free. Here’s the best of what’s around:

  • VMware Workstation/Player – Not free, but feature-rich and integrates into vSphere.
  • Microsoft Hyper-V – Comes with x64 server versions of Windows (2008 and later), and x64 desktop versions of Windows 8 and later. Despite all of the “server” nomenclature, client operating systems will work just fine.
  • Oracle VirtualBox – Free, and available for Windows, macOS, and Linux as both the host OS and the client OS.

I am aware that there are virtualization products for macOS, and Linux, but we’re working with Windows. I think it is best to just stick with that for the whole process. I’m sure everything would be fine if Windows was not the host operating system.

Given that, you’re going to want to do this work on a moderately beefy PC. Not all of us have Dell Precision workstations, or even access to a server with Hyper-V or vSphere installed, but using an under powered PC will make building images, and just using virtualization a slow and miserable experience. The key is storage. Creating images, multiple images with snapshots, and testing uses up a great deal of space on the disk drive(s). I would not bother using a drive smaller than 1TB. It’ll work on something smaller, but in that case, you are limiting the whole process. Even 1TB SSDs are reasonably priced now. SSDs are king, but still not equal to spinning disks in price per gigabyte. A combination of something like a 256GB SSD for the host operating system and applications with a 4TB spinning HDD for storage would work well. RAM is also very important because, when using VMs, RAM is being used by both the host and guest operating systems, at the same time. Try to max-out what your PC will take. 32GB, 64GB of RAM is not unreasonable for this type of work.

Modern CPUs are plenty powerful for many tasks, virtualization too. Intel CPUs have extensions specifically for virtualization. Quad-core CPUs should be a pre-requisite for a host PC that will do virtualization. You could use a dual-core CPU, but recall the part from above about under powered PCs and virtualization. If you can get a CPU with more cores, 6, 8, great! Xeon CPUs are really nice. I wouldn’t bother with anything under a quad-core i7. Another thing to also consider, that is sometimes overlooked, is bus speed. You could have the fastest CPU with many cores, a ton of RAM, working off a sweet 2TB SSD, but if the bus that connects all of these devices together is small, all you are creating is a digital traffic jam. NVMe, and M.2 SSDs are slowly replacing SATA-based SSDs and spinning HDDs in consumer and business PCs. They offer a significant increase in throughput and speed for data storage. DDR4 memory is the latest and greatest in RAM technology, until 2020, when DDR5 is expected. It is not the cheapest, but DDR4 outperforms all of its predecessors. Obviously, you want to get the best set up you can, but I understand budgets have limits.

Virtual Machine Settings…

This can vary from place to place, but I would use at least 4GB of RAM, one vCPU with 2 cores, and a 128GB VHD. That has worked well for me with Windows 7 and 10. If you can give the VM 8GB of RAM, do it. The smallest disk drive we have out there is a 128GB SSD in some Dell OptiPlex 9020s we purchased in 2014. When finished, my image has a disk footprint of around 70GB (35GB compressed by dism). If the new image will be small, then a 64GB VHD is fine. That is as small as I would go. It is possible to squeeze an image of Windows 10 (plus updates), Office 2016, Adobe Reader, Chrome, VLC, and AV software onto a 32GB drive, it is a tight squeeze. Windows grows in size over time, and 32GB will be gone long before you even realize it. I’m starting to think 32GB is too small for an iPhone… The virtual NIC should be configured for NAT, and not bridged to the production network. We’ll have a fresh install of Windows, straight from the ISO, and temporarily unpatched. The image should not see the production LAN until it is ready for testing (patched), or ready for use.

OS Installation…

After the guest VM is created for the new image, connect its virtual CD/DVD-ROM drive to the ISO file for Windows 10. In VMware Workstation, new VMs, with no OS installed, automatically boot to the virtual CD/DVD-ROM by default.

Follow the on-screen prompts to install Windows into the VM, but STOP after the first reboot from install/file copy to OEM/Windows setup. Setup will stop at that point, and wait for user input. There, we’ll use audit mode to finish setting Windows up the way we would like it. I have more information about installing Windows 10 in a separate post.

Press control + shift + F3 to reboot into audit mode.

STOP at this screen!

To get into audit mode, press control + shift + F3 all at the same time, like the three-finger salute (control + alt + delete). Windows will reboot, and automatically log in as the built-in administrator account, and will continue to do so, no matter how many times you reboot, until sysprep is run. Here, we’ll customize Windows 10 as desired, then run sysprep with an unattend.xml file that copies our profile over to the default (CopyProfile).

From within your virtual machine software, take a snapshot of the VM, at this point.

Most corporate or “work” PCs have Microsoft Office installed along with Windows and other common programs. Microsoft/Windows Update is used to update both Office and Windows. At this point, I install Office (silently with a MSP file), and enable Windows to update other products in addition to itself. This is done from the new Settings application \ “Updates & Security” \ “Advanced options” \  “Give me updates for other Microsoft products when I update Windows.”

The above setting has to be enabled for Windows to update Office too.

Once that is set, run updates on the new VM until there are no more left. The later the build of Windows 10, the fewer updates will be required. Microsoft Office 2016 has been available for some time, and has a decent amount of available updates online. Once the updates are finished, shut down the VM, and take another snapshot.

Some basic applications, which are not included with a regular install of Windows, are utilities that other applications use. Applications like the various Visual C++ Redistributables (VCPP), Microsoft Silverlight, and Updated .NET Frameworks (4.5/4.6). These are easily found online, and can be installed silently. The Deployment Research site has a script that gathers all of the C++ Redistributables together, and installs them, silently, in one script.

Download the VCPPs from the Microsoft website (both x86 and x64), and move them to a folder structure named as follows: (#### = the date for the VCPP application, 2005-2015)

Source \ VC#### \ vcredist_x64.EXE

Download all of the VCPP apps for x86 and x64 versions 2005, 2008, 2010, 2012, 2013, and 2015 and arrange them like above.

The script to install all of these can be found here.

Silverlight is also freely available from Microsoft’s website.

Next, is to install all of the regular applications that people use every day. Web browsers like Google Chrome, or Mozilla Firefox, PDF readers like Adobe Reader, or SumatraPDF, communications application such as Skype or Zoom, and multimedia apps like VLC, or iTunes. I download, and store the applications I intend to use on a server share, then use silent install scripts to install them on Windows 10, which is still in audit mode.

Some basic silent install commands for common applications. If you’re in for more details, check out ITNinja.com. They have a compendium of unattended and deployment-related information for many applications.

  • Adobe Reader: msiexec /qb /i AcroRead.msi TRANSFORMS=AdobeReaderDC.mst
  • Google Chrome Enterprise: msiexec /qn /norestart /i “GoogleChromeStandaloneEnterprise.msi”
  • Mozilla Firefox: FirefoxSetup.exe -ms
  • VLC: vlc-2.2.1-win32.exe /L=1033 /S /NCRC
  • Java (if you must): jre-8u66-windows-x64.exe” /s JAVAUPDATE=0 AUTOUPDATECHECK=0
  • Notepad++: npp.6.8.7.Installer.exe /S
  • 7-Zip: msiexec /q /I 7z920-x64.msi

Ninite.com has a site that will create a wrapper as an executable that will download whatever freeware is chosen and install them. All in one go.

Keep in mind that the fewer applications that are placed into the image, the longer that image will stay relevant. MDT/SCCM can deploy applications in addition to the OS itself. Products like Adobe Flash Player, and Adobe AIR change so often that I just install them when the image is deployed.

Run each of the newly-installed applications and configure them as desired. Shut down, take a snapshot, then reboot and let Windows 10 continue in audit mode.

To save time and effort in configuring Windows the way I need it, I try to automate as much as possible. Scripting the basics and eliminating the redundant and repetitive tasks can save a lot of time and prevent unnecessary mistakes.

Creating user accounts – I typically make a local user account for administrative use and for general use in case the domain is somehow unavailable.

First, I create a local folder to contain log files and other goodies, then hide it. “C:\Stuff” in this example.

mkdir C:\Stuff

attrib +h C:\Stuff

echo Creating local user accounts

net user pcadmin * /add /comment:”Local admin account” /passwordchg:NO
wmic useraccount where “name=’pcadmin'” set passwordexpires=FALSE
net localgroup “Administrators” pcadmin /add

net user pcuser * /add /comment:”Local user account” /passwordchg:NO
wmic useraccount where “name=’pcuser'” set passwordexpires=FALSE
net localgroup “Guests” pcuser /add

echo Local user accounts created on %date% at %time%>>C:\Stuff\Windows-10-Config-Script.txt

The asterisk (*) after the username will prompt for the new user’s password instead of coding it into the script and leaving it for prying eyes. The last command (echo…) will create a text file and add the text between echo and the first >. The double >> will just add the text to an existing file should that be the case.

To keep from surprising users with new builds or versions of Windows 10 through Microsoft Windows Update, I set a registry key to disables Windows upgrades through updates.

reg add “HKEY_LOCAL_MACHINE\SOFTWARE\Policies\Microsoft\Windows\WindowsUpdate” /v DisableOSUpgrade /t REG_DWORD /d 1 /f

echo Windows 10 version upgrade disabled on %date% %time%>>C:\Stuff\Windows-10-Config-Script.txt

The next thing I want up and running right off of the bat is remote desktop.

echo Enabling RDP with SASC alternate port
reg add “HKEY_LOCAL_MACHINE\SYSTEM\CurrentControlSet\Control\Terminal Server” /v fDenyTSConnections /t REG_DWORD /d 0 /f
reg add “HKEY_LOCAL_MACHINE\SYSTEM\CurrentControlSet\Control\Terminal Server\WinStations\RDP-Tcp” /v “PortNumber” /t REG_DWORD /d “0xdesired_port_number_in_hex” /f
netsh advfirewall firewall add rule name=”Alternate RDP Port” dir=in action=allow protocol=TCP localport=desiredportnumberinbase10

echo RDP enabled with SASC alternate port on %date% at %time%>>C:\Stuff\Windows-10-Config-Script.txt

A facet of Windows’ default configuration is to hide file extensions. I can guess the designers at Microsoft figured doing so might be helpful to end users, but in practice I have found it to be anything but for most people. I inject a quick registry change to show those pesky extensions .

reg add HKCU\Software\Microsoft\Windows\CurrentVersion\Explorer\Advanced /v HideFileExt /t REG_DWORD /d 0 /f
echo Windows file extensions shown on %date% %time%>>C:\Stuff\Windows-10-Config-Script.txt


This next part of the script is entirely optional. I don’t recommend activating Windows or Office until it is ready for the end user. A caveat in configuring a default user profile, even using Windows in audit mode, is that Windows cannot be personalized until it is activated. That means you will not be able to configure a wallpaper, screensaver, desktop icons, or color theme. I don’t find that to be a big deal as most of those items can be configured through a post-deployment registry tweak or with Group Policy. However, if those items are to be included with a custom default user profile during sysprep, activate and make the necessary changes. Then, add this to the script.


REM Try KMS activation first. If that doesn’t work, try MAK activation.
cscript C:\Windows\System32\slmgr.vbs /skms kmsserver.company.com:port
cscript C:\Windows\System32\slmgr.vbs /ipk THEWI-NDOWS-10KMS-PRODU-CTKEY
cscript C:\Windows\System32\slmgr.vbs /ato
if %ERRORLEVEL% == 0 echo Windows activated by KMS on %date% %time%>C:\Stuff\Windows-10-KMS-Act.txt
EXIT
else
REM If KMS is not available, use an MAK to activate.
cscript C:\Windows\System32\slmgr.vbs /ipk THEWI-NDOWS-10MAK-PRODU-CTKEY
cscript C:\Windows\System32\slmgr.vbs /ato
echo Windows activated by MAK on %date% %time%>C:\Stuff\Windows-10-MAK-Act.txt
       EXIT


If Windows was just activated, shut down, take a snapshot, then reboot and let Windows 10 continue in audit mode.


Custom Default User Profile…


Prepare the default user profile, the built in Administrator account, in the way the end user should have it. I would be cautious when running applications under this account to answer any first run prompts. Windows 10 does more during a user’s first login process than it did with Windows 7. These changes lengthen the amount of time it takes a new user to log in for the first time. As applications are run and settings configured, the user profile grows in size, quickly, going from 2MB to 500MB without doing much. This default profile is copied over from C:\Users\default each time a new user is brought on to Windows. The larger the profile, the longer the copy process will take and lengthen an already long login process. More and more I have sought ways to provide default user settings through group policy and our endpoint management platform, BigFix.


If a VM snapshot hasn’t been taken in a while, take one now and certainly before sysprep is run in any fashion.


In order for sysprep to copy the customized user profile we have configured to the default, replacing what Windows provides, there can only be one profile on Windows at the time sysprep is run. If there’s more than one profile, sysprep won’t copy anything. Delete any profile from Windows, through the System applet, except for the customized profile. This also ensures that everyone who logs into a PC with this image of Windows installed will get the customized profile.


Next, create an unattend.xml file with the Copy Profile option set to true. Unattend file creation needs to be done on another, separate install of Windows 10 that is running the exact same version of Windows 10 for which the unattend.xml is being made. Copy the unattend.xml file over to the VM (C:\Windows\System32\sysprep) which is about to be sysprepped and run:


sysprep.exe /oobe /generalize /shutdown /unattend:C:\File\Path\To\unattend.xml


Sysprep will take its time and do its thing to generalize Windows and shut down. Take another VM snapshot at this time and power-on the VM again. Windows OOBE will run as if it were a new PC obtained from an OEM or a vendor. Create a bogus user account to complete the OOBE process and get to the Windows desktop. Log off of the new user account and log in as the BUILTIN Administrator (It should be listed at the bottom-left portion of the login screen). Delete the new user account, created through OOBE, and confirm that the resultant user profile being given is what the end user should have. Take yet another snapshot of the VM. Once it is, capture the image with the imaging tool of choice. We use the Microsoft Deployment Toolkit (MDT). To capture an installation of Windows into MDT, connect to the deployment share with the Run dialog from the installation of Windows that is to be captured. No need to reboot into an MDT Windows PE USB drive.


\\mdtserver.company.com\deploymentshare\Scripts\LightTouch.vbs


Select the Sysprep and Capture task that was made to create an image of Windows 10. The task will also sysprep Windows and reboot into Windows PE and perform a capture, creating a WIM file in the deployment share’s “Captures” folder. Leave the VM alone, and let things take their time. Depending on the size of the install on the VHD, it could take an hour or more. A behavior specific to the 1709 builds of Windows 10 is the tendency for Windows, after being sysprepped in an MDT capture task, will not reboot into Windows PE. It would just go back into Windows again, skipping the capture entirely. To fix this, I’ve had to make sure that the VM’s virtual CD/DVD drive, mapped to the MDT Windows PE ISO file, is the first item on the VM’s boot sequence. Hyper-V will remove the virtual CD/DVD drive from the top of the boot order, and replace it with the Windows Boot volume from the VHD. In VMware Workstation, I have to edit the VM’s VMX file to include a boot delay, which give me time to interrupt the boot sequence and redirect it as desired. Just add:

 
bios.bootdelay = 20000
 

to the VM’s VMX file and it will wait 20 seconds before completing the default order in the boot sequence, which is more than enough time to stop it, get into the virtual BIOS, and switch boot devices. Providing one is paying attention…


Enjoy and happy imaging!

Time Shifting Part 1

Hello,

We’ve been using Windows 10 in our public spaces for little over a year now with widespread use enacted over the summer. Adoption was positive. No one came out with torches and pitchforks as I had feared.

That is not to say we were not completely without issues. The strangest of which was a habit noticed by some users of the Windows clock, the one in the system tray, freezing or losing time. This became an issue when faculty were giving tests and using the PC’s clock to time the exam. Students were being shortchanged on the apparent time.

My first thought was to check the BIOS’ clock. I make sure that is right before I image the PC for the first time. There is a bunch of changes I make to a new PC before it is imaged and brought into service. The oldest machine exhibiting symptoms is just three years old. The CMOS battery should not be going yet. It’s possible, but not probable. As expected, all was fine.

The time zone is correct (EST vs. PST). Windows setup defaults to Pacific time (GMT -7:00) for Redmond, WA.

The computers can get their timing from one of several sources. By default, Windows 10 will try to sync with Microsoft’s time server (time.windows.com). Computers on a Windows active directory domain can get their time from the domain controller (DC) that holds the PDC Emulator FSMO (the first DC in the domain by default). A group policy object (GPO) can be used to control the complete operation of the Windows NTP client, including which server to use. Lastly, the option exists to inject the NTP settings directly into the registry.

I typically use a GPO to point our Windows clients to the university’s own NTP servers. Simple. To test NTP connectivity to the NTP server, execute the following in a command prompt.

w32tm /stripchart /computer:us.pool.ntp.org

The affected clients were all set to the correct time, and they were using the university’s own time servers, which I am positive are correct. What gives?

The Event logs on Windows were not showing any indicators of failure around the reported times the displays froze. Another thought was that the Crestron display systems we use in the classrooms was freezing the output to the monitor/screen as a power-saving measure of sort and thus not showing the clock’s progression. It wouldn’t be unheard of for Crestron to skew something in Windows. We’ve had numerous issues with audio output in these circumstances. I tested out the classroom Windows 10 image on identical hardware in my office sans the Crestron system and it the clock froze. Crestron cannot be the culprit, at least in this case.

So, despite my concerted attempts in every job I have ever held to not be a clockwatcher, I am in this case… To demonstrate and test for this issue, myself and others (if interested), log into a PC as a regular user and watch for the clock to not change when the time on our phones or watches does.

Is it the image of Windows 10 that we are using? Before deploying Windows and software to our classroom computers, we perform a heavy series of changes to ensure that everything works and that an instructor will get the exact same computing experience no matter which classroom from which they are teaching. Profile customizations…

I took a classroom computer (Lenovo M93/M900 “Tiny”) and installed Windows 10 on it from the Microsoft ISO. I then used our endpoint management software to install most of the software we use in the classrooms. Some titles are too big to be deployed in this manner. I’m writing about you MATLAB and you SAS. This all took about a day with little input from me. I joined the domain, placed the computer in the same OU as the rest of the classrooms and logged in as a regular user. No clock changes. The time kept up in the task bar until our auto-logoff settings took effect.

So, it is the image? The next question is what in the image is the problem? The list of customizations and changes we make is several pages long and gets smaller every year. We use a domain-based group policy to provide the overall configuration profile to classroom users. From the desktop environment to power settings and everything in-between group policy is the driver of the end result. Local GPOs are helpful, but not in examples of mass-deployment. The only thing we set in the local GPOs are those that we are certain we will never ever need. The truly onerous, useless features or settings that Microsoft includes for who knows what reason. That approach takes a great deal of work and testing to achieve a reliable and desired state configuration.

The version of Windows 10 we piloted in a couple of computing labs, initially was the first RTM version (1507). No problems aside from UI issues some users did not like. When taking Windows 10 to the next level, our 200+ classrooms, Windows 10 “Anniversary Update” (1607) was the latest available in Microsoft’s Software as a Service design (SaaS). Our pilot encompassed two labs of about sixty computers in total. If there were a time-related issue, I am sure I would have heard about it at some point.

Either way, where it stands now the problem IS with Windows 10 Enterprise x64 1607 and group policy for our domain. I’ll update with more information when it becomes available.


Easy Stuff – A Fresh Install of Windows 10

Hi,

Now for something completely different… Something basic, and easy, installing Windows 10. As the versions of Microsoft Windows have progressed, the steps for installation have become fewer and easier. Roughly, Windows 10 installs the very same way as Windows 8/8.1, and to a lesser extent, Windows 7. Most consumers received their copy of Windows 10 as a free upgrade to their existing computers. Other consumers obtained Windows 10 through the purchase of a new a computer from a retailer. Those two examples cover most of the consumer Windows 10 market, save for the gamers and enthusiasts who often build their own PCs. Large to medium-sized businesses and other institutions usually have some type of software agreement with Microsoft that grants them access to Windows 10 installers as ISO files. Where I work, we completely wipe any new PC we receive and install our custom image of Windows 7 or Windows 10 through MDT. Most times, we never even see the OS the OEM placed on the new computer’s hard drive.

Before installing anything, consider whether or not Windows 10 is a good idea. I am a big believer in “if it is not broken, don’t fix it”, within reason. For many folks, Windows XP works great, and does what they need, but it is no longer supported by Microsoft, and many software companies. I like to stick with products that are currently supported by their manufacturers with security patches and updates. If you’re installing to new or existing computer hardware, gather a list of your existing computer’s hardware from the Windows Device Manager, and check the computer manufacturer’s website for Windows 10 drivers. Driver support for the new operating system is essential to a successful Windows install. The same goes for your applications. Visit their respective websites and see if the your release supports Windows 10, or if they have a newer version that does. If you can’t use the applications your computer was purchased for running, on the new operating system, there is no sense in moving to that new OS.

Another point which should be considered before, during, and after the Windows 10 install, and generally for the operation of any computer on the public Internet today is security… A big part of how and why Windows PCs become compromised is through poor patching or no patching being done at all. During the install process, you’ll have a fresh install of Windows 10, un-patched and without malware protection, on the public Internet. Though the probability of something going wrong is very light, not like it would be for a fresh install of Windows 7, there’s still a chance. Best to isolate the new install from the web with a NAT device or router. Most businesses and consumer homes use a wireless router for connectivity, but it is still best to make sure Windows 10 stays behind a NAT until it is fully patched, and configured with malware protection.

A nice thing about Windows 10 is that it will run on many types of computers, even those with meagre hardware specifications. Still, 32-bit (x86) versions of Windows 10 require the 32-bit installer, and the same goes for the 64-bit (x64) version of Windows 10. I struggle to find a good reason to use the 32-bit version of Windows today. The bitwise operator of your computer’s CPU and the corresponding chipset are what determines the version of Windows, which can be used. Most CPUs today are 64-bit, but can run the 32-bit OS. 64-bit platforms make available faster, multicore CPUs, and amounts of RAM greater than 4GB. 32-bit applications, like Mozilla Firefox, and VLC can still run on 64-bit versions of Windows 10. The same goes for 64-bit versions of Windows 7, 8, and 8.1. Unless a concrete and specific reason for using a 32-bit version of Windows is apparent, go with the 64-bit edition.

Microsoft’s hardware requirements for Windows 10 can be found here. Generally, you would be hard pressed to find a computer, worth using, that does not exceed the given hardware specifications. My suggestions are to have at least 4GB of RAM (8GB-16GB would be better), a dual-core x64 CPU (Core i5 or better), and a disk drive with at least 64GB of space. Since we’re installing from scratch, this is the time to replace or optimize any hard drive-related components. I like SSDs because of their speed, and they are no longer incredibly expensive as they used to be. NewEgg has 250GB Samsung SSDs for under $100.00. A no brainer…

Whether your installing to a virtual machine (VM), or actual computer hardware, you should do so to a clean hard drive. It is possible to just install over an old system, and have the Windows 10 installer overwrite everything, but that could be problematic. If an existing computer will be re-purposed as a Windows 10 computer, why not remove the hard drive with the existing Windows install, and replace it with a fresh, clean SSD? That way, if there are any deal-breaking problems with the Windows 10 install, you can just swap-in the original disk drive and be back at square one with no data loss. In any circumstance, if you are going to be tinkering with hard drives, make a fresh and complete backup of any crucial data before proceeding. I have seen static discharges, which were very minimal to us, destroy good hard drives.

To install from a VM, you simply need access to the original ISO for Windows 10. Installing to hardware requires placing the Windows 10 ISO on a USB flash drive as a bootable volume. I like to use a program called “Rufus” to create bootable USB drive for Windows, and Linux. Microsoft also makes a tool for converting an ISO file to a bootable USB drive, as well.

After creating a new VM, point the virtual CD/DVD drive to the Windows 10 install ISO file. In VMware Workstation, a fresh VM, with no installed OS, will boot to the virtual CD/DVD drive file automatically. If an existing VM will be used, which already has an installed OS, wipe the virtual hard drive before installing Windows 10. A basic Windows PE USB flash drive contains the diskpart utility which can quickly erase a drive, virtual or fixed, with the “clean” command. Some computers may require their BIOS to be reconfigured to allow it to boot from a USB drive. Most PCs won’t need to be re-configured this way, but if the PC does not boot to the USB drive, check the BIOS before worrying about the actual USB drive.

Once the computer or VM’s boot sequence detects and mounts the Windows 10 install drive, it will start the install sequence (setup), which is a customized version of Windows PE. When everything is ready, a welcome screen will be displayed.

Choose the appropriate options and click “Next”, or press Alt+N. The next screen allows you to opt for a Windows installation, or to repair your computer. Note that the repair option is only for that version of Windows, the one that is on the ISO. Click “Install now”, or press Alt+I, and things will proceed.

Install Windows 10, or repair your computer.

Next, accept the Microsoft EULA by selecting the check box, or pressing the Alt+A keyboard combo, and clicking “Next” (Alt+N).

Accept the EULA to continue

The Windows 10 installer will next ask where it should install Windows, and display a dialog of detected disk drives. No specific partitioning and formatting is required here. Setup will do that automatically, using the whole drive as a single partition/volume. If you have a different partitioning scheme in mind, do it here. Windows 10 has to be installed on an NTFS volume, no exceptions. If no drives are listed in the dialog box, Windows 10 setup either does not have the storage drivers to detect and mount the drive, or the drive is currently formatted with a file system Windows cannot understand. Erase the drive, and/or obtain the Windows 10 drivers for the computer’s chipset and storage hardware, then select the “Load driver” link (Alt+L).

Choose the drive, and click Next.

Once the install volume is chosen, partitioned, and formatted, setup will copy the install files over to the install drive, create/hide boot and recovery partitions, and unpack the install.wim file onto the main partition. This will take from 15 minutes to an hour, depending on the speed of the target hardware. Just leave the computer alone, and let setup do its thing. If there’s a problem, setup will indicate that.

Installing… Be patient, and leave the computer alone during this part.

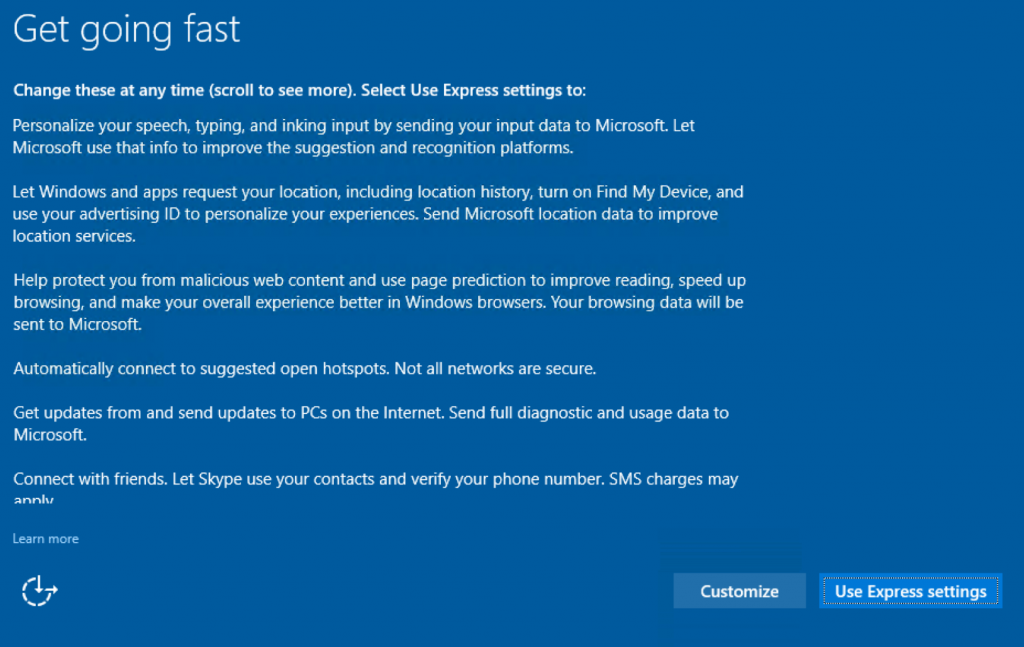
If the actual installation portion to the disk drive succeeds, setup will reboot the computer and start from the newly-installed image on the internal hard drive, not the USB install drive. Still, leave the install USB drive inserted into the computer, or keep the install ISO attached to the VM. When setup is ready for more user input, a Windows 10-style series of dialog windows will appear. First being whether or not to customize the setup options, or use “Express settings.” I always opt to customize every time.

Optional choice; Use Express settings, or Customize

Microsoft made Windows 10 very net-centric, and defaults to using, and/or prompting people to use their online services like the Windows Store, and OneDrive. These services are nice, but not be appropriate at this time, or for this user’s install. I really have yet to meet anyone that actually uses apps from the Windows Store, but that is me. Some people may use DropBox, or Google Drive to store their files online. I err on the side of caution, and disable every data collection service Windows 10 setup offers. These new features can be enabled at a later time, if desired.

Turn-off all personalization options that send usage data to Microsoft

Disable automatic connectivity behavior, and advanced telemetry data being sent to Microsoft.

Turn it all off. DO NOT automatically connect to open wireless hotspots

Windows SmartScreen only works for Internet Explorer (IE, and yes, it is still there), and the new Microsoft Edge web browser. It will not help with Mozilla Firefox, or Google Chrome, which is what most people use for everyday browsing. Turn it off. DON’T opt to send browsing data to Microsoft for better page prediction. Google does enough of that already. And absolutely, beyond any reasonable doubt, DO NOT receive Windows updates from unknown computers on the Internet. Keeping Windows is very important, but get the updates from Microsoft.

Turn it all off. There’s no need to send browsing data to Microsoft, or get Windows updates anywhere but from Microsoft

With all of that now set, Windows setup will do as instructed, which will take a little while. During this time, you’ll see the progress wheel doing its thing.

Please wait…

When done, setup will ask about how you are going to log in. This part is a little misleading. The two choices are to join an Azure Active Directory domain, or a local Active Directory domain. The time might not be right for either of these choices yet, so what’s the best option? Even if you’re not ready to join a local Active Directory domain, choose that option, and do not join the Azure domain. The process of selecting the local domain will prompt for the creation of a local administrative account. Recall, that the regular built-in Administrator account is disabled and without a password by default in Windows 8-10.

Join a local Active Directory domain for now

Next is that prompt to create a local account, which will have administrative privileges. Choose a good name, and a long, complex password to secure the account. Ideally, this account being created here should not be for every day use.

Create a local administrative account here in this step

While creating the account, and installing the new-style Windows Store apps behind the scenes, setup display what Microsoft calls “sign-in animation.” This step is repeated for a user that logs into a specific Windows 10 installation for the first time. Also, if a user decides to participate in early previews of new Windows 10 releases, existing users will go through this step again each time a new build of Windows 10 is installed.

Welcome! Please, wait…

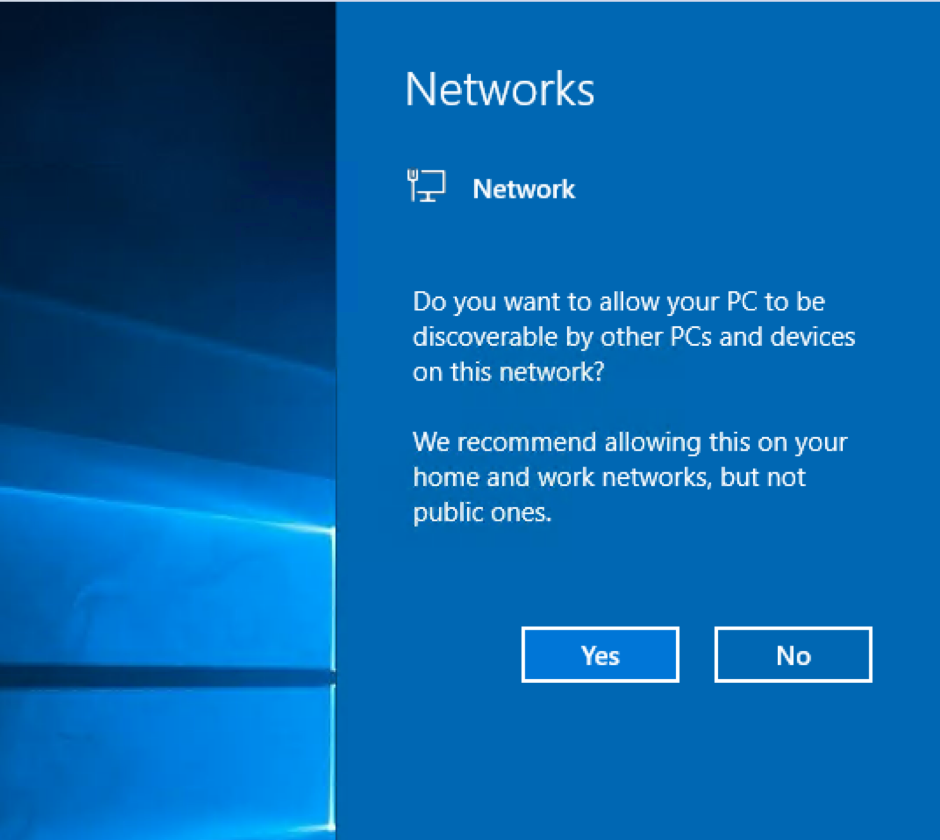
When the animation finishes with the completion of the underlying tasks, a fresh Windows 10 desktop is displayed with the Start menu extended. If you’re connected to the Internet through a traditional ethernet UTP cable (Cat5/5e/6), you’ll see a prompt from the right side, asking if the computer should be discoverable on the network. This is a positive indicator of network connectivity. It is up you, but I would remain isolated until anti-malware software is installed and security settings are in place. Something similar will also appear for any available wireless networks that are detected.

Network discovery? Yes/no?

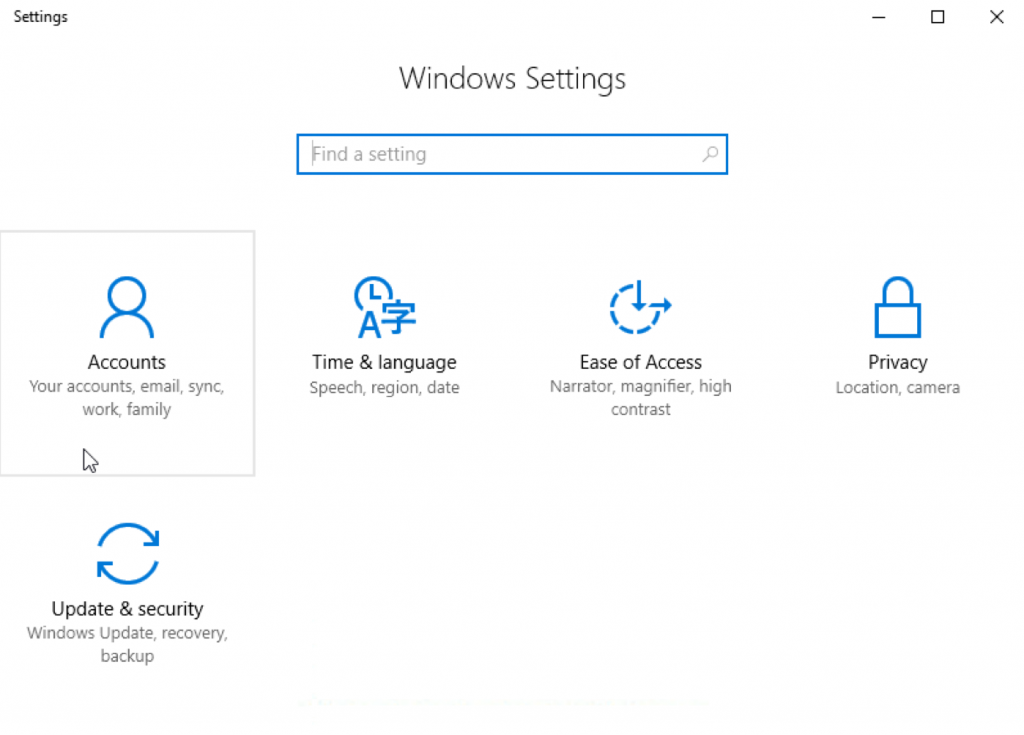
Once network connectivity is established, the next step should be to bring the new Windows 10 installation up to date with the built-in Windows Update client in the new-style Settings application, not the usual “Control Panel” as in earlier versions of Windows. The Start menu has a gear icon on the very left of the menu, above the power button, and under the user icon. The word “Settings” could also just be typed into Cortana, and found that way.

Go for the updates, and update Windows until there is no more updates needed.

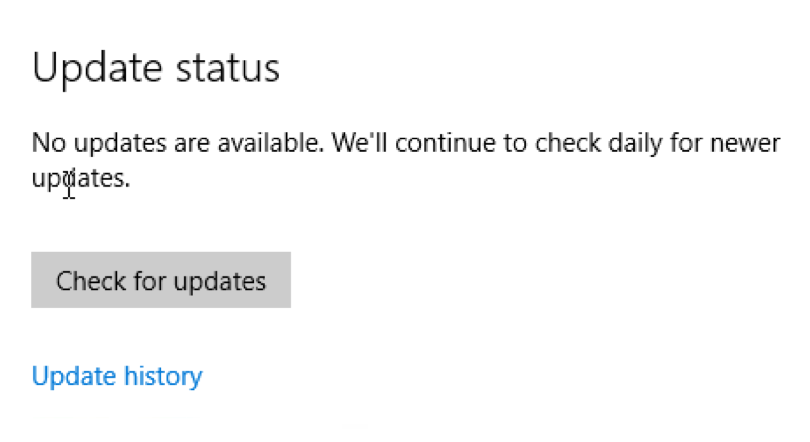
One point to consider is that most computers, Windows and macOS, usually have Microsoft Office installed at some point. Businesses usually have volume licenses along with the agreements that give them access to the Windows operating system. Now, Microsoft opts to provide both Windows and the Office suite as a service, instead of a product. Microsoft Office is available in this manner through the Office 365 subscription plan. If you’re going to install Office, do it now, and then run Windows Update on Windows 10 to bring both products up to date at the same time. By default, a new install of Windows 10 will not update itself automatically, immediately after being installed. That will happen overnight, provided the computer is powered on. Click the “Check for updates” button to get the process started.

Current update status, just after install, finds no updates.

Fortunately, Windows 10 hasn’t been out too long to require a massive set of 400+ updates to bring it current like a fresh install of Windows 7. Microsoft has also decided to package individual updates together in “packs” to make updating easier and quicker. The example version I am using here is Windows 10 Education 1607 (10.0.14393.0) x64, which was released on July of 2016. There aren’t that many updates out for this version, so the process will be quick. If Microsoft Office 2016 is included, there will be more updates downloaded, and installed. If Office 2013 is being updated, there will be even more updates to process.

Updates installing. Rinse and repeat until there are no more available.

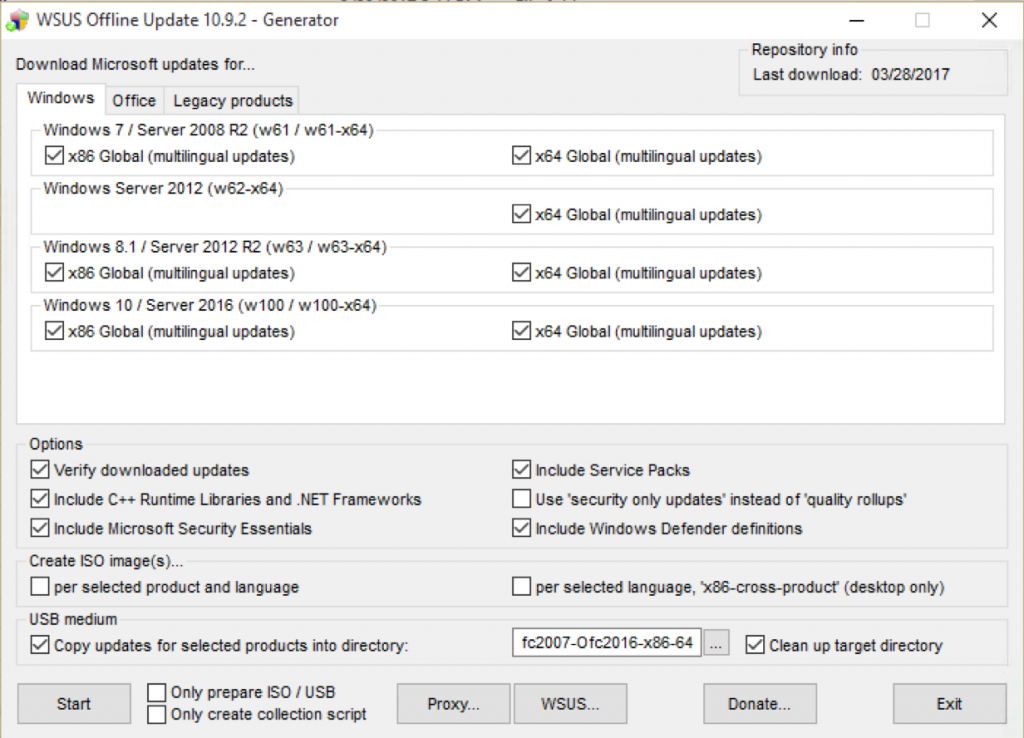
One tool that is available online, for free (donations are appreciated), is called “wsusoffline.” The idea is to take the updating capacity of a networked WSUS server, and roll it into a local package which can be run like a regular Windows executable. As of this writing, wsusoffline will download, organize, and install updates for Microsoft Windows Vista through Windows 10, and Microsoft Office versions 2007 through 2016, in x86 and x64 versions for each product. Wsusoffline also includes updates for server operating systems, Windows Server 2008 through Windows Server 2016. I’ve used this product to apply a range of updates quickly to fresh installs of Windows I thought were not patched enough to be on the public Internet.

Choose your products, create a destination folder, and download the updates.

If you’d like to use wsusoffline with Windows Vista and Office 2007 installs, don’t wait. Microsoft and eventually wsusoffline are ending support for Windows Vista and Office 2007 on April 11, 2017.

If Windows 10 was just installed in a VM, and after the updates for Windows and Office are done, now would be a good time to create a snapshot. In any situation, Windows 10 will prompt you to activate your copy of Windows. I’d hold-off on this step. Get Windows 10 to the exact spot and configuration you’d like, with all of your applications installed, run it for a few days, then activate. That way, if you need to repeat the installation on the same computer, not others, you won’t burn through your activations. The same goes for Microsoft Office.

Now comes the fun part of installing all of the applications needed on the new install. I take the sting out of this by installing applications AS I need them, and not all at once, automating the install process as much as I can. To get operational, you’re going to need a few apps to be installed immediately after the Windows 10 installation. Windows 10, by itself, is not very useful. I also go through the process of removing the Windows Store apps that come with Windows 10 through Microsoft PowerShell.

The basics for me are: Google Chrome for browsing the web, the free version of Malwarebytes for protection against web-junk, 7-zip to enhance file compression/decompression, iTunes and VLC for my media content, Notepad++ and Visual Studio Code for my text editing duties, Paint.NET for graphics editing, and Sumatra PDF for reading those types of files. On my personal Windows installs, I leave out the Adobe products and Java until they are explicitly needed. Nothing against either one of those vendors, but those products are common malware vectors. At work, they are all needed. For Adobe Reader, Flash Player, Shockwave Player, and AIR. I submit an online form to Adobe for digital distribution. In return, I get a custom URL, which allows me to download full versions of the latest Adobe products. I place the silent install commands for these applications in a script, and run it all from a network share, or virtual share.

A really cool feature about this set of applications is that I don’t have to go out and hunt down the latest versions of each, individually. A website, called Ninite, will create an install package (EXE) that will go out and download the latest versions of the applications you have selected, and install them in one go. For free too, though there a paid pro version.

That’s it! Windows 10 is installed, with updates, and applications. The next steps should be to create another local account, a non-admin, for daily use, and decide how malware protection software will be implemented and managed.

Enjoy!


MDT and Drivers

Drivers are a big part of getting Windows to work properly. Anyone who has ever had to troubleshoot a piece of hardware on Windows knows this. When generalizing an installation of Windows for capture with sysprep, all but the most basic drivers are removed. This makes the captured image applicable to many different types of hardware. During a task sequence, MDT runs a plug and play check, for hardware at a couple of different points to determine what drivers, if any, are needed. When a matching driver is found, it is injected into the image before it is applied to the computer’s hard drive. To do this, MDT has a folder/section in the deployment share that is dedicated to organizing and storing drivers. It is called “Out-of-Box-Drivers” (OOBD).

The basic INF files are what MDT needs for driver injection. Many drivers are distributed as packages, which come in the form of an executable. This is not what we need. If an executable is the only way a driver is available, it must be imported as an application into MDT, and installed via task sequence. Fortunately, OEMs like Dell, Lenovo, HP, and even Microsoft make bulk downloads of model-specific drivers available from their sites. Dell hardware drivers come in the form of a CAB file, which can be opened with the expand command, or with a compression/decompression utility like 7-zip.

Bulk-driver Download Sites for Dell, Lenovo, HP, and Microsoft (Surface)

I create a folder structure on the MDT server similar to “Drivers\Windows ##\Vendor\Model.” For example: D:\Drivers\Windows 7\Dell\OptiPlex 990

I do not delineate between x86 and x64 versions of drivers in my folder path because nearly all of my OS deployments are 64-bit. Dell combines x86 and x64 drivers in the same download. Many Dell drivers can be used on both platforms. Lenovo drivers will try to extract to their own, specified path, but that can be changed at runtime. Complete, downloaded driver packs can be between 300MB and 1,000MB in size, except for WinPE driver packs which are very small.

Using the expand command, I’ll extract the drivers to my folder structure.

expand C:\Users\jasonrw\Downloads\990-OptiPlex-ABCDE.cab -f:* “D:\Drivers\Windows 7\Dell\OptiPlex 990”

The command prompt window will scroll really quickly and end with the prompt returning. Now, we can import them into MDT. MDT is able to handle drivers in different manners. The basic default option is to throw all drivers into the same folder at the root OOBD directory. With that, a deployment task will search the entire OOBD store for the right drivers. This increases the chance of the wrong driver being selected. WMI is great, but it is not perfect. Another option is to break down the OOBD store by manufacturer/vendor or by operating system version. Creating folders for Windows 7 and Windows 10, respectively can help minimize the chance of a wrong driver being installed. I take it one step further, actually a couple of steps further. I still use MDT’s WMI hardware-querying capabilities, but I tell it exactly where to look.

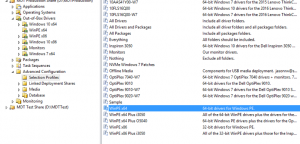
I create a specific folder structure under OOBD that matches a specific WMI query I pass on to the deployment task. For example, Windows 7: Out-of-box-drivers\Windows 7\Dell Inc.\OptiPlex 990

OOBD Folder Hierarchy

The bottom two folder tiers each correspond to variable in a WMI query, Make and Model. To find the make or manufacturer of an OEM PC, run the following command from a command prompt.

wmic computersystem get manufacturer

The returns for Dell and Lenovo are “Dell Inc.” and “Lenovo

To get the model, run the same command as above, but replace “manufacturer” with “model” Top that off with a folder for OS version and platform, and you have something to use. In the task sequence, a task variable can be inserted into the PreInstall phase, before the inject drivers step to tell the task sequence exactly where to look. The variable is “DriverGroup001”, and the value is “Windows 7 x64\%Make%\%Model%” This will allow a task sequence to correctly use a WMI query to find the drivers for the exact make and model being imaged.

Task Sequence Variable

The Inject Drivers step has its own settings that needs to be configured. For our purpose, the selection profile has to be set to “Nothing” with all drivers from the selection profile being used.

Selection Profile

Selection profiles are the ultimate step toward driver control. They are a pre-defined selection of drivers that may encompass and individual model, or manufacturer. MDT ships with a few pre-defined selection profiles, but more can be created to suit any need. Given the exact control this approach provides, there is one detraction, it limits task versatility. Since a selection profile tells a task sequence exactly which drivers to use, MDT doesn’t query for them. The default setting for Inject Drivers is to query the entire OOBD store, but when “Nothing” is set, they querying is off. If it is desired that a task sequence only serve one or two makes of computers, this might be a good approach. I support about a dozen different models from two manufacturers, and I’d like my task sequences to be applicable to all.

I do use a selection profile to organize the drivers I use for my MDT Windows PE ISO/WIM files. Dell and Lenovo make drivers just for Windows PE available as a download too. I use the same approach as above to download, extract, and import the Windows PE drivers into MDT. Then, I create a selection profile for the Windows PE drivers and use that for my ISO/WIM file drivers.

Selection Profiles

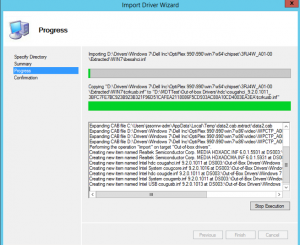
To import drivers into OOBD, make your folders as desired, right-click the folder for the computer model, and choose “Import drivers.” A wizard will open, walking you through the process of importing the drivers from where they were extracted. It is real easy.

Import Drivers Wizard

After the driver import, the deployment share must be updated. By default, MDT uses the all network and system drivers it has in the OOBD store for the Windows PE ISO/WIM file. This can be changed, as I described above, with a custom selection profile, but it is not mandatory. Still, note, that each time drivers are added and removed, the deployment share should be updated for those new drivers to be used. Some drivers are clearly depicted whether or not they are x86 or x64. In reality, many single drivers can be used on both platforms, but the descriptor files do not always indicate that to MDT. Thus, MDT will import the driver and override the specified platform. This is noted after all of the drivers have been imported for that operation.

screen-shot-2016-09-25-at-15-06-54

I, personally, write down the name of each driver with a warning, and disable them after the wizard ends. Disabling/deleting a driver is easy, just right-click it in the MDT workbench and choose the appropriate option. Drivers must be disabled from their property sheet. Disabling a driver is a safe approach before it is determined that deletion is necessary. Only ever delete a driver from the MDT workbench. DO NOT go into the driver store via the file system and delete it that way.

Disable Driver

Again, when disabling or deleting a driver, you must update the deployment share to take it out of Windows PE.

Finding, downloading, extracting, and importing drivers into MDT is a big part of MDT configuration, which takes a great deal of time. If it is done with forethought and planning, it can minimize the driver problems a deployment share might have, and need only be done once. I note the name and date of the driver files that I download and import into MDT. Then, I can periodically check for updates from the vendor’s web-sites. The older a model is with the manufacturer, the less-frequent they tend to update the drivers packs for that model. If the manufacturer does not make a driver pack available for your model, it is possible, though very tedious, to download each driver, and extract them individually. I try to avoid doing that.

Thanks!


UEFI and a Dell OptiPlex 990

Hello,

I do a great deal of work with virtual machines and perform all of my operating system development on virtual platforms. My desktop PC came with a 500GB hard drive. Using a virtualization program and creating a couple of production sized virtual machines will take up a great deal of that space very quickly.

A larger hard drive is one of the easiest upgrades one can make to a computer. I ordered a 3TB drive for my Dell OptiPlex 990 and had hoped to just plug and chug, but it didn’t work out that way. What I had found out that the default traditional method of BIOS hardware management on the PC only allowed it to see partitions or drives no larger than 2TB. BIOS-based computers use hard drives that are partitioned in the Master Boot Record or “MBR” format. To use the new crop of large drives with more than 2TB of space, one needs to format the drive as a GUID Partition Table or GPT device. There, the largest of drives can be partitioned and formatted as one single volume, which is what I was after.

I should have just done my homework and just ordered a 2TB drive. Under BIOS/MBR, Windows setup would only see 2TB, leaving around 768GB unavailable. GPT disks cannot use the BIOS system. They rely on a newer system called the Universal Extensible Firmware Interface, or “UEFI.” The OptiPlex 990 has the ability to use a BIOS-based system or UEFI, but not both. Each are mutually exclusive to the OptiPlex 990. Newer computers have the ability to use UEFI with support for legacy BIOS system (UEFI-CSM), but not the 990.

I initially tried to get the 3TB HDD to be recognized by booting to a Windows PE boot drive and use DISKPART to partition and format the HDD as a GPT disk. Still, Windows setup would not use the drive. Windows 10 setup would indicate that setup could not use any available partition as they were in GPT format. The problem wasn’t the drive, which was set up correctly, it was the install media. I use an 8GB USB key drive to install Windows from an ISO file. A great piece of freeware called “Rufus” is what I use to make the boot-able USB key from the Windows ISO file. Rufus defaults to creating a Windows PE volume, which is what Windows setup is, that supports both MBR and UEFI with backwards compatibility. I though that would work, and it should have, but the OptiPlex 990 was BIOS or UEFI, not both. One option to create the USB boot key was pure UEFI.

While I was sorting this out, I noticed that when I switched the 990’s BIOS to UEFI mode, there were no more boot-able drives like the HDD, CD/DVD, or USB listed. This was accurate because none had been made available. The 3TB drive was GPT but did not contain any boot-able volumes at that point. I had yet to make a pure-UEFI USB key, and there was no disc in the DVD-RW drive, so no there were no UEFI boot options. Any and all BIOS/MBR, and UEFI/GPT boot devices are shown when the PC POSTs. As soon as I partitioned and formatted the 3TB drive as GPT, and inserted the all-UEFI USB boot drive, the OptiPlex 990 saw the USB drive as a UEFI boot device and Windows setup accepted the partitioned 3TB drive for install. After that, Windows 10 installed and I had ALL of the available space, which came in around 2.78TB.

To do…

Partition/format the drive as a GPT device.

Create a boot-able Windows PE USB drive and boot the target computer to it, with the larger-than-2TB-HDD installed.

Run DISKPART from the Windows PE prompt and enter the following commands to partition and format the drive as a GPT disk, minus the REM statements.

select disk 0
clean
convert gpt
rem == 1. Windows RE tools partition ===============
create partition primary size=300
format quick fs=ntfs label="Windows RE tools"
assign letter="T"
set id="de94bba4-06d1-4d40-a16a-bfd50179d6ac"
gpt attributes=0x8000000000000001
rem == 2. System partition =========================
create partition efi size=100
rem    ** NOTE: For Advanced Format 4Kn drives,
rem               change this value to size = 260 ** 
format quick fs=fat32 label="System"
assign letter="S"
rem == 3. Microsoft Reserved (MSR) partition =======
create partition msr size=128
rem == 4. Windows partition ========================
rem ==    a. Create the Windows partition ==========
create partition primary 
rem ==    b. Create space for the recovery image ===
shrink minimum=15000
rem       ** NOTE: Update this size to match the size
rem                of the recovery image           **
rem ==    c. Prepare the Windows partition ========= 
format quick fs=ntfs label="Windows"
assign letter="W"
rem === 5. Recovery image partition ================
create partition primary
format quick fs=ntfs label="Recovery image"
assign letter="R"
set id="de94bba4-06d1-4d40-a16a-bfd50179d6ac"
gpt attributes=0x8000000000000001
list volume
exit

Script from Microsoft

Create the all-UEFI Windows install USB drive…

Go into the computer’s BIOS by pressing F2 during the boot sequence (Dell), before Windows even starts to load. NOTE: BIOS/MBR disks will not boot in a UEFI/GPT configuration. Any change from BIOS/MBR to UEFI/GPT WILL REQUIRE a Windows reinstall. No way around it, so Back up your data.

On a separate computer, insert the USB key, and open Rufus as an admin.

The USB key should be listed in the top dialog box, make sure you’re formatting the right drive if there are multiple USB drives currently inserted into the PC. From the bottom part, near where it says “Create boot-able disk using [ ISO Image]”, click the small button with the disc and drive icon and choose your Windows install ISO.

Next, select the drop-down menu option under “Partition scheme and target system type”, choose “GPT partition scheme for UEFI.” If the source ISO file changes, the partition scheme changes also, so watch that.

RufusCreate the drive and insert it into the computer that has the large HDD and boot to it by pressing F12 (Dell/Lenovo). If the USB key was created properly as a UEFI device, it will show up as a UEFI boot option under the BIOS boot options which will still be the CD/DVD drive and the HDD (possibly).

Install Windows and relish in the large space now available!


How to Create a Windows Image for Mass Deployment

Requirements: Windows install media (7 or 10. 8.x?), desired apps for the image (Office, PDF viewer, web browsers, plugins), virtual machine software (VMware Workstation, Microsoft Hyper-V, or Oracle Virtual Box), and image creation and deployment software (ImageX.exe, MDT, SCCM).

Almost every place I have ever worked, IT had or needed a method to clone and deploy a specific Windows configuration and application set. From a few PCs, to hundreds, the requirements were the same, to deploy the same configuration with as little, repetitive work as possible. The ideal target being what Microsoft calls “zero-touch” deployments that require no interaction on the target computer whatsoever. This is offered by Microsoft System Center (SCCM) along with the Deployment Toolkit (MDT). Many shops do not operate that way, and have some level of interaction required during the imaging process. This piece will discuss creating a Windows install for distribution.


What you’ll need…

Windows and software install media (obviously)

Virtual machine software for the creation workspace. Why? Two reasons. First, virtual machines provide the option to create hardware-neutral images which can be applied anywhere, regardless of what is actually in the target computer. One image becomes possible for multiple hardware configurations. This also involves less work in mainatining the image as any work only needs to be done once and not x-times per different type of hardware. Second, most virtual machine software (I’m not sure about Virtual Box) have the ability to save a VM’s state, and revert back to that state, should it become necessary. VMware calls these “snapshots”, and Microsoft uses the term “checkpoint” in Hyper-V. Should a screw-up occur, it can be undone without loosing work or have to re-do everything. These are two facets that are simply not available with building images on real hardware. Test on real hardware, but build in a virtual environment.

  • VMware Workstation is pricey, but well worth the cost IMHO.
  • Hyper-V comes with Windows Server 2008 and later, Pro and Enterprise versions of Windows 8, 8.1, and 10 as “Client Hyper-V.”. The build computer’s CPU must support hardware assisted virtualization for Windows to install the Hyper-V role. Intel Core 2 Duo/Quad CPUs won’t muster.
  • Virtual Box, now owned by Oracle, is a freebie. I haven’t used Virtual Box very much outside of general curiosity.

The build workstation has to have some power to it. Nothing extravagant like an Alienware, or Falcon Northwest gaming rig, but above average. Try to avoid using a laptop as a VM build station. Laptops are great for testing, but a desktop PC is optimal. Don’t use a Mac. I love my MacBook Pro, but it isn’t meant for making Windows images. A quad-core CPU (Intel Core i5/i7, or AMD Phenom series) will work for starters. The more powerful, the better. RAM is the key. The more the better. I routinely work with 16GB of RAM on my workstation (the most it’ll take), and it can handle three running VMs and the host OS before going wacky. 32GB of RAM is not ridiculously expensive today, and well-worth the couple-hundred extra bucks. VMs take up storage space quickly. Working on several VMs, it is not difficult to fill a 2TB HDD (I’ve done it). Those are not that expensive either, and 2TB is the starting point I’d go with for a virtualization rig. Anything more, and you have to make sure your PC supports UEFI vs. BIOS, or else all of the drive’s space will not be recognized by the firmware, and Windows. Working from USB storage might fly, but the throughput won’t match that of internal storage, and you’ll have a bottleneck. My VM creation setup, however, is backed-up every night to my trusty 4TB WD USB HDD. If you can get large-capacity SSDs instead of traditional rotational drives, do it, but don’t sacrifice space for speed. An SSD for the boot volume with Windows and apps along with a large 2TB+ traditional HDD for VM storage is a nice setup, and not fiscally unrealistic.

Virtual Machine Setup…

Create a new VM that will become your Windows image. For Windows 7 and later, I recommend 4GB of RAM, 1 CPU with 2 virtual cores (if possible), and a virtual hard drive the size of the smallest drive that will ever receive the image. We have some 128GB SSDs out there, so 128GB is my vHDD size. That’ll assure the image will fit everywhere you intend to deploy it. Now, it is easy to see how fast space will go on your drives. Everything else is fine with the defaults. Bridged vs. NAT network adapter? It doesn’t really matter even for network-based capture/deployment. I’ve used both and have noticed no speed differential.

Install and Configure Windows…

Install Windows onto the VM with all of the default settings. If you’re lazy like me, you can use an unattend file to answer all of those pesky setup questions. This site, the Windows Answer File Generator, has a GREAT web UI for creating unattend.xml files that WORK. Place the unattend file at the root of your install media and let Windows install itself. The whole process for Windows 7-10 should be 20-30 minutes. Don’t bother with the product key and activation. Sysprep will just strip that out in the end. If your build process takes longer than a month, you might need the key and activation. I’ve never run into that problem. Don’t join any active directory domains. Sysprep will quit if it is run on a domain-joined PC.

Next, power-down (not sleep, hibernate, or pause) the VM and create a snapshot or checkpoint. This will save you 20-30 minutes of re-installing should a foul-up occur. Power back on and go into Programs and Features (Windows 7) and add/remove all of the stuff that is not needed. I get rid of the tablet components, XPS printer/viewer, Windows Media Center, Windows Fax and Scan. All of the stuff I know the end users will not touch.

Update Windows/Office…

Before getting into the nitty-gritty of configuration, completely update Windows through Microsoft Update. The older your version of Windows, the more updates it will need, and the longer the update process will take. A fresh install of Windows 7 Enterprise SP1 x64 from MS VLC ISO required 296 updates before no  more were required (as of February 2016). This will take about a day (8+ hours) to complete. One might think about adding MS Office into this process to allow it to join in the update process, but there is a reason not. Take this opportunity of having a clean install of Windows, updated, and use it as a template for other VMs. VMware Workstation allows VMs to be cloned and copied, so a patched copy of Windows can serve as a starting point for other virtual machine projects. A MAJOR time saver. Completely update Windows until it screams “no more” and shut down, then take a snapshot.

Clone or continue? That’s up to you, but whatever is chosen, the next part is installing MS Office (if needed. I can’t imagine it wouldn’t), and completely updating that through Microsoft Update. I do a custom install of Office to not include the programs users won’t need, like Infopath, and Lync, Skype for Business, and OneDrive for Business. YMMV. Microsoft Office 2013 Pro Plus needed 151 updates to be complete from a fresh install of the MS VLC ISO. Again, I wouldn’t bother with product keys or activation for Office. Shut down and take a snapshot when that part is done.

Application Installs…

Add all of the applications that need to be deployed with the image. Here is where the question of thin image vs. thick image is contemplated. A thin image contains just the bare essentials needed to get started with many other apps installed at distribution. Programs that change often, and would require updating/re-capturing the image are best left to installation at deployment. Candidates for this include Adobe Flash Player, Shockwave, AIR, and antivirus software. Software that has first-run settings which must be answered for the end user should be placed into the image, and not installed at deploy time. We install many apps with our image, so this process takes us about as long as it does to update Windows and Office. A good example set to start would be: Mozilla Firefox ESR, Google Chrome Enterprise, Adobe Acrobat Reader, Quicktime Player, VLC Media Player, Microsoft Silverlight, Visual C++ Redistributables 2005-2015, Skype and 7-zip. Run each and every newly-installed application to make sure they work as intended, and then delete the downloaded installers. The plugins, and antivirus (SEP) will be installed when the image is deployed. Power-down the VM and take another snapshot.

By this point, we have a basic working install of Windows which is moderately useful and could probably be distributed to end users. One question does arise which is substantial in nature, and determines how next to proceed. Does a custom default user profile need to be created and configured? If yes, we need to do that before capture.

Customizing a default user profile…

Windows, by itself, works pretty well out of the box, but comes with a myriad of first-run dialogs and prompts which can be confusing. My target audience is public computing, classrooms, kiosks and labs. For privacy reasons, user profiles are not kept on the computers. As soon as a user logs off from Windows, their profile is removed. Each time someone logs into one of the computers I am responsible for administering, they are logging in for the first time. Any and all first-run dialogs/prompts that can appear will. The option to spend 10-15 minutes of a 60 minute class, getting the software to work as desired, and out of the way is just not an option. To prevent this, I try to configure as much for the end user in advance as possible. Group policy is my hero in this effort. Almost anything can be set for the computer or a user through a GPO. The exceptions being non-Microsoft software like MATLAB, Maple, and Stata that all have first-run issues which often require administrative intervention. I don’t let users run as admins.

Sysprep is the utility Microsoft has made available for generalizing an installation of Windows since Windows 2000. Starting with Windows Vista, Microsoft changed to an image-based installation and mmaintenance process. Sysprep changed too, and became much more difficult to use (for me anyway). It is at this time that copying a customized user profile to the default required the use of an unattend.xml file. With Windows 2000 and XP, you could actually just copy it and everything would be fine. In the specialize pass (No. 4) of the unattend.xml file there is an option to add a pass called “CopyProfile” to the “Microsoft-Windows-Shell-Setup” setting that will copy the built-in administrator account’s profile to the default. The trick is when to apply this, during capture, or during deployment? That depends on how you’re capturing and deploying, but either way the built-in administrator account is what I use as a template for my custom default user profile.
Enable the built-in administrator account and give a password you’ll be comfortable with entering dozens of times. Log in as the admin, and immediately delete the profile for the other account setup asked you to make after installing Windows. The reason for this is that CopyProfile will not copy the admin’s profile if another profile exists on the file system at the time the copy takes place (experience speaking here). Delete the profile from the advanced system properties window, and not by just deleting the folder under C:\Users. Other accounts can remain, they just cannot have profiles.

As the built-in admin, configure the Windows environment they way you want the end users to have it. Again, most of these tasks can be accomplished with a domain-based GPO. Run each and every program the end users are likely to use and answer any first-run dialogs and prompts. DO NOT surf the web as the built-in administrator on a Windows PC without antivirus software for obvious reasons, but an important another is profile size. Surfing with Chrome or Firefox even on just a couple of sites and will add megabytes of data to the profile. You could probably get away with not even running any of the browsers at all with a good GPO in place. Google, Mozilla, and of course Microsoft make GPO settings available to completely configure each piece of software and eliminate any first-runs. Adobe recently made an admx template for configuring Acrobat Pro and Reader via GPO. GPO templates exist for Microsoft Office 2007-2016, with a dizzying array of possible configuration options. Those and the settings for Windows will get 95% of end user configuration done in a customized profile.

Things that are easily set include the desktop wallpaper and icons, the start menu, screensaver, power options, and remote desktop settings. Take your time and run through each usage scenario, if possible, without puffing up the profile’s size. Large user profiles take a while to create at log in, and lengthen the log in time required to get started. In my case, every is logging in for the first time, so their profile will be created when the need to use the PC. A 500MB profile will slow that entire process down. Once things are as desired, power the VM down and take a snapshot. This snapshot is a failsafe point for return after the image has been captured.

Capturing the Image…

There are several different ways to get an image of Windows. Traditionally, Norton (Symantec) Ghost was the standard for deploying Windows operating system images. After acquisition, Symantec let the product stagnate over a period of years as Microsoft developed successive versions Windows, and it became necessary for us to switch to a solution that would natively support later versions of Windows PE. We adopted MDT a couple of years ago for a few reasons, and that allowed us to change the way we made operating system images. Driver support in Ghost is not real versatile. The option to create one image for multiple hardware configurations required substantial tweaks and endless trial and error testing Ghost was designed to have one image per hardware type, with all of the drivers included in the image. This is not that big of a deal since many large IT outfits only support a few different types of hardware models and configurations. For us, that was six different images for a single type of Windows install (Windows 7 Pro x64). Needless to say the images did not get updated too often due to the amount of work involved.

Removing the hardware dependence and creating hardware-neutral images was a requirement for our new imaging software. An install in a virtual machine allows that type of neutrality.

Boot the VM to be captured an log on as the built-in administrator, the one that was pre-configured before. From the advanced system properties, delete every other user profile on Windows. The accounts can stay, but the profiles cannot. If there are any VM-dependent software like VMware Tools, or Hyper-V Integration services installed, uninstall them. If there are mapped drives between the host and guest OS, power-down the VM, remove them, and restart.

I like to clean Windows before capture by running a few command prompt executables.

Go to %TEMP% from the Run dialog and delete everything there that can be deleted.

Open an administrative command prompt and run the following commands.

Delete any and all shadow copies.

vssadmin delete shadows /All /Quiet

Get rid of any downloaded software updates.

del c:\Windows\SoftwareDistribution\Download\*.* /f /s /q

Delete any hidden Windows install files. Chances are there are none, but it cannot hurt to check.

del %windir%\$NT* /f /s /q /a:h

Delete the Windows prefetch files. There also probably none of those either.

del c:\Windows\Prefetch\*.* /f /s /q

Run disk cleanup.

c:\windows\system32\cleanmgr /sagerun:1

Defragment the C:\ drive (It shouldn’t be that fragmented).

defrag c: /U /V

Clear the Event Logs. Execute one command on each line.

wevtutil el 1>cleaneventlog.txt
for /f %%x in (cleaneventlog.txt) do wevtutil cl %%x
del cleaneventlog.txt

Flush the DNS cache.

ipconfig /flushdns

NOW! We’re ready to capture. The question is how?

We use MDT for imaging. MDT has a special type of task sequence called “Sysprep and Capture.” To kick this off, from the install of Windows to be captured, navigate to \\mdtserver.domain.com\DeploymentShare$\Scripts and run LightTouch.vbs. This will connect to the deployment share, and start the process. Enter any credentials required, select the appropriate task sequence, and give the image a name, then begin. Capturing from a VM to an actual MDT server, over the network, will take a while. Even for small images, it is best to just let the task run and not use the build computer for anything else until it is finished. I do this at the end of the day, when I’m not going to be needing to use the computer.

Once the image has been captured, the VM will restart and wait for further action. At that point, power-down the VM, and roll back to the last snapshot taken before the VM was captured. Back to not-so-square-one, and ready to re-capture, update, or whatever when necessary.

Outside of MDT, it is possible to capture with just a Windows PE boot disk with ImageX.exe. This process is not a clean and automatic as MDT, but it works. Going that way, the pre-capture setup process goes a little differently. In its most basic form, you need to only run sysprep from the VM about to be captured, and shut down, then restart to the WinPE boot disk and run ImageX.exe. To copy the default user profile this way, an unattend.xml file needs to be used with sysprep and the CopyProfile option must be set to “True.” The unattend file is only needed if there are any customizations that need to be applied when the image is applied to a computer. Large capacity USB flash drives are very affordable. I have a 128GB USB drive, that I purchased for $29.99, configured as a WinPE boot drive, and can be used to capture images directly to the drive instead of over the network, as it is usually done.

Enjoy!

If Operating Systems Were Airlines

A shorter version of an old favorite

MS-DOS Airlines (not that many of us use MS-DOS in the 21st Century)

Everybody pushes the airplane until it glides, then they jump on and let the plane coast until it hits the ground again, then they push again jump on again, and so on.

Windows Air

The terminal is pretty and colorful, with friendly stewards, easy baggage check and boarding, and a smooth take-off.  After about 10 minutes in the air, the plane explodes with no warning whatsoever.

Windows NT Air

Just like Windows Air, but costs more, uses much bigger planes, and takes out all the other aircraft within a 40-mile radius when it explodes.

Mac Airlines

All the stewards, stewardesses, captains, baggage handlers, and ticket agents look the same, act the same, and talk the same. Every time you ask questions about details, you are told you don’t need to know, don’t want to know, and would you please return to your seat and watch the movie.

Unix Airlines

Each passenger brings a piece of the airplane and a box of tools to the airport. They gather on the tarmac, arguing constantly about what kind of plane they want to build and how to put it together. Eventually, they build several different aircraft, but give them all the same name. Some passengers actually reach their destinations. All passengers believe they got there.

Linux Airlines

Disgruntled employees of all the other OS airlines decide to start their own airline. They build the planes, ticket counters, and pave the runways themselves. They charge a small fee to cover the cost of printing the ticket, but you can also download and print the ticket yourself. When you board the plane, you are given a seat, four bolts, a wrench and a copy of the seat-HOWTO.html. Once settled, the fully adjustable seat is very comfortable, the plane leaves and arrives on time without a single problem, the in-flight meal is wonderful. You try to tell customers of the other airlines about the great trip, but all they can say is, “You had to do what with the seat?”

Original Source

Jason Watkins, 12/28/15


MDT, Getting Ready for Deployments

As stated before, MDT needs an operating system before it can start deploying Windows. In addition to that, deployment tasks are needed to coordinate the deployment activities. One tenet put forth by Microsoft is to use MDT to create a “reference image” to be customized and captured as a custom image (WIM) later.

Having MDT create the reference image as much as possible will save a great deal of working updating Windows and installing applications. If it is preferred that all of the work for creating a reference image be done manually, that is possible too. A virtual machine is the best choice for creating a reference image for mass deployment. Virtual machines allow the creation of a true hardware-neutral installation of Windows. No hardware-specific driver or applications are installed, with the exception of things like VMware tools and the Hyper-V client software. Those can be removed prior to capture.

No install of Windows is very useful, out of the box, without additional software. In businesses, software such as Microsoft Office, Adobe Reader, and antivirus software are used to provide functionality. MDT can install applications as part of a deployment task in addition to connecting to a WSUS server for updates. WSUS offers a closer point for updates rather than going all the way to Microsoft Update over the Internet.

To add applications to MDT for installation with a deployment task…

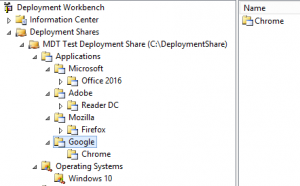
Open the MDT Deployment Workbench and go to the Applications folder. Like the operating systems folder, I like to organize the Applications folder by manufacturer, product, and version. This approach is completely optional and not required. To create folders, just right-click the Applications folder and choose “New Folder.” Folders can be nested inside of one another.

MDT Applications Folders

Software folders created under the larger Applications folder.

To import applications into their respective folders, right-click that for and choose “New Application.” A wizard will start, prompting for information. For example, Microsoft Office 2016 Pro Plus.

The first step is to choose the type of application source files, though other options exist to use application files on a network share, and to create an application bundle (more on that later).

Application Type

Select the appropriate application type.

Next, the wizard asks for the application’s details. Only the application name is required. It is best to be as descriptive as possible.

Details

Enter in the appropriate information.

Where the source files are located on the file system is the next question. Provide the correct location and choose “Next.”

Source

Browse to the source for the application’s files.

The next step is to choose the name for the application’s destination directory in the deployment share. The application name and version from the details page are provided as a default. If that should be changed, now is the time to do it, not later.

The “Command Details” page asks for the silent install command for the application and provides the working directory in the deployment share. Microsoft Office’s silent install command is simple, “setup.exe.” However, Office has a customization tool, which is available by running “setup.exe /admin”, that allows an MSP modification package to be created with installation settings and customizations. MDT is aware of this and provides an option to run this customization tool from the application’s property sheet. Placing the final product of the customization tool, an MSP file, in the Updates folder of the Office install directory will have it used each time Office is installed from that location.

Command Details

Microsoft Office uses setup.exe for it’s silent install command, but other applications may vary.

Finish the rest of the wizard with the Summary and Progress screens and Office will be imported into the Applications folder on MDT. After that, further customization can be made to the application. Microsoft Office has the unique “Office Products” tab which is specific to that application.

Office 2016 Properties

The Microsoft Office 2016 property sheet in MDT. Note the Office Customization Tool button.

Many other applications can be added to MDT this way. I’ve had the best results with the MSI version of applications, but those are not always available. To get started with a fully functional install of Windows for my users, I include the following applications. Download link in the name and the silent install commands are in parenthesis.

Microsoft Office (setup.exe)

Microsoft Visual C++ 2005-2012 Redistributable x86 and x64 (vcredist_x64.exe /Q)

Mozilla Firefox (FirefoxSetup.exe -ms)

Google Chrome Enterprise (msiexec /q /I googlechromestandaloneenterprise.msi)

Adobe Reader (msiexec /qb /i AcroRdrDC1500720033_en_US.msi TRANSFORMS=AcroRdrDC1500720033_en_US.mst)

Note: Adobe Reader uses a transforms (MST) file to supply the unattended installation parameters. That file is created with the Adobe Customization Wizard, a separate application that must be downloaded and installed from Adobe. Also, Adobe doesn’t provide the full installer for Reader and other products from its regular download location. To get the full versions, one must apply for a free license to distribute Adobe products in the enterprise. Don’t use the regular consumer download location for Adobe products. Apply for the distribution license here.

Other applications like Flash-player, Shockwave, Java, and Adobe AIR change often. I do not usually include those in the reference image unless an installed application specifically require it. There is a good question around whether or not Flash-player should be included given its common security vulnerabilities. Those applications I choose deploy with the finished image along with the antivirus software. It is not that much of a task to add/update the install packages for Flash-player and such as they become available.

With this all in place, deployment tasks can be created to create a reference image of Windows 10 and Office 2016.

Jason Watkins

11/3/15


MDT, Importing an Operating System

In order for MDT to do anything, it needs an operating system to capture or to deploy. MDT 2013 Update 1 will use operating system file from the Windows installation ISO, or captured from a custom installation. Either way, the file format for the operating system must be in Windows Image (WIM) format. Starting with Windows Vista, Microsoft switched to WIM format for the files on the original installation media (DVD or ISO). Windows 10 is no different.

To get started, the original installation image for the version of Windows to be deployed must be imported into MDT. For example, we’ll import Windows 10 Enterprise into MDT with the “Import Operating System wizard.” I like to organize the operating systems and other files by category.

Mount the operating system ISO, or insert the operating system DVD into the MDT server.

Open MDT, and navigate to the Operating Systems folder.

Right-click the operating systems folder and choose “New Folder.” Call it “Windows 10.” At this point you could create a sub-folder to Windows 10 after the bit strength of the operating system, x64 or x86, but since I only plan on dealing with 64-bit Windows 10 there is no need.

The new Windows folder under the operating systems folder in MDT.

The new Windows folder under the operating systems folder in MDT.

Right-click the new Windows 10 folder and choose “Import Operating System.” A wizard will appear, guiding the process.The first place determines what kind of image is being imported. Our example will import “Full set of source files.” The “Custom image files” is for a customized install of Windows captured as a WIM file.

Full set of source files is needed to start with MDT.

Full set of source files is needed to start with MDT.

Next, navigate to the drive that contains the source files that are to be imported into MDT. here, it is drive “E:\”

Navigate to the source directory where the operating system files are.

Navigate to the source directory where the operating system files are.

The next step asks for an operating system directory. The default is to take it from the title of the ISO. I added the word “ISO” to the end of the name, so it can be distinguished from other operating system files. This name is the name of the folder the operating system files will go into in the deployment share, under “Operating Systems.”

Give the target directory for the OS a descriptive name.

Give the target directory for the OS a descriptive name.

Continue through the summary, and finish importing the operating system into MDT. The import will take a few moments to complete. After the import is done, the new OS will be in the deployment console, under the name it was given.

The imported OS WIM in the deployment workbench.

The imported OS WIM in the deployment workbench.


With Windows 10 into MDT, we can create deployment tasks to install Windows 10 on computers and even capture it back after customization. That will be next.


MDT, Getting Started

The Microsoft Deployment Toolkit (MDT), a very nice option for deploying Windows in small to large environments.

Symantec Ghost was the de facto tool we used to deploy Windows to end user computers. One big issue was that Ghost, as a product, wasn’t updated to keep pace with the new versions of Windows. Another issue with Ghost was driver management. There was no easy and reliable way to configure a central driver store that the images could use, so multiples images, one for each hardware type, had to be kept. MDT uses a shared, central store to keep drivers. Initially, Ghost was able to automatically reboot client into an image task via a desktop agent. As Windows progressed in development and Ghost stagnated, the compatibility with Windows PE, the tool used by Ghost to start a computer into an imaging task, became nil. To use Ghost, at the end, each client computer had to be manually started into an imaging task with a USB boot key.

The requirements for any new imaging system included a hardware-neutral image creation process, a central driver store, and the ability to remotely initiate an imaging task on a client computer (zero touch). Two out of three isn’t too bad. MDT offers the ability to use a hardware-neutral imaging process with a central driver store, but it doesn’t specifically offer zero touch imaging. The higher-end product, Microsoft System Center, does. MDT is centered around a lite touch approach which requires a minimal, and manual interaction with the target desktop. Many settings, however, can be automated to the point of complete autonomy. Best of all, unlike Microsoft System Center, MDT is free of charge.

To use MDT version 2013 Update 1, Windows 7 or better is needed as a source platform. I tested with a proper version of Windows Server 2012. Windows Server is required at some point for PXE-booting capability via Windows Deployment Services (WDS). WDS will allow a PC to boot to a network-based Windows PE image, created with MDT, and commence imaging. Windows Server will also support more than ten simultaneous SMB connections unlike a desktop version of Windows. An essential part of setting up MDT on a server is the Windows Assessment and Deployment Kit (ADK) for Windows 10. The ADK contains the tools necessary to create the deployment infrastructure for MDT, most notably Windows PE.

For example:

  1. Install Windows Server 2008 R2 or better and update it to it’s fullest extent (that may take a while), in addition to installing antivirus software and joining an active directory domain (optional).
  2. Then, install the ADK for Windows 10, which covers deployment for Windows 7, 8, 8.1, and 10 as well as the servers. If there are no plans to use the MDT database with the server, SQL Server Express need not be installed with ADK. SQL can always be added later if the requirements change. Reboot the server.
  3. Install MDT 2013 Update 1 on the server. If you’re unsure over which version of ADK or MDT to install, go with the x64 version. In my experience, the x64 version will deploy a 32-bit (x86) operating system, if need be.
ADK for Windows 10 installing on Windows Server 2012 R2

ADK for Windows 10 installing on Windows Server 2012 R2

Now, MDT is set up on a server but it cannot do anything yet. There is much more configuration necessary to get to a working imaging and deployment solution. The first part is to create a deployment share. Everything MDT does is from within one or more deployment shares. Since MDT is very similar to a dedicated file server which shares Windows images and applications, it is best to use a very large storage space for the deployment share. I tried to set up a deployment share on a separate DFS path from the server’s own file system, but it did not work. Windows PE couldn’t find that deployment share during a deployment task sequence. For testing, a 1TB volume was more that sufficient for test and low-level production use. I’d split the 1TB volume into two partitions, one for the operating system, and the other for MDT’s deployment shares.

Should I dedicate an entire server or VM to MDT? It really depends on how much use is planned for it. Even if MDT is used to create and pull custom images of Windows which contain only the bare minimums necessary to create a usable, working Windows install, those images will start to take up space. Use as a traditional file server in addition to MDT is practical, but there may be performance deficits during times of peak imaging. YMMV…

Another important thing to note is that at this point, before the MDT config is set up, make sure the host name for the server is set to the desired name. Windows PE uses the server’s host name in the UNC path to connect to the deployment share during an imaging task. If the server is renamed, post MDT-config, those changes will NOT propagate to the deployment shares. It is not that much of a big deal to modify the deployment share to use the new name, but it is a hassle and best avoided.

To create a deployment share, open up the MDT Deployment Workbench as an administrative user on the server. It might even be a great idea to pin a shortcut to the Deployment Workbench to the task bar or desktop. The deployment workbench is divided into two sections, the Information Center, and the Deployment Shares. Choose the lower-half of the window, and right-click Deployment Shares and choose “New Deployment Share.” A wizard will appear, walking you through the creation process.

The first part of the wizard is to establish the local file path for the new deployment share. The default is “C:\DeploymentShare.” I would make this on a volume that is not shared with the operating system and that has plenty of space available. The new share can be named anything, but it cannot and should not ever be renamed. What name is chosen here is what will be for that share for it’s duration. Since I’m just testing here, I’ll go with the default.

New Deployment Share PathThe next step establishes the new deployment share’s share name, which is just the chosen name of the folder with a dollar sign ($) appended. In this example, the share name is “DeploymentShare$.” This share must be freely available on the network to clients that will be imaged with MDT. As stated before, the name of this share should never be changed once it is established.

After that, the next step is to give the new share a descriptive name. Again, this can be anything. If multiple deployment shares will exist on the same server, this name will be used to differentiate them in the Deployment Workbench. Be succinct and descriptive.

The Options page prompts for information that will form the basis of the deployment share’s configuration file, CustomSettings.ini. Any setting chosen here can be changed later on by editing that file. Usually, the defaults are fine for starters.

New Deployment Share OptionsThe next screen is a summary of the options chosen up to this point. The opportunity to go back and change anything is available here. Once this the wizard has advanced past this screen, the option to go back is no longer available. Make sure everything is as desired and proceed. The wizard will create the share and upon a successful completion will present it in the Deployment Workbench.

Deployment Workbench Image

The new deployment share in the Deployment Workbench

Despite being created, the new deployment share cannot do anything yet. In order for it to become functional, the new deployment share needs one or more operating system images, applications to deploy at the time of imaging (optional), drivers for the deployments, and task sequences to coordinate the deployment process. The deployment share is divided into several folders, each named after it’s intended function. A right-click to any of those folders will provide the option to add content to those folders. Sub-folders can be added under the main folders for further organization. It is a good idea to divide your operating systems folder by the OS being used, the drivers folder by the manufacturer and model of computer holding the drivers. It doesn’t have to be done that way, but organization provides further opportunities for customization down the road.

The deployment share is controlled by a configuration file, a text file called “CustomSettings.ini.” The file resides in the deployment share’s folder, in the Control folder. CustomSettings.ini (CS) can be accessed easily by right-clicking the deployment share in the Deployment Workbench and choosing “Properties” and selecting the “Rules” tab.

A default CustomSettings.ini in the deployment share properties.

A default CustomSetting.ini in the deployment share properties.

Bootstrap.ini is a configuration file that is placed on the Windows PE volume when the deployment share is updated. Some of the configuration changes made to a deployment share are incorporated into Windows PE once the deployment share is updated. Upon update, the Windows PE volumes are created with the Bootstrap.ini file, drivers and any other selected options. The deployment share need only be updated when drivers are added/removed from the deployment share, and changes made to the Bootstrap.ini file. To update the share, right-click it’s folder in the Deployment Workbench and choose “Update Deployment Share.” The first update will take a while to complete as all of the drivers, or just the selection preset, are added to Windows PE. After that, the Windows PE ISO is only updated with the most recent changes made to the deployment share, unless the share (Windows PE) has been selected to be completely rebuilt.

Jason Watkins

10/30/2015

The next step is located here.

Note: Microsoft has a great series of Technet articles on how to deploy Windows 10 with MDT. The information contained in this post is a much simpler version of that information.