Network Printer Setup
Before you begin
- Make sure you have the most recent drivers for your printer. You can download them from the manufacturer’s website.
- Follow any instructions on the manufacturers website to extract or install the drivers in Windows.
- Make sure the Printer is powered on and connected to the network via ethernet.
- Obtain a configuration page from the printer that has the IP address on it. Each make and/or model of printer has a different process for printing a configuration page. Check with the manufacturer of you printer on how to print a configuration page.
- Make sure your computer is properly connected to the network via ethernet and is properly configured.
Instructions
- Click on Start — Printers and Faxes. The Printers and Faxes window opens.
- On the menu bar select File - Add Printer.
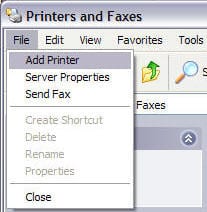
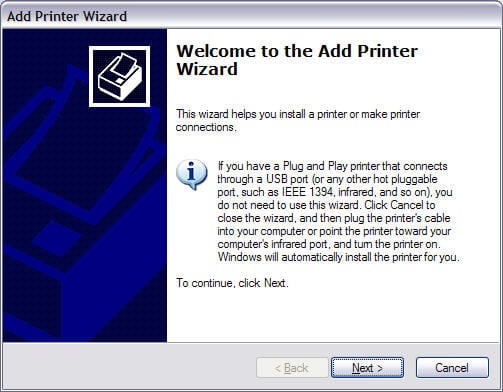
- The Add Printer Wizard opens.

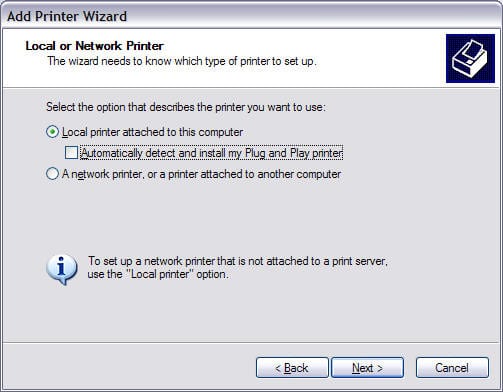
- Click the Next button and select “Local printer attached to this computer”. Make sure “Automatically detect and install my Plug and Play printer” is not selected.

- Click the Next button and select “Create a new port””. From the Type of port: pull-down menu, select “Standard TCP/IP Port”.

- Click the Next button. The Add Standard TCP/IP Wizard will open.

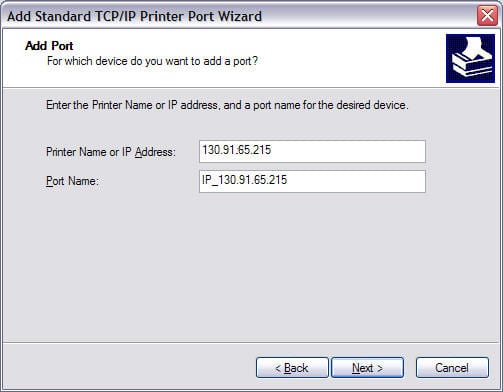
- Click the Next button. In the Printer Name or IP Address field, enter the printer’s IP address or host name (IP address is preferred). The wizard will create a Port Name based on the IP address or host name you entered. If you want to make it more descriptive, you can change the Port Name.

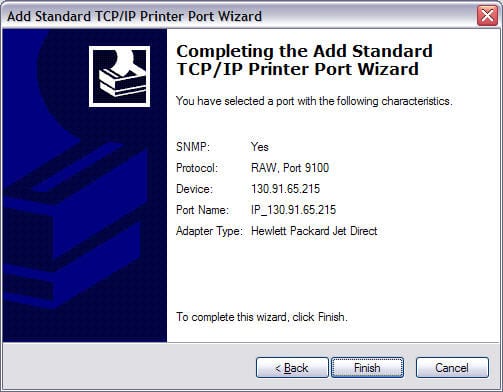
- Click the Next button. The wizard will display a confirmation page. Make a note of the Port Name in case you need to re-install the printer.

- Click the Finish button. The Install Printer Software window will appear.
- Select your printer’s manufacturer from the list on the left, and select your printer’s model and driver from the list on the right. If you can’t find your printer driver in the list, it may be a newer printer. Try clicking on the Windows Update button and repeating the last two steps. If you need to use a specific driver from a disk, click on the Have Disk... button and follow the prompts to choose the driver.

- Click the Next button. The Name Your Printer window will appear.
- Windows will assign a name based on the printer driver you selected. If you want to make it more descriptive, change the description in the Printer Name box.
- If you want this printer to be your default printer, choose the Yes radio button; if not, choose the No radio button.

- Click the Next button. The Print Test Page window appears.
- Select Yes.

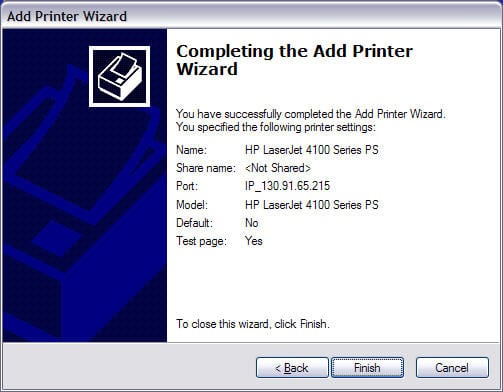
- Click the Next button. The wizard will display a confirmation window.
- Click the Finish button. After a few seconds, files will be copied and drivers will be loaded. A dialog box will appear about your test page.

- Click the OK button. Check to see if your test page printed on the printer.