
“MDT on a Stick”
MDT is excellent at deploying operating system images over the network, but in some cases, the network is not good enough for reliable deployment. Air-gapped networks or others with limited bandwidth can prevent MDT deployments from succeeding. I have a couple of spaces like this and in those areas I use a complete self-contained MDT deployment share on a single USB drive. Fortunately, USB drive prices have come down enough to make a large-capacity drives easily affordable. In this case, I would focus more on the USB drive’s speed in addition to capacity.
This process is pretty straight forward, it just needs a bit of time and a decent amount of free hard drive space.
The first thing needed (obviously) is a working MDT deployment share. If the share isn’t working properly, those issues will transfer to the offline deployment share/USB drive. Secondly, the MDT share needs to be laid out in detail and organized. The more it is, the better options will be for the offline MDT USB drive.
The offline share’s definition is based on an MDT selection profile. This determines what components of the MDT deployment share get incorporated into the offline USB drive.

To create, right-click the Selection Profiles folder and choose “New selection profile.”
Most of the deployment share contents need to be selected for the offline USB to work. The differences available depend on how many levels of organization are built into the deployment share. I have everything broken down by operating system. This allows me to create an offline USB drive for just Windows 10, Windows 11 or both with the matching ISOs, task sequences and drivers.
Once created, you can choose to add/remove components to the offline share via that selection profile. Here I have just the items needed to deploy Windows 11. Windows 10 isn’t long for my network.
To contain all of this a media file is created which will hold an exact copy of the source MDT deployment share, as defined by the selection profile. This is where the decent amount of free HDD space is needed. If the deployment share is 200GB, the drive where the media file lives will need at least that amount.
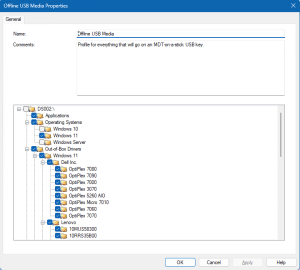
The media file’s properties is a replica of the deployment share’s properties and would be configured as a regular MDT deployment share.
To create the media file, right-click the Media folder and choose “New media.” It will ask where to create and store the media file and which selection profile it should use. Quick video showing how to create the selection profile and media file.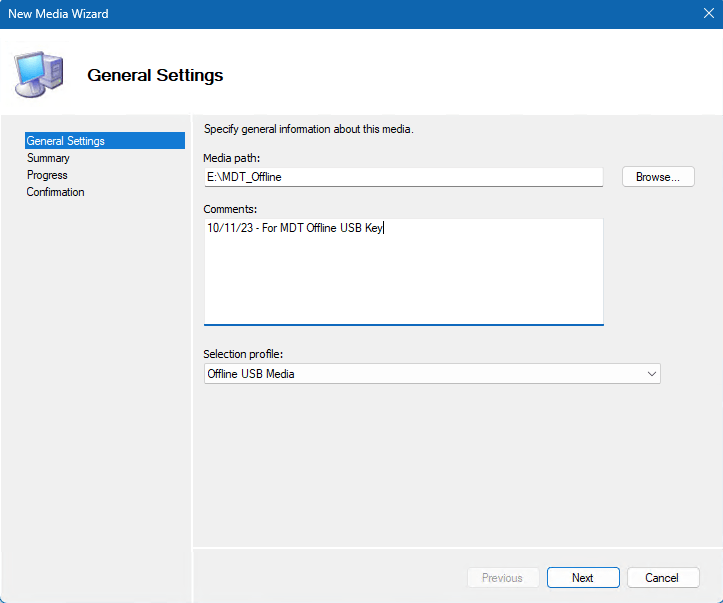
As one would for a regular MDT deployment share, options can be configured for the configuration.ini and bootstrap.ini files as well as regular preferences. Changes made to the media file properties do not propagate back to the source MDT deployment share. Changes made to the source MDT deployment share DO propagate down to the media file when the media file is updated.
Quick video about editing the media file.
The directory where the media file lives holds a copy of the deployment share in the “Content” directory as well as the resulting ISO that is created. If the intention is to have multiple media files, house each in their own directory.

After everything has been created and configured, the media file needs to be updated. This is the same as updating the deployment share with the differences being that a new ISO is created each time the media file is updated. The entire deployment share will be copied into a Windows PE ISO. This happens in its entirety each time the media file is updated. The are no deltas incorporated. Given the size of the selection profile and the speed of the storage media, this can take a bit of time.
After that, the ISO can be tested in virtualization or written to a USB key. Test it all out before writing to a USB drive. Keep in mind all of the software, ISOs and scripts that are on the MDT deployment share, now reside on that USB drive.
Enjoy!