
Applications, operating systems, drivers are all great but do nothing without a working task sequence. Task sequences are basic XML files which call on a series of scripts to run parameters chosen by the user, when the task was created. There are a few different types of task sequences, some for capturing images, some for deploying software, but most center around deploying an operating system image to computer hardware. That is where our focus will be.
The simplest way to get started with a new task sequence is to right-click the Task Sequences folder, and choose “New Task Sequence.” Like other areas of MDT, some thought should be placed into how this is laid out. Just like we did with the Operating Systems folder, I like to arrange the Task Sequences folder according to OS, and image type. I actually create the same folders in the Task Sequences area so that they mirror the Operating systems folder.
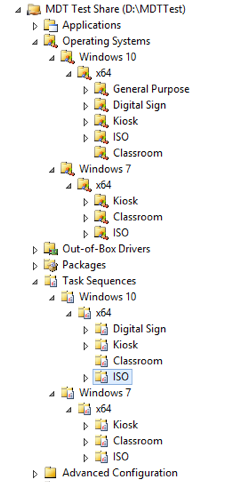
MDT’s operating system and task sequence folders are the same.
Generally, one operating system image goes along with a single task sequence. I haven’t run across the need to use the same image with multiple different task sequences. Creating folders is just as easy as starting to create a task sequence, right-click the node above and choose “New Folder.” Also, if one was to create an offline MDT deployment share, separated tasks and operating systems can make your selection profile much slimmer.
The process of creating a new task sequence is wizard driven like many things in MDT. Each task needs a unique ID for starters, and a name which can or can not be unique. The ID becomes the name of the folder for the task sequence in the deployment share’s file system hierarchy. I like to use a truncated version of what the task sequence does for the ID. Example: DEPW7EX64 for deploying an image of Windows 7 Enterprise x64, or CAPW7EX64 for capturing an image. Whatever works is fine just as long as each ID is unique. The name and description should be concise and meaningful as it is shown to the one doing the imaging on the image selection screen, from Windows PE.

Select a unique ID and meaningful a name and description.
Next, is the place to select the type of task sequence being created. There are several types, the one we’re looking for is “Standard Client Task Sequence.”

For our example, choose the Standard Client Task Sequence
Next, we need an image to deploy. Here’s another example where a little organization can pay off down the road. In this case, making the images easier to find. We’re going to choose the basic install image of Windows 7 from the ISO.
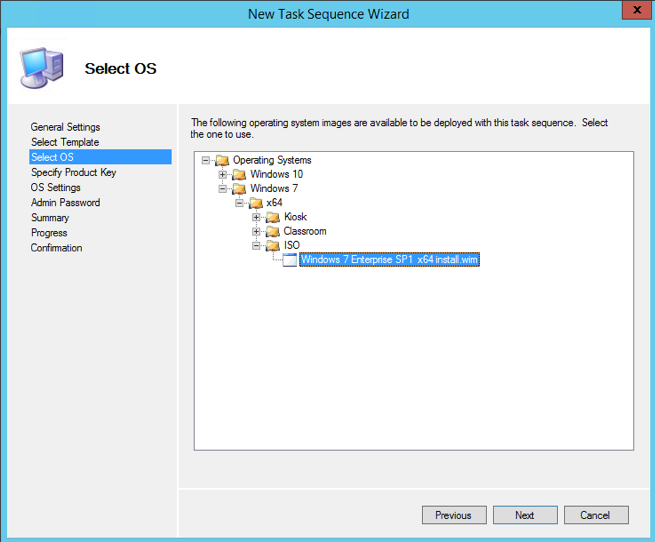
Choose the desired OS image.
Windows needs a product key to be legit. The next screen presents three options for a product key: none, a MAK key, and a retail product key. I choose to use KMS activation for my deployments, and rely upon a scripts to point Windows to the KMS server, enter the key, and activate. The script was added to MDT as an application and is run that way. However, if MAK activation is the way to go, here’s the chance.
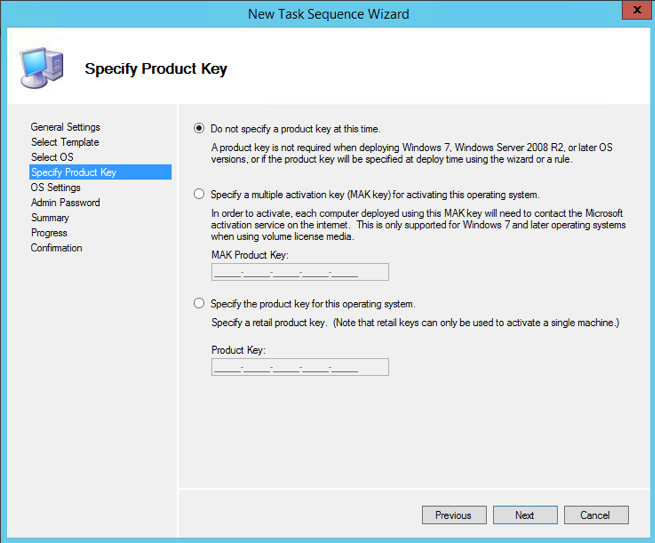
I typically do not enter a product key at this stage.
Next, we have to enter some OS information. I use the persons or organization to whom the software is licensed. Keep in mind that the home page URL is for Internet Explorer only.
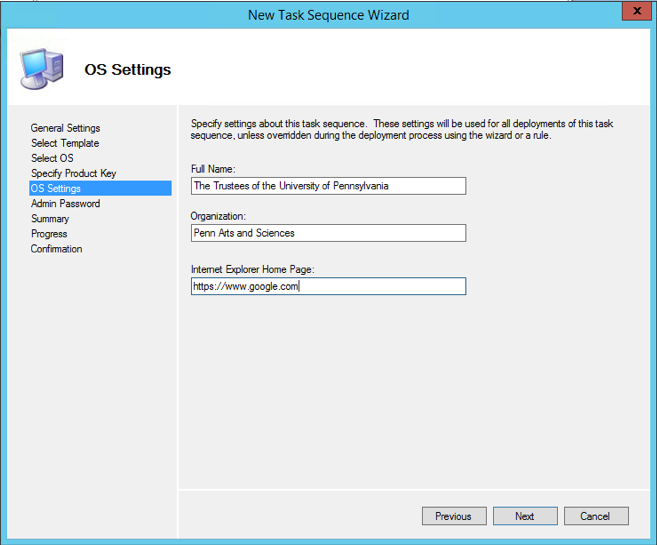
Here, I enter the registered owners and/or organization of the software license.
The next step asks for the password of the local administrator account, the built-in administrator. I enter a basic password here that will be changed later on. Keep in mind the password IS obfuscated in the resulting unattend.xml file, so it is safe there. I actually have a task disable the built-in administrator account from BigFix, after imaging has completed.
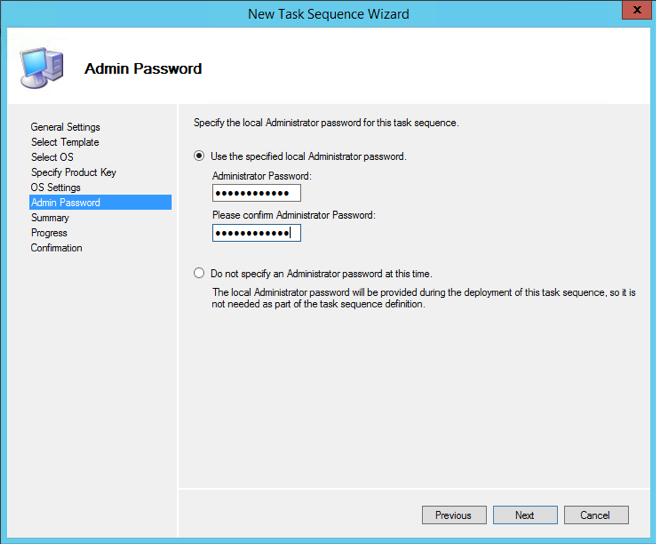
Enter a password for the built-in administrator account.
The following steps are a summary screen and a finish. Those can be passed through with Next and Finish. Now, we have a basic task that will deploy Windows 7 without much customization.

The completed task sequence.
To get a bit more out of it, especially where driver insertion is performed, we’ll need to edit the task sequence and add a couple of steps. Just right-click the task sequence and choose “Properties.” The General page lists all of the settings entered before, lest they be changed now. I usually don’t mess with those all too much. I do, however, get into the Task Sequence tab. Here are the steps MDT processes, sequentially, when executing a task sequence.
I like to have firm control over which drivers are used on the imaged PC, so I tell the task sequence exactly where to look, and leave little for MDT to figure out. The first step to this is to add a Task Sequence Variable which will identify which drivers to use. Choose “Add” from the top menu, and track down to “Task Sequence Variable.” Place it in the “Preinstall” section, right above the inject drivers step.
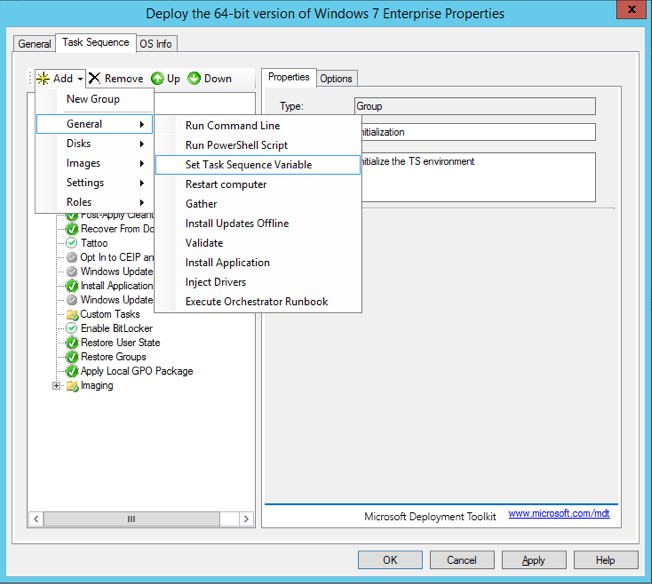
Variable above the Inject Drivers step.
Set the variable name to “DriverGroup001”, and the value to “Windows 7 x64\%Make%\%Model%” (without quotes). This convention follows a previous post I have about driver management. If you followed the steps there, these will compliment them.
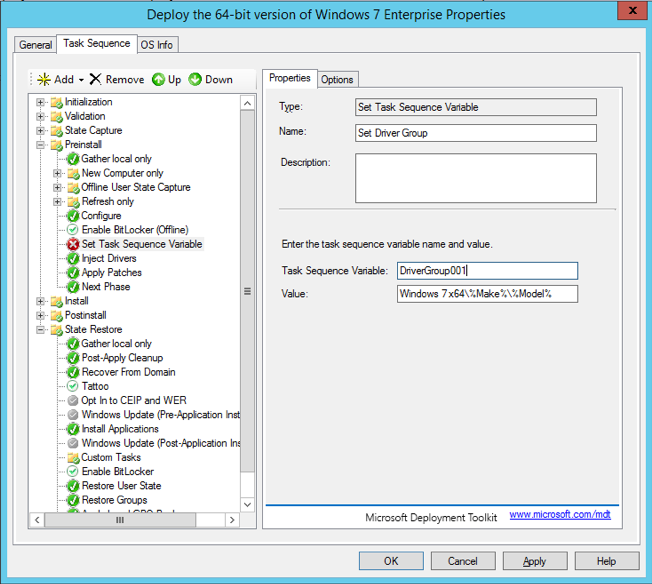
DriverGroup001 \ Windows 7 x64\%Make%\%Model%
Next, we have to modify the Inject Drivers step from allowing all of the drivers on the deployment share to only the ones found at “Windows 7 x64\%Make%\%Model%.” To do this, change the selection profile to “Nothing”, and choose the radio button titled “Choose all drivers from this selection profile.” This will turn off automatic driver detection and just use the drivers found in “Windows 7 x64\%Make%\%Model%.”
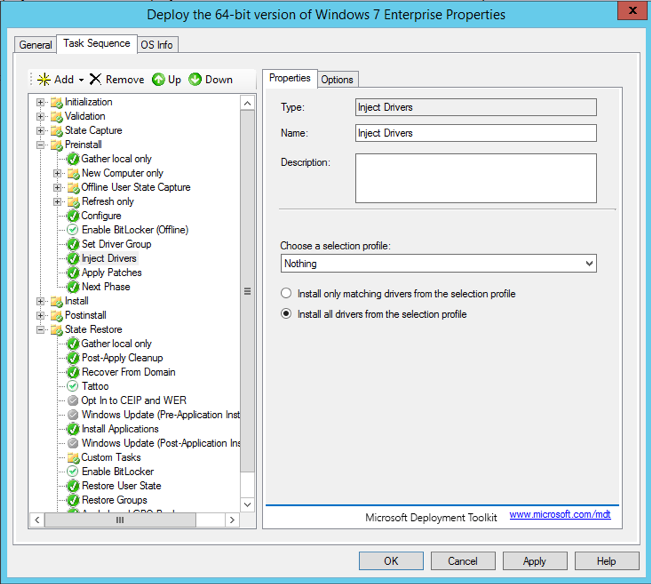
Selection Profile = Nothing / Choose all drivers…
In a very basic sense, we’re done. MDT will install Windows 7 and only use drivers detected by WMI for the installed hardware. This is a quick way to get up and running with a basic Windows install. However, additional steps can be added to sweeten the task sequence.
In the “State Restore” section, one step we really don’t have to touch is “Install Applications.” In its default state, the MDT wizard will prompt the end user to install any or all applications listed on the deployment server. This is good for versatility, but can get a bit repetitive if done many times. To get around the prompt and have MDT install the necessary applications, I create an app bundle, add my desired apps to the bundle and have the Install Applications step just run that. For example, my bundle is called “Windows 10 Classroom Software.” It contains Symantec Endpoint Protection (SEP), the BigFix client (IEM), and the Sassafras K2 client. The main reason why I do not build these into the image is that their values need to be unique on every installed instance. I could install them on a template computer, and remove their unique components, but it is just as easy to install them during deployment. Even though the name says “Windows 10 Classroom Software” it will run on Windows 7.

Create an application bundle and have MDT install that.
Now, our virgin Windows 7 install will have antivirus software, and endpoint management software, which is pretty much everything we need for our working environment. I could use MDT to install Microsoft Office and anything else, but BigFix will do so too.
This was a good write-up. Thank you
Thank you for visiting
Hi. Just curious, Does DriverGroup001 work for each OS you have under Out-of-Box Drivers? Is there a DriverGroup002 for Windows 10 x64?
p.s. thanks a ton for all the work on these articles. they have helped me immensely
Hi,
DriverGroup002 would be the variable for a second deployment share in the deployment workbench. I am glad you have found my posts helpful.
Hello Jason!
Thank you so much for your posts. This has been tremendously helpful.
Do you have somewhere you cant point me to help build an App bundle like you have outlined? Would make deploying Adobe much better,
Thanks for everything
Is unattend is same thing as task sequence in MDT or can MDT can get away with using just task sequence?
Nice write-up , 🙂