
The main point of MDT and WDS is to place Windows on a computer’s disk drive. To do this, MDT uses a series of steps in a task sequence that perform the necessary operations to facilitate installation. The crucial point to all of this is the network. Networking between the MDT/WDS server and the target clients must be clear and working. DHCP, DNS, and even WINS (if you’re feeling nostalgic) all must be working properly or else what could seemingly be an MDT/WDS problem, could actually be a network problem. MDT uses two ways to connect to the server over the network, USB key, and PXE. Pre-execution Environment (PXE) requires the use of a Windows Server configured with the Windows Deployment Services (WDS) role. MDT USB keys are copies of Windows PE, designed to connect to MDT and pull an image from the server. This is where the focus of this post will reside.
The good thing is that MDT has a provision for creating it’s boot sources built-in. Each time a deployment share is updated in MDT the drivers and settings contained within that share are added to a boot WIM and a boot ISO that is used to connect to the MDT server. These are located in the Boot folder of the deployment share. The WIM is used for copy to an WDS server and served-up via PXE. The ISO is meant for a CD-ROM, or the modern USB key. Simply booting a PC to that disc or key, and with DHCP working, the PC will connect to the MDT server. MDT does support the use of static IP addresses at the welcome screen, but DHCP is better and essential if PXE booting is desired.
Creating the MDT (Windows PE) boot volume…
Drivers are the biggest issue with regards to MDT’s Windows PE boot volume. Many times I have had to troubleshoot a connection to MDT that wasn’t connecting only to find out a driver was the issue. Like the target images, MDT’s PE needs network and system drivers to run on the clients to/for connecting. OEMs like Dell and Lenovo make Windows PE drivers available for their hardware, which makes it easy to organize those resources. Another place I go for network drivers is Intel’s web-site and their PRO LAN drivers.
Once I download and extract the drivers, I import them into MDT the normal way, but into their own folder within the driver store. Just like I create folders for the operating system and platform, I also create a Windows PE folder at the same level.
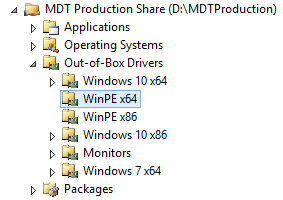 Once the drivers are added, I create a selection profile for just the PE drivers. This is so I can assign them to the MDT Windows PE boot device. Selection profiles are found under the “Advanced Configuration” folder, under task sequences. Simply, right-click the folder to create a new selection profile and drill-down the driver list to select only the Windows PE drivers. I create a separate profile for 32-bit and 64-bit platforms.
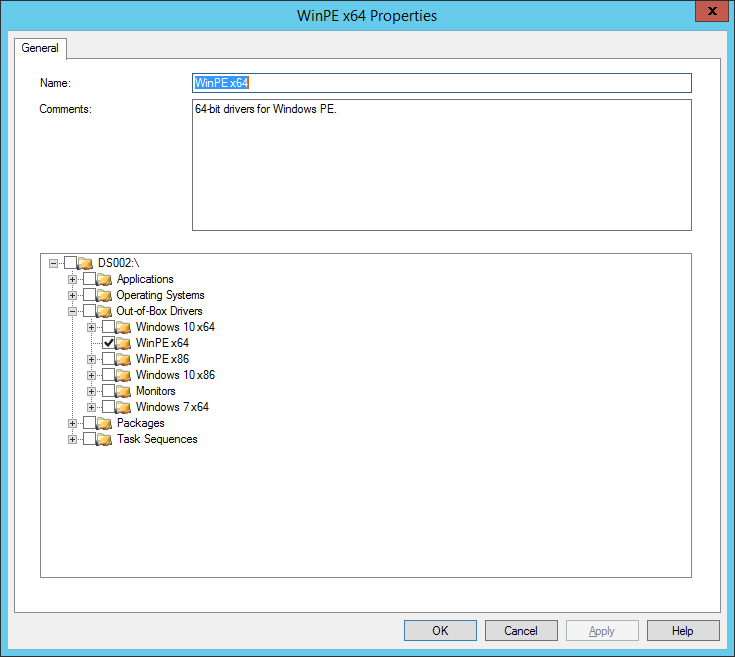 Now, from the properties of the deployment share, choose the Windows PE tab and then choose the “Drivers and Patches” sub-tab. From the drop-down list, any selection profile can be used with all or some of the drivers. This is where I choose my WinPE selection profile. With this, only the WinPE drivers will be used to connect to the MDT server. Note: there are two options on the WinPE tab, one for x86 and x64.
 Other details can be set on the Windows PE tab, though the defaults are usually sufficient. For example, I change the wallpaper Windows PE uses to display a message on the screen, while the computer is imaging.
 The image description for the WIM file is what WDS displays to the end user when they PXE boot to that server and are prompted to select a boot volume. I rename the WIM description and the ISO file name to follow suit with the deployment share.
When everything is as-desired, the deployment share must be updated to generate/regenerate the Windows PE WIM and ISO files. This process takes a few moments to complete, so grab a drink…
Once the deployment share has been successfully updated and has generated the Windows PE volumes in the desired configurations, we need to get those onto the WDS server, or portable media. Even with extreme customization, the ISO for the deployments share’s Windows PE volume is pretty small (by today’s standards). I’ve been using a legacy 512MB USB key for my 64-bit MDT Windows PE, which has to be over ten years old by now. Of course, later USB keys can be used. Use whatever method is best suited to place the ISO on the USB key as a bootable volume. I like to use a piece of freeware, called “Rufus“, but again use whatever works for you.
For WDS, the WIM file, created by updating the MDT deployment share, and placed in the “Boot” folder, along with the Windows PE ISOs, must be copied to the WDS server (if WDS, and MDT are on different computers), and used to “replace”, or create the WDS boot volume.

Go into WDS, right-click the desired boot image, and choose “Replace Image…”
After replacing the WDS boot image, it is not a bad idea to restart WDS on that server, just in case.
Deploy Time…
Get the target computer or VM ready by making sure it can either boot to the NIC, and get a DHCP address, or boot to USB. If you’re PC is using UEFI for its BIOS/firmware, booting to the NIC will most-likely have to be enabled in the BIOS setup (at least for Dell hardware anyway). Most of the PCs shipping from OEMs today will boot to a USB drive without any configuration needed. While in the BIOS setup, you might want to check that too. Pressing F12 on both Dell and Lenovo hardware will interrupt the boot sequence, and allow one to change the boot device for this particular boot, or enter the BIOS. Either way, boot to the USB to use a WinPE USB boot drive, or to the NIC for WDS. Also, keep in mind that complete network connectivity is required throughout the whole imaging process, from start to finish. If MDT’s WinPE volume cannot get an IP address, or see the computer/VM’s hard drive, the correct drivers need to be added. I think 85% of MDT imaging problems are driver-related.
I like to do my imaging off of the production network. First reason, is to not interfere with bandwidth that other computers may need during the day. However, MDT is a good network citizen. I’ve imaged dozens of computers over the production network, at the same time, without any negative impact. Second reason is that after imaging completes, you may have an unpatched copy of Windows on the network. This depends on the steps enabled in your task sequence, whether Windows Update is enabled or not, and how old the image being deployed actually is. Keeping the newly-imaged isolated from everyone else until it has had a chance to get the latest updates from WSUS, and get the latest virus definitions from SEP is a good idea. Since I am the only one using my MDT/WDS server, I keep that behind the NAT as well. My imaging traffic never even sees the production network, usually…
If MDT will deploy an image to a PC that already has a copy of Windows installed, and is not going to be performing an upgrade, wipe the target hard drive first. I use diskpart, and its “clean” command to quickly prepare disk drives on existing installations. Backup any and all data on the target PC before cleaning. If any doubt exists as to whether or not the data might be needed later on, back it up. Adding the following text to a simple txt file, called “clean.txt” will automatically clean any disk that is listed as disk zero.
select disk 0
clean
From a Windows PE command prompt, run the script by executing:
diskpart.exe /s clean.txt > diskpart_log.txt
Boot the computer, and connect to the MDT server. If things start going wrong at this point, there are few things, which are most-likely the culprit.
Can’t boot to USB drive, or the NIC? Check the BIOS, and modify the boot sequence, if necessary. Most new PCs are not set to boot to the NIC in the BIOS, so if that is your goal, check that setting and enable it. While in the BIOS, make sure ALL USB ports are enabled, and configured to allow boot. If the PC is set to successfully boot to either option, check the USB flash drive by using it to boot a known-good PC, which has been demonstrated to boot to USB or NIC in the past. For the hell of it, try a different USB port. I’ve only ever had one USB flash drive completely die on me. If the PC will not boot to the NIC, make sure that option is enabled in the BIOS, and that DHCP is working on your network. Make sure the WDS server is available over the network through ping via IP address and host name.
Successfully booted into MDT WinPE, but cannot connect to the deployment share? Start simple, make sure the WinPE session has received an IP address from DHCP. Press F8, in WinPE, and run the usual ipconfig command from the resulting command prompt. If DHCP is not available, find out why and fix it, or enter a static IP address at BDD Welcome screen (The first MDT screen, asking what is to be done). If a static IP address doesn’t work, then the problem is probably driver related. Add the drivers for the target hardware to the MDT driver store, and update the deployment share with complete regeneration (not the default option). Then, re-copy the WinPE ISO the USB flash drive, or replace the boot WIM on WDS with the updated copy, and restart WDS services on the server.
If the deployment share is accessed through a username and password, then make sure the correct set of credentials is being used. For domain use, I create a global group in active directory, and add those users that require access to the deployment share. Test access by having those users connect to the deployment share from Windows Explorer via:
\\server.domain.com\DeploymentShare$
If they cannot do that, they’ll never get in through Windows PE. Check the permissions… If the BDD Welcome screen, or a login prompt for the deployment share are not being displayed, the BootStrap.ini file is configured to bypass the welcome screen and automatically log users into the deployment share. That has to be done intentionally, and is not a default. Whether or not this is desired is up to the administrator of the deployment share. Having these steps pre-configured is essential for automating the imaging process, but not required for every MDT scenario.
Choose the option to deploy a new operating system on the BDD Welcome page, and select the desired task sequence. The steps given will all depend on how the deployment share’s CustomSettings.ini file is configured. I have one deployment share that is completed automated, without prompts. All the tech or whomever is imaging the computer sees is the actual process of MDT imaging the computer.
If the task sequence fails before it can re-partition and format the internal disk drive, there is most-likely a driver issue with either the chipset or storage controller in Windows PE. Again, add the latest WinPE drivers for your particular hardware. Even if you updated the drivers last week, check again. There may be an even newer update waiting. If that does happen, restart the image deployment from the beginning. Reboot the computer and “clean” the disk again with diskpart, or the new deployment will produce an error stating that a deployment is already in progress, and ask if you would like to continue that deployment, or start a new one. Chances are if the internal disk drive can be accessed, from Windows PE, by diskpart, and cleaned, there will be no issues accessing that drive to re-partition and format.
Once the task sequence has started, it will run by itself until something breaks, or asks for input. This again depends on the CustomSettings.ini, and specifically how the task sequence is configured. By default, all task sequences have an “Install applications” step, which will prompt the user to select which applications should be installed during deployment. Some task sequences will prompt for user data backup and restore, and some will prompt to capture an image of the computer, after deployment has finished. It all depends on how MDT is configured. If the deployment is running, just leave it alone and wait. Do not use either the computer receiving the image, or the one providing the image. For the wallpaper I use on my MDT Windows PE boot volumes, I have a Penn logo with a detailed inscription of what the computer is currently doing, and my contact information. The wallpaper image also asks that the computer not be used while the sign is present, and that interrupting the imaging process would require it to start all over again. Depending on network speed, the speed of the hardware at both ends, and the image size, the whole deployment process could be relatively quick, or could last a few hours. Just wait, and see until something breaks. If the task sequence fails in deploying Windows to that computer, MDT will indicate that with a pink-colored window. Completion, but with errors is indicated by a yellow-colored window, and success is indicated by a white window, indicating such. The MDT error messages are completely nondescript and far from helpful. The true key to identifying and fixing problems with MDT are the copious log files it generates.