Creating Task Sequences for MDT

Applications, operating systems, drivers are all great but do nothing without a working task sequence. Task sequences are basic XML files which call on a series of scripts to run parameters chosen by the user, when the task was created. There are a few different types of task sequences, some for capturing images, some for deploying software, but most center around deploying an operating system image to computer hardware. That is where our focus will be.

The simplest way to get started with a new task sequence is to right-click the Task Sequences folder, and choose “New Task Sequence.” Like other areas of MDT, some thought should be placed into how this is laid out. Just like we did with the Operating Systems folder, I like to arrange the Task Sequences folder according to OS, and image type. I actually create the same folders in the Task Sequences area so that they mirror the Operating systems folder.

MDT's operating system and task sequence folders are the same.

MDT’s operating system and task sequence folders are the same.

Generally, one operating system image goes along with a single task sequence. I haven’t run across the need to use the same image with multiple different task sequences. Creating folders is just as easy as starting to create a task sequence, right-click the node above and choose “New Folder.” Also, if one was to create an offline MDT deployment share, separated tasks and operating systems can make your selection profile much slimmer.

The process of creating a new task sequence is wizard driven like many things in MDT. Each task needs a unique ID for starters, and a name which can or can not be unique. The ID becomes the name of the folder for the task sequence in the deployment share’s file system hierarchy. I like to use a truncated version of what the task sequence does for the ID. Example: DEPW7EX64 for deploying an image of Windows 7 Enterprise x64, or CAPW7EX64 for capturing an image. Whatever works is fine just as long as each ID is unique. The name and description should be concise and meaningful as it is shown to the one doing the imaging on the image selection screen, from Windows PE.

Select a unique ID and meaningful a name and description.

Select a unique ID and meaningful a name and description.

Next, is the place to select the type of task sequence being created. There are several types, the one we’re looking for is “Standard Client Task Sequence.”

For our example, choose the Standard Client Task Sequence

For our example, choose the Standard Client Task Sequence

Next, we need an image to deploy. Here’s another example where a little organization can pay off down the road. In this case, making the images easier to find. We’re going to choose the basic install image of Windows 7 from the ISO.

Choose the desired OS image.

Choose the desired OS image.

Windows needs a product key to be legit. The next screen presents three options for a product key: none, a MAK key, and a retail product key. I choose to use KMS activation for my deployments, and rely upon a scripts to point Windows to the KMS server, enter the key, and activate. The script was added to MDT as an application and is run that way. However, if MAK activation is the way to go, here’s the chance.

I typically do not enter a product key at this stage.

I typically do not enter a product key at this stage.

Next, we have to enter some OS information. I use the persons or organization to whom the software is licensed. Keep in mind that the home page URL is for Internet Explorer only.

Here, I enter the registered owners and/or organization of the software license.

Here, I enter the registered owners and/or organization of the software license.

The next step asks for the password of the local administrator account, the built-in administrator. I enter a basic password here that will be changed later on. Keep in mind the password IS obfuscated in the resulting unattend.xml file, so it is safe there. I actually have a task disable the built-in administrator account from BigFix, after imaging has completed.

Enter a password for the built-in administrator account.

Enter a password for the built-in administrator account.

The following steps are a summary screen and a finish. Those can be passed through with Next and Finish. Now, we have a basic task that will deploy Windows 7 without much customization.

The completed task sequence.

The completed task sequence.

To get a bit more out of it, especially where driver insertion is performed, we’ll need to edit the task sequence and add a couple of steps. Just right-click the task sequence and choose “Properties.” The General page lists all of the settings entered before, lest they be changed now. I usually don’t mess with those all too much. I do, however, get into the Task Sequence tab. Here are the steps MDT processes, sequentially, when executing a task sequence.

I like to have firm control over which drivers are used on the imaged PC, so I tell the task sequence exactly where to look, and leave little for MDT to figure out. The first step to this is to add a Task Sequence Variable which will identify which drivers to use. Choose “Add” from the top menu, and track down to “Task Sequence Variable.” Place it in the “Preinstall” section, right above the inject drivers step.

Variable above the Inject Drivers step.

Variable above the Inject Drivers step.

Set the variable name to “DriverGroup001”, and the value to “Windows 7 x64\%Make%\%Model%” (without quotes). This convention follows a previous post I have about driver management. If you followed the steps there, these will compliment them.

DriverGroup001 \ Windows 7 x64\%Make%\%Model%

DriverGroup001 \ Windows 7 x64\%Make%\%Model%

Next, we have to modify the Inject Drivers step from allowing all of the drivers on the deployment share to only the ones found at “Windows 7 x64\%Make%\%Model%.” To do this, change the selection profile to “Nothing”, and choose the radio button titled “Choose all drivers from this selection profile.” This will turn off automatic driver detection and just use the drivers found in “Windows 7 x64\%Make%\%Model%.”

Selection Profile = Nothing / Choose all drivers...

Selection Profile = Nothing / Choose all drivers…

In a very basic sense, we’re done. MDT will install Windows 7 and only use drivers detected by WMI for the installed hardware. This is a quick way to get up and running with a basic Windows install. However, additional steps can be added to sweeten the task sequence.

In the “State Restore” section, one step we really don’t have to touch is “Install Applications.” In its default state, the MDT wizard will prompt the end user to install any or all applications listed on the deployment server. This is good for versatility, but can get a bit repetitive if done many times. To get around the prompt and have MDT install the necessary applications, I create an app bundle, add my desired apps to the bundle and have the Install Applications step just run that. For example, my bundle is called “Windows 10 Classroom Software.” It contains Symantec Endpoint Protection (SEP), the BigFix client (IEM), and the Sassafras K2 client. The main reason why I do not build these into the image is that their values need to be unique on every installed instance. I could install them on a template computer, and remove their unique components, but it is just as easy to install them during deployment. Even though the name says “Windows 10 Classroom Software” it will run on Windows 7.

Create an application bundle and have MDT install that.

Create an application bundle and have MDT install that.

Now, our virgin Windows 7 install will have antivirus software, and endpoint management software, which is pretty much everything we need for our working environment. I could use MDT to install Microsoft Office and anything else, but BigFix will do so too.


MDT and Drivers

Drivers are a big part of getting Windows to work properly. Anyone who has ever had to troubleshoot a piece of hardware on Windows knows this. When generalizing an installation of Windows for capture with sysprep, all but the most basic drivers are removed. This makes the captured image applicable to many different types of hardware. During a task sequence, MDT runs a plug and play check, for hardware at a couple of different points to determine what drivers, if any, are needed. When a matching driver is found, it is injected into the image before it is applied to the computer’s hard drive. To do this, MDT has a folder/section in the deployment share that is dedicated to organizing and storing drivers. It is called “Out-of-Box-Drivers” (OOBD).

The basic INF files are what MDT needs for driver injection. Many drivers are distributed as packages, which come in the form of an executable. This is not what we need. If an executable is the only way a driver is available, it must be imported as an application into MDT, and installed via task sequence. Fortunately, OEMs like Dell, Lenovo, HP, and even Microsoft make bulk downloads of model-specific drivers available from their sites. Dell hardware drivers come in the form of a CAB file, which can be opened with the expand command, or with a compression/decompression utility like 7-zip.

Bulk-driver Download Sites for Dell, Lenovo, HP, and Microsoft (Surface)

I create a folder structure on the MDT server similar to “Drivers\Windows ##\Vendor\Model.” For example: D:\Drivers\Windows 7\Dell\OptiPlex 990

I do not delineate between x86 and x64 versions of drivers in my folder path because nearly all of my OS deployments are 64-bit. Dell combines x86 and x64 drivers in the same download. Many Dell drivers can be used on both platforms. Lenovo drivers will try to extract to their own, specified path, but that can be changed at runtime. Complete, downloaded driver packs can be between 300MB and 1,000MB in size, except for WinPE driver packs which are very small.

Using the expand command, I’ll extract the drivers to my folder structure.

expand C:\Users\jasonrw\Downloads\990-OptiPlex-ABCDE.cab -f:* “D:\Drivers\Windows 7\Dell\OptiPlex 990”

The command prompt window will scroll really quickly and end with the prompt returning. Now, we can import them into MDT. MDT is able to handle drivers in different manners. The basic default option is to throw all drivers into the same folder at the root OOBD directory. With that, a deployment task will search the entire OOBD store for the right drivers. This increases the chance of the wrong driver being selected. WMI is great, but it is not perfect. Another option is to break down the OOBD store by manufacturer/vendor or by operating system version. Creating folders for Windows 7 and Windows 10, respectively can help minimize the chance of a wrong driver being installed. I take it one step further, actually a couple of steps further. I still use MDT’s WMI hardware-querying capabilities, but I tell it exactly where to look.

I create a specific folder structure under OOBD that matches a specific WMI query I pass on to the deployment task. For example, Windows 7: Out-of-box-drivers\Windows 7\Dell Inc.\OptiPlex 990

OOBD Folder Hierarchy

The bottom two folder tiers each correspond to variable in a WMI query, Make and Model. To find the make or manufacturer of an OEM PC, run the following command from a command prompt.

wmic computersystem get manufacturer

The returns for Dell and Lenovo are “Dell Inc.” and “Lenovo

To get the model, run the same command as above, but replace “manufacturer” with “model” Top that off with a folder for OS version and platform, and you have something to use. In the task sequence, a task variable can be inserted into the PreInstall phase, before the inject drivers step to tell the task sequence exactly where to look. The variable is “DriverGroup001”, and the value is “Windows 7 x64\%Make%\%Model%” This will allow a task sequence to correctly use a WMI query to find the drivers for the exact make and model being imaged.

Task Sequence Variable

The Inject Drivers step has its own settings that needs to be configured. For our purpose, the selection profile has to be set to “Nothing” with all drivers from the selection profile being used.

Selection Profile

Selection profiles are the ultimate step toward driver control. They are a pre-defined selection of drivers that may encompass and individual model, or manufacturer. MDT ships with a few pre-defined selection profiles, but more can be created to suit any need. Given the exact control this approach provides, there is one detraction, it limits task versatility. Since a selection profile tells a task sequence exactly which drivers to use, MDT doesn’t query for them. The default setting for Inject Drivers is to query the entire OOBD store, but when “Nothing” is set, they querying is off. If it is desired that a task sequence only serve one or two makes of computers, this might be a good approach. I support about a dozen different models from two manufacturers, and I’d like my task sequences to be applicable to all.

I do use a selection profile to organize the drivers I use for my MDT Windows PE ISO/WIM files. Dell and Lenovo make drivers just for Windows PE available as a download too. I use the same approach as above to download, extract, and import the Windows PE drivers into MDT. Then, I create a selection profile for the Windows PE drivers and use that for my ISO/WIM file drivers.

Selection Profiles

To import drivers into OOBD, make your folders as desired, right-click the folder for the computer model, and choose “Import drivers.” A wizard will open, walking you through the process of importing the drivers from where they were extracted. It is real easy.

Import Drivers Wizard

After the driver import, the deployment share must be updated. By default, MDT uses the all network and system drivers it has in the OOBD store for the Windows PE ISO/WIM file. This can be changed, as I described above, with a custom selection profile, but it is not mandatory. Still, note, that each time drivers are added and removed, the deployment share should be updated for those new drivers to be used. Some drivers are clearly depicted whether or not they are x86 or x64. In reality, many single drivers can be used on both platforms, but the descriptor files do not always indicate that to MDT. Thus, MDT will import the driver and override the specified platform. This is noted after all of the drivers have been imported for that operation.

screen-shot-2016-09-25-at-15-06-54

I, personally, write down the name of each driver with a warning, and disable them after the wizard ends. Disabling/deleting a driver is easy, just right-click it in the MDT workbench and choose the appropriate option. Drivers must be disabled from their property sheet. Disabling a driver is a safe approach before it is determined that deletion is necessary. Only ever delete a driver from the MDT workbench. DO NOT go into the driver store via the file system and delete it that way.

Disable Driver

Again, when disabling or deleting a driver, you must update the deployment share to take it out of Windows PE.

Finding, downloading, extracting, and importing drivers into MDT is a big part of MDT configuration, which takes a great deal of time. If it is done with forethought and planning, it can minimize the driver problems a deployment share might have, and need only be done once. I note the name and date of the driver files that I download and import into MDT. Then, I can periodically check for updates from the vendor’s web-sites. The older a model is with the manufacturer, the less-frequent they tend to update the drivers packs for that model. If the manufacturer does not make a driver pack available for your model, it is possible, though very tedious, to download each driver, and extract them individually. I try to avoid doing that.

Thanks!


UEFI and a Dell OptiPlex 990

Hello,

I do a great deal of work with virtual machines and perform all of my operating system development on virtual platforms. My desktop PC came with a 500GB hard drive. Using a virtualization program and creating a couple of production sized virtual machines will take up a great deal of that space very quickly.

A larger hard drive is one of the easiest upgrades one can make to a computer. I ordered a 3TB drive for my Dell OptiPlex 990 and had hoped to just plug and chug, but it didn’t work out that way. What I had found out that the default traditional method of BIOS hardware management on the PC only allowed it to see partitions or drives no larger than 2TB. BIOS-based computers use hard drives that are partitioned in the Master Boot Record or “MBR” format. To use the new crop of large drives with more than 2TB of space, one needs to format the drive as a GUID Partition Table or GPT device. There, the largest of drives can be partitioned and formatted as one single volume, which is what I was after.

I should have just done my homework and just ordered a 2TB drive. Under BIOS/MBR, Windows setup would only see 2TB, leaving around 768GB unavailable. GPT disks cannot use the BIOS system. They rely on a newer system called the Universal Extensible Firmware Interface, or “UEFI.” The OptiPlex 990 has the ability to use a BIOS-based system or UEFI, but not both. Each are mutually exclusive to the OptiPlex 990. Newer computers have the ability to use UEFI with support for legacy BIOS system (UEFI-CSM), but not the 990.

I initially tried to get the 3TB HDD to be recognized by booting to a Windows PE boot drive and use DISKPART to partition and format the HDD as a GPT disk. Still, Windows setup would not use the drive. Windows 10 setup would indicate that setup could not use any available partition as they were in GPT format. The problem wasn’t the drive, which was set up correctly, it was the install media. I use an 8GB USB key drive to install Windows from an ISO file. A great piece of freeware called “Rufus” is what I use to make the boot-able USB key from the Windows ISO file. Rufus defaults to creating a Windows PE volume, which is what Windows setup is, that supports both MBR and UEFI with backwards compatibility. I though that would work, and it should have, but the OptiPlex 990 was BIOS or UEFI, not both. One option to create the USB boot key was pure UEFI.

While I was sorting this out, I noticed that when I switched the 990’s BIOS to UEFI mode, there were no more boot-able drives like the HDD, CD/DVD, or USB listed. This was accurate because none had been made available. The 3TB drive was GPT but did not contain any boot-able volumes at that point. I had yet to make a pure-UEFI USB key, and there was no disc in the DVD-RW drive, so no there were no UEFI boot options. Any and all BIOS/MBR, and UEFI/GPT boot devices are shown when the PC POSTs. As soon as I partitioned and formatted the 3TB drive as GPT, and inserted the all-UEFI USB boot drive, the OptiPlex 990 saw the USB drive as a UEFI boot device and Windows setup accepted the partitioned 3TB drive for install. After that, Windows 10 installed and I had ALL of the available space, which came in around 2.78TB.

To do…

Partition/format the drive as a GPT device.

Create a boot-able Windows PE USB drive and boot the target computer to it, with the larger-than-2TB-HDD installed.

Run DISKPART from the Windows PE prompt and enter the following commands to partition and format the drive as a GPT disk, minus the REM statements.

select disk 0
clean
convert gpt
rem == 1. Windows RE tools partition ===============
create partition primary size=300
format quick fs=ntfs label="Windows RE tools"
assign letter="T"
set id="de94bba4-06d1-4d40-a16a-bfd50179d6ac"
gpt attributes=0x8000000000000001
rem == 2. System partition =========================
create partition efi size=100
rem    ** NOTE: For Advanced Format 4Kn drives,
rem               change this value to size = 260 ** 
format quick fs=fat32 label="System"
assign letter="S"
rem == 3. Microsoft Reserved (MSR) partition =======
create partition msr size=128
rem == 4. Windows partition ========================
rem ==    a. Create the Windows partition ==========
create partition primary 
rem ==    b. Create space for the recovery image ===
shrink minimum=15000
rem       ** NOTE: Update this size to match the size
rem                of the recovery image           **
rem ==    c. Prepare the Windows partition ========= 
format quick fs=ntfs label="Windows"
assign letter="W"
rem === 5. Recovery image partition ================
create partition primary
format quick fs=ntfs label="Recovery image"
assign letter="R"
set id="de94bba4-06d1-4d40-a16a-bfd50179d6ac"
gpt attributes=0x8000000000000001
list volume
exit

Script from Microsoft

Create the all-UEFI Windows install USB drive…

Go into the computer’s BIOS by pressing F2 during the boot sequence (Dell), before Windows even starts to load. NOTE: BIOS/MBR disks will not boot in a UEFI/GPT configuration. Any change from BIOS/MBR to UEFI/GPT WILL REQUIRE a Windows reinstall. No way around it, so Back up your data.

On a separate computer, insert the USB key, and open Rufus as an admin.

The USB key should be listed in the top dialog box, make sure you’re formatting the right drive if there are multiple USB drives currently inserted into the PC. From the bottom part, near where it says “Create boot-able disk using [ ISO Image]”, click the small button with the disc and drive icon and choose your Windows install ISO.

Next, select the drop-down menu option under “Partition scheme and target system type”, choose “GPT partition scheme for UEFI.” If the source ISO file changes, the partition scheme changes also, so watch that.

RufusCreate the drive and insert it into the computer that has the large HDD and boot to it by pressing F12 (Dell/Lenovo). If the USB key was created properly as a UEFI device, it will show up as a UEFI boot option under the BIOS boot options which will still be the CD/DVD drive and the HDD (possibly).

Install Windows and relish in the large space now available!


How to Create a Windows Image for Mass Deployment

Requirements: Windows install media (7 or 10. 8.x?), desired apps for the image (Office, PDF viewer, web browsers, plugins), virtual machine software (VMware Workstation, Microsoft Hyper-V, or Oracle Virtual Box), and image creation and deployment software (ImageX.exe, MDT, SCCM).

Almost every place I have ever worked, IT had or needed a method to clone and deploy a specific Windows configuration and application set. From a few PCs, to hundreds, the requirements were the same, to deploy the same configuration with as little, repetitive work as possible. The ideal target being what Microsoft calls “zero-touch” deployments that require no interaction on the target computer whatsoever. This is offered by Microsoft System Center (SCCM) along with the Deployment Toolkit (MDT). Many shops do not operate that way, and have some level of interaction required during the imaging process. This piece will discuss creating a Windows install for distribution.


What you’ll need…

Windows and software install media (obviously)

Virtual machine software for the creation workspace. Why? Two reasons. First, virtual machines provide the option to create hardware-neutral images which can be applied anywhere, regardless of what is actually in the target computer. One image becomes possible for multiple hardware configurations. This also involves less work in mainatining the image as any work only needs to be done once and not x-times per different type of hardware. Second, most virtual machine software (I’m not sure about Virtual Box) have the ability to save a VM’s state, and revert back to that state, should it become necessary. VMware calls these “snapshots”, and Microsoft uses the term “checkpoint” in Hyper-V. Should a screw-up occur, it can be undone without loosing work or have to re-do everything. These are two facets that are simply not available with building images on real hardware. Test on real hardware, but build in a virtual environment.

  • VMware Workstation is pricey, but well worth the cost IMHO.
  • Hyper-V comes with Windows Server 2008 and later, Pro and Enterprise versions of Windows 8, 8.1, and 10 as “Client Hyper-V.”. The build computer’s CPU must support hardware assisted virtualization for Windows to install the Hyper-V role. Intel Core 2 Duo/Quad CPUs won’t muster.
  • Virtual Box, now owned by Oracle, is a freebie. I haven’t used Virtual Box very much outside of general curiosity.

The build workstation has to have some power to it. Nothing extravagant like an Alienware, or Falcon Northwest gaming rig, but above average. Try to avoid using a laptop as a VM build station. Laptops are great for testing, but a desktop PC is optimal. Don’t use a Mac. I love my MacBook Pro, but it isn’t meant for making Windows images. A quad-core CPU (Intel Core i5/i7, or AMD Phenom series) will work for starters. The more powerful, the better. RAM is the key. The more the better. I routinely work with 16GB of RAM on my workstation (the most it’ll take), and it can handle three running VMs and the host OS before going wacky. 32GB of RAM is not ridiculously expensive today, and well-worth the couple-hundred extra bucks. VMs take up storage space quickly. Working on several VMs, it is not difficult to fill a 2TB HDD (I’ve done it). Those are not that expensive either, and 2TB is the starting point I’d go with for a virtualization rig. Anything more, and you have to make sure your PC supports UEFI vs. BIOS, or else all of the drive’s space will not be recognized by the firmware, and Windows. Working from USB storage might fly, but the throughput won’t match that of internal storage, and you’ll have a bottleneck. My VM creation setup, however, is backed-up every night to my trusty 4TB WD USB HDD. If you can get large-capacity SSDs instead of traditional rotational drives, do it, but don’t sacrifice space for speed. An SSD for the boot volume with Windows and apps along with a large 2TB+ traditional HDD for VM storage is a nice setup, and not fiscally unrealistic.

Virtual Machine Setup…

Create a new VM that will become your Windows image. For Windows 7 and later, I recommend 4GB of RAM, 1 CPU with 2 virtual cores (if possible), and a virtual hard drive the size of the smallest drive that will ever receive the image. We have some 128GB SSDs out there, so 128GB is my vHDD size. That’ll assure the image will fit everywhere you intend to deploy it. Now, it is easy to see how fast space will go on your drives. Everything else is fine with the defaults. Bridged vs. NAT network adapter? It doesn’t really matter even for network-based capture/deployment. I’ve used both and have noticed no speed differential.

Install and Configure Windows…

Install Windows onto the VM with all of the default settings. If you’re lazy like me, you can use an unattend file to answer all of those pesky setup questions. This site, the Windows Answer File Generator, has a GREAT web UI for creating unattend.xml files that WORK. Place the unattend file at the root of your install media and let Windows install itself. The whole process for Windows 7-10 should be 20-30 minutes. Don’t bother with the product key and activation. Sysprep will just strip that out in the end. If your build process takes longer than a month, you might need the key and activation. I’ve never run into that problem. Don’t join any active directory domains. Sysprep will quit if it is run on a domain-joined PC.

Next, power-down (not sleep, hibernate, or pause) the VM and create a snapshot or checkpoint. This will save you 20-30 minutes of re-installing should a foul-up occur. Power back on and go into Programs and Features (Windows 7) and add/remove all of the stuff that is not needed. I get rid of the tablet components, XPS printer/viewer, Windows Media Center, Windows Fax and Scan. All of the stuff I know the end users will not touch.

Update Windows/Office…

Before getting into the nitty-gritty of configuration, completely update Windows through Microsoft Update. The older your version of Windows, the more updates it will need, and the longer the update process will take. A fresh install of Windows 7 Enterprise SP1 x64 from MS VLC ISO required 296 updates before no  more were required (as of February 2016). This will take about a day (8+ hours) to complete. One might think about adding MS Office into this process to allow it to join in the update process, but there is a reason not. Take this opportunity of having a clean install of Windows, updated, and use it as a template for other VMs. VMware Workstation allows VMs to be cloned and copied, so a patched copy of Windows can serve as a starting point for other virtual machine projects. A MAJOR time saver. Completely update Windows until it screams “no more” and shut down, then take a snapshot.

Clone or continue? That’s up to you, but whatever is chosen, the next part is installing MS Office (if needed. I can’t imagine it wouldn’t), and completely updating that through Microsoft Update. I do a custom install of Office to not include the programs users won’t need, like Infopath, and Lync, Skype for Business, and OneDrive for Business. YMMV. Microsoft Office 2013 Pro Plus needed 151 updates to be complete from a fresh install of the MS VLC ISO. Again, I wouldn’t bother with product keys or activation for Office. Shut down and take a snapshot when that part is done.

Application Installs…

Add all of the applications that need to be deployed with the image. Here is where the question of thin image vs. thick image is contemplated. A thin image contains just the bare essentials needed to get started with many other apps installed at distribution. Programs that change often, and would require updating/re-capturing the image are best left to installation at deployment. Candidates for this include Adobe Flash Player, Shockwave, AIR, and antivirus software. Software that has first-run settings which must be answered for the end user should be placed into the image, and not installed at deploy time. We install many apps with our image, so this process takes us about as long as it does to update Windows and Office. A good example set to start would be: Mozilla Firefox ESR, Google Chrome Enterprise, Adobe Acrobat Reader, Quicktime Player, VLC Media Player, Microsoft Silverlight, Visual C++ Redistributables 2005-2015, Skype and 7-zip. Run each and every newly-installed application to make sure they work as intended, and then delete the downloaded installers. The plugins, and antivirus (SEP) will be installed when the image is deployed. Power-down the VM and take another snapshot.

By this point, we have a basic working install of Windows which is moderately useful and could probably be distributed to end users. One question does arise which is substantial in nature, and determines how next to proceed. Does a custom default user profile need to be created and configured? If yes, we need to do that before capture.

Customizing a default user profile…

Windows, by itself, works pretty well out of the box, but comes with a myriad of first-run dialogs and prompts which can be confusing. My target audience is public computing, classrooms, kiosks and labs. For privacy reasons, user profiles are not kept on the computers. As soon as a user logs off from Windows, their profile is removed. Each time someone logs into one of the computers I am responsible for administering, they are logging in for the first time. Any and all first-run dialogs/prompts that can appear will. The option to spend 10-15 minutes of a 60 minute class, getting the software to work as desired, and out of the way is just not an option. To prevent this, I try to configure as much for the end user in advance as possible. Group policy is my hero in this effort. Almost anything can be set for the computer or a user through a GPO. The exceptions being non-Microsoft software like MATLAB, Maple, and Stata that all have first-run issues which often require administrative intervention. I don’t let users run as admins.

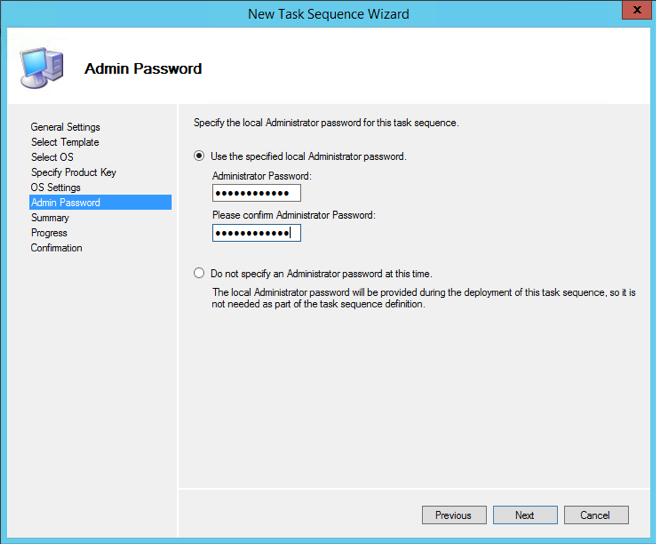
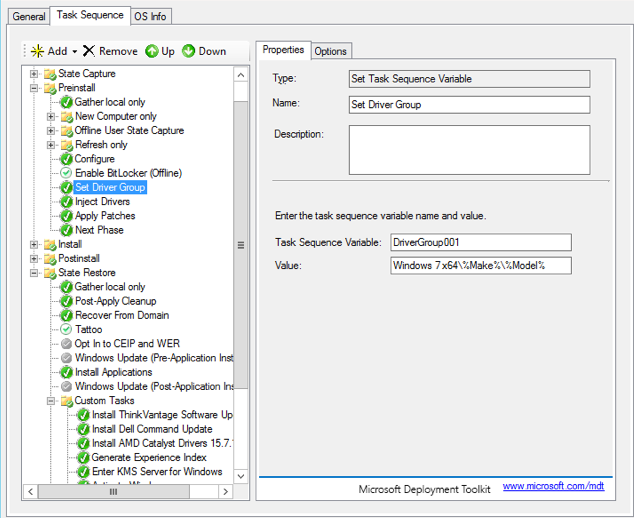
Sysprep is the utility Microsoft has made available for generalizing an installation of Windows since Windows 2000. Starting with Windows Vista, Microsoft changed to an image-based installation and mmaintenance process. Sysprep changed too, and became much more difficult to use (for me anyway). It is at this time that copying a customized user profile to the default required the use of an unattend.xml file. With Windows 2000 and XP, you could actually just copy it and everything would be fine. In the specialize pass (No. 4) of the unattend.xml file there is an option to add a pass called “CopyProfile” to the “Microsoft-Windows-Shell-Setup” setting that will copy the built-in administrator account’s profile to the default. The trick is when to apply this, during capture, or during deployment? That depends on how you’re capturing and deploying, but either way the built-in administrator account is what I use as a template for my custom default user profile.

Enable the built-in administrator account and give a password you’ll be comfortable with entering dozens of times. Log in as the admin, and immediately delete the profile for the other account setup asked you to make after installing Windows. The reason for this is that CopyProfile will not copy the admin’s profile if another profile exists on the file system at the time the copy takes place (experience speaking here). Delete the profile from the advanced system properties window, and not by just deleting the folder under C:\Users. Other accounts can remain, they just cannot have profiles.

As the built-in admin, configure the Windows environment they way you want the end users to have it. Again, most of these tasks can be accomplished with a domain-based GPO. Run each and every program the end users are likely to use and answer any first-run dialogs and prompts. DO NOT surf the web as the built-in administrator on a Windows PC without antivirus software for obvious reasons, but an important another is profile size. Surfing with Chrome or Firefox even on just a couple of sites and will add megabytes of data to the profile. You could probably get away with not even running any of the browsers at all with a good GPO in place. Google, Mozilla, and of course Microsoft make GPO settings available to completely configure each piece of software and eliminate any first-runs. Adobe recently made an admx template for configuring Acrobat Pro and Reader via GPO. GPO templates exist for Microsoft Office 2007-2016, with a dizzying array of possible configuration options. Those and the settings for Windows will get 95% of end user configuration done in a customized profile.

Things that are easily set include the desktop wallpaper and icons, the start menu, screensaver, power options, and remote desktop settings. Take your time and run through each usage scenario, if possible, without puffing up the profile’s size. Large user profiles take a while to create at log in, and lengthen the log in time required to get started. In my case, every is logging in for the first time, so their profile will be created when the need to use the PC. A 500MB profile will slow that entire process down. Once things are as desired, power the VM down and take a snapshot. This snapshot is a failsafe point for return after the image has been captured.

Capturing the Image…

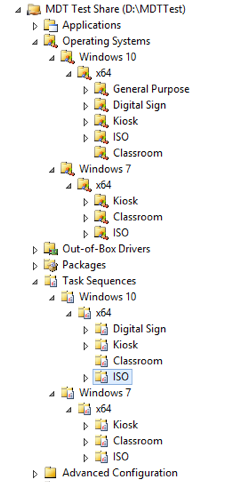
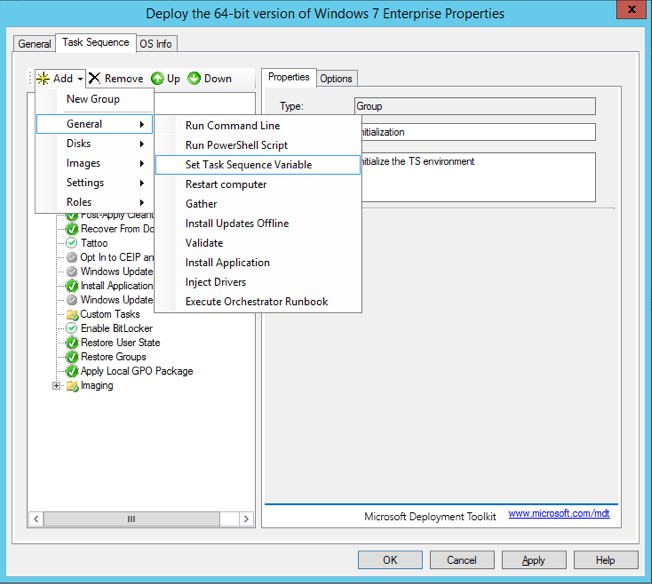
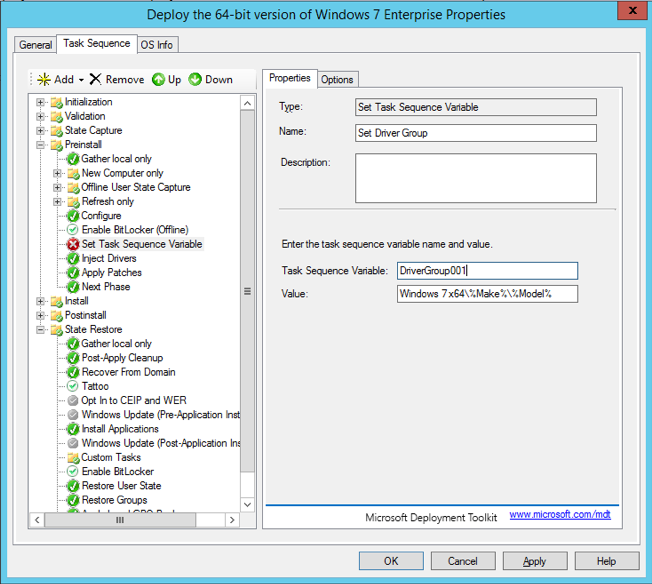
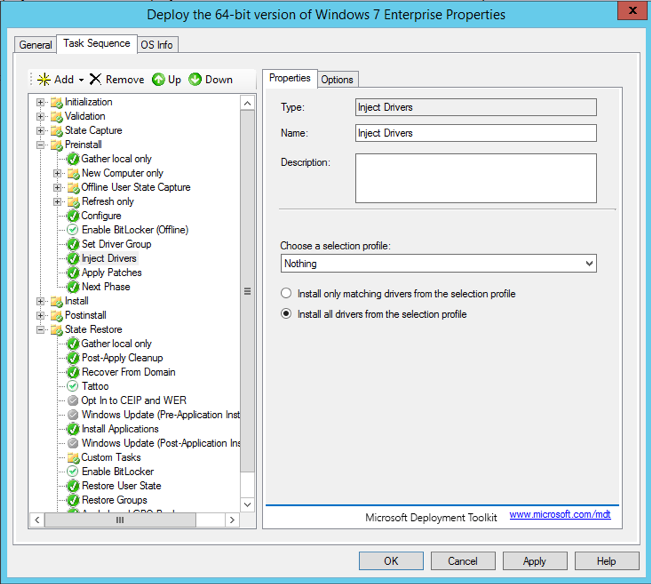
There are several different ways to get an image of Windows. Traditionally, Norton (Symantec) Ghost was the standard for deploying Windows operating system images. After acquisition, Symantec let the product stagnate over a period of years as Microsoft developed successive versions Windows, and it became necessary for us to switch to a solution that would natively support later versions of Windows PE. We adopted MDT a couple of years ago for a few reasons, and that allowed us to change the way we made operating system images. Driver support in Ghost is not real versatile. The option to create one image for multiple hardware configurations required substantial tweaks and endless trial and error testing Ghost was designed to have one image per hardware type, with all of the drivers included in the image. This is not that big of a deal since many large IT outfits only support a few different types of hardware models and configurations. For us, that was six different images for a single type of Windows install (Windows 7 Pro x64). Needless to say the images did not get updated too often due to the amount of work involved.

Removing the hardware dependence and creating hardware-neutral images was a requirement for our new imaging software. An install in a virtual machine allows that type of neutrality.

Boot the VM to be captured an log on as the built-in administrator, the one that was pre-configured before. From the advanced system properties, delete every other user profile on Windows. The accounts can stay, but the profiles cannot. If there are any VM-dependent software like VMware Tools, or Hyper-V Integration services installed, uninstall them. If there are mapped drives between the host and guest OS, power-down the VM, remove them, and restart.

I like to clean Windows before capture by running a few command prompt executables.

Go to %TEMP% from the Run dialog and delete everything there that can be deleted.

Open an administrative command prompt and run the following commands.

Delete any and all shadow copies.

vssadmin delete shadows /All /Quiet

Get rid of any downloaded software updates.

del c:\Windows\SoftwareDistribution\Download\*.* /f /s /q

Delete any hidden Windows install files. Chances are there are none, but it cannot hurt to check.

del %windir%\$NT* /f /s /q /a:h

Delete the Windows prefetch files. There also probably none of those either.

del c:\Windows\Prefetch\*.* /f /s /q

Run disk cleanup.

c:\windows\system32\cleanmgr /sagerun:1

Defragment the C:\ drive (It shouldn’t be that fragmented).

defrag c: /U /V

Clear the Event Logs. Execute one command on each line.

wevtutil el 1>cleaneventlog.txt
for /f %%x in (cleaneventlog.txt) do wevtutil cl %%x
del cleaneventlog.txt

Flush the DNS cache.

ipconfig /flushdns

NOW! We’re ready to capture. The question is how?

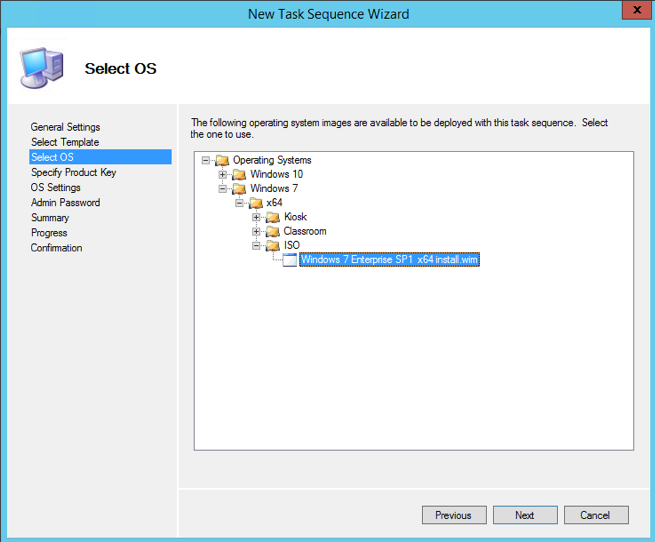
We use MDT for imaging. MDT has a special type of task sequence called “Sysprep and Capture.” To kick this off, from the install of Windows to be captured, navigate to \\mdtserver.domain.com\DeploymentShare$\Scripts and run LightTouch.vbs. This will connect to the deployment share, and start the process. Enter any credentials required, select the appropriate task sequence, and give the image a name, then begin. Capturing from a VM to an actual MDT server, over the network, will take a while. Even for small images, it is best to just let the task run and not use the build computer for anything else until it is finished. I do this at the end of the day, when I’m not going to be needing to use the computer.

Once the image has been captured, the VM will restart and wait for further action. At that point, power-down the VM, and roll back to the last snapshot taken before the VM was captured. Back to not-so-square-one, and ready to re-capture, update, or whatever when necessary.

Outside of MDT, it is possible to capture with just a Windows PE boot disk with ImageX.exe. This process is not a clean and automatic as MDT, but it works. Going that way, the pre-capture setup process goes a little differently. In its most basic form, you need to only run sysprep from the VM about to be captured, and shut down, then restart to the WinPE boot disk and run ImageX.exe. To copy the default user profile this way, an unattend.xml file needs to be used with sysprep and the CopyProfile option must be set to “True.” The unattend file is only needed if there are any customizations that need to be applied when the image is applied to a computer. Large capacity USB flash drives are very affordable. I have a 128GB USB drive, that I purchased for $29.99, configured as a WinPE boot drive, and can be used to capture images directly to the drive instead of over the network, as it is usually done.

Enjoy!