Hi,
Now for something completely different… Something basic, and easy, installing Windows 10. As the versions of Microsoft Windows have progressed, the steps for installation have become fewer and easier. Roughly, Windows 10 installs the very same way as Windows 8/8.1, and to a lesser extent, Windows 7. Most consumers received their copy of Windows 10 as a free upgrade to their existing computers. Other consumers obtained Windows 10 through the purchase of a new a computer from a retailer. Those two examples cover most of the consumer Windows 10 market, save for the gamers and enthusiasts who often build their own PCs. Large to medium-sized businesses and other institutions usually have some type of software agreement with Microsoft that grants them access to Windows 10 installers as ISO files. Where I work, we completely wipe any new PC we receive and install our custom image of Windows 7 or Windows 10 through MDT. Most times, we never even see the OS the OEM placed on the new computer’s hard drive.
Before installing anything, consider whether or not Windows 10 is a good idea. I am a big believer in “if it is not broken, don’t fix it”, within reason. For many folks, Windows XP works great, and does what they need, but it is no longer supported by Microsoft, and many software companies. I like to stick with products that are currently supported by their manufacturers with security patches and updates. If you’re installing to new or existing computer hardware, gather a list of your existing computer’s hardware from the Windows Device Manager, and check the computer manufacturer’s website for Windows 10 drivers. Driver support for the new operating system is essential to a successful Windows install. The same goes for your applications. Visit their respective websites and see if the your release supports Windows 10, or if they have a newer version that does. If you can’t use the applications your computer was purchased for running, on the new operating system, there is no sense in moving to that new OS.
Another point which should be considered before, during, and after the Windows 10 install, and generally for the operation of any computer on the public Internet today is security… A big part of how and why Windows PCs become compromised is through poor patching or no patching being done at all. During the install process, you’ll have a fresh install of Windows 10, un-patched and without malware protection, on the public Internet. Though the probability of something going wrong is very light, not like it would be for a fresh install of Windows 7, there’s still a chance. Best to isolate the new install from the web with a NAT device or router. Most businesses and consumer homes use a wireless router for connectivity, but it is still best to make sure Windows 10 stays behind a NAT until it is fully patched, and configured with malware protection.
A nice thing about Windows 10 is that it will run on many types of computers, even those with meagre hardware specifications. Still, 32-bit (x86) versions of Windows 10 require the 32-bit installer, and the same goes for the 64-bit (x64) version of Windows 10. I struggle to find a good reason to use the 32-bit version of Windows today. The bitwise operator of your computer’s CPU and the corresponding chipset are what determines the version of Windows, which can be used. Most CPUs today are 64-bit, but can run the 32-bit OS. 64-bit platforms make available faster, multicore CPUs, and amounts of RAM greater than 4GB. 32-bit applications, like Mozilla Firefox, and VLC can still run on 64-bit versions of Windows 10. The same goes for 64-bit versions of Windows 7, 8, and 8.1. Unless a concrete and specific reason for using a 32-bit version of Windows is apparent, go with the 64-bit edition.
Microsoft’s hardware requirements for Windows 10 can be found here. Generally, you would be hard pressed to find a computer, worth using, that does not exceed the given hardware specifications. My suggestions are to have at least 4GB of RAM (8GB-16GB would be better), a dual-core x64 CPU (Core i5 or better), and a disk drive with at least 64GB of space. Since we’re installing from scratch, this is the time to replace or optimize any hard drive-related components. I like SSDs because of their speed, and they are no longer incredibly expensive as they used to be. NewEgg has 250GB Samsung SSDs for under $100.00. A no brainer…
Whether your installing to a virtual machine (VM), or actual computer hardware, you should do so to a clean hard drive. It is possible to just install over an old system, and have the Windows 10 installer overwrite everything, but that could be problematic. If an existing computer will be re-purposed as a Windows 10 computer, why not remove the hard drive with the existing Windows install, and replace it with a fresh, clean SSD? That way, if there are any deal-breaking problems with the Windows 10 install, you can just swap-in the original disk drive and be back at square one with no data loss. In any circumstance, if you are going to be tinkering with hard drives, make a fresh and complete backup of any crucial data before proceeding. I have seen static discharges, which were very minimal to us, destroy good hard drives.
To install from a VM, you simply need access to the original ISO for Windows 10. Installing to hardware requires placing the Windows 10 ISO on a USB flash drive as a bootable volume. I like to use a program called “Rufus” to create bootable USB drive for Windows, and Linux. Microsoft also makes a tool for converting an ISO file to a bootable USB drive, as well.
After creating a new VM, point the virtual CD/DVD drive to the Windows 10 install ISO file. In VMware Workstation, a fresh VM, with no installed OS, will boot to the virtual CD/DVD drive file automatically. If an existing VM will be used, which already has an installed OS, wipe the virtual hard drive before installing Windows 10. A basic Windows PE USB flash drive contains the diskpart utility which can quickly erase a drive, virtual or fixed, with the “clean” command. Some computers may require their BIOS to be reconfigured to allow it to boot from a USB drive. Most PCs won’t need to be re-configured this way, but if the PC does not boot to the USB drive, check the BIOS before worrying about the actual USB drive.
Once the computer or VM’s boot sequence detects and mounts the Windows 10 install drive, it will start the install sequence (setup), which is a customized version of Windows PE. When everything is ready, a welcome screen will be displayed.

Choose the appropriate options and click “Next”, or press Alt+N. The next screen allows you to opt for a Windows installation, or to repair your computer. Note that the repair option is only for that version of Windows, the one that is on the ISO. Click “Install now”, or press Alt+I, and things will proceed.
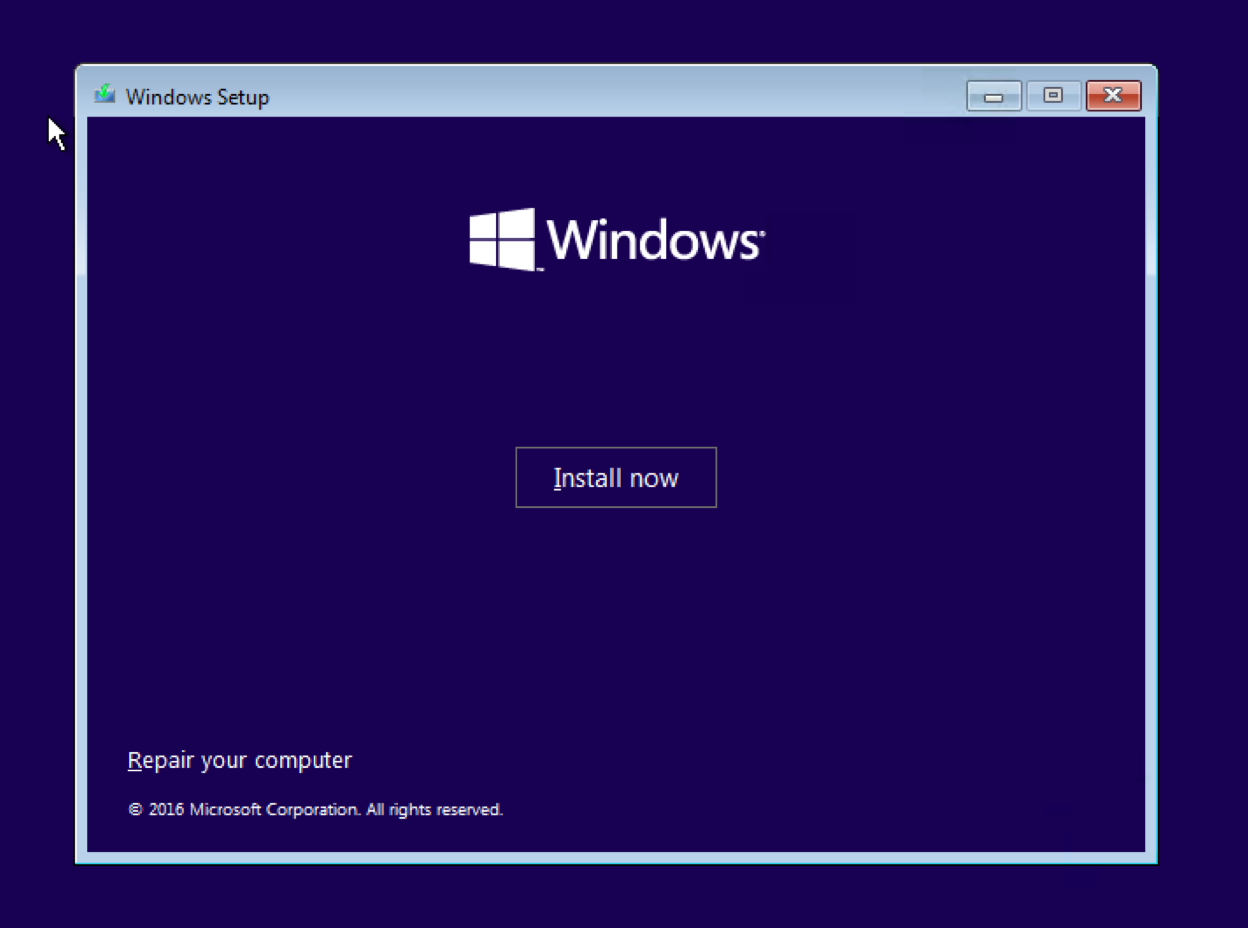
Install Windows 10, or repair your computer.
Next, accept the Microsoft EULA by selecting the check box, or pressing the Alt+A keyboard combo, and clicking “Next” (Alt+N).

Accept the EULA to continue
The Windows 10 installer will next ask where it should install Windows, and display a dialog of detected disk drives. No specific partitioning and formatting is required here. Setup will do that automatically, using the whole drive as a single partition/volume. If you have a different partitioning scheme in mind, do it here. Windows 10 has to be installed on an NTFS volume, no exceptions. If no drives are listed in the dialog box, Windows 10 setup either does not have the storage drivers to detect and mount the drive, or the drive is currently formatted with a file system Windows cannot understand. Erase the drive, and/or obtain the Windows 10 drivers for the computer’s chipset and storage hardware, then select the “Load driver” link (Alt+L).

Choose the drive, and click Next.
Once the install volume is chosen, partitioned, and formatted, setup will copy the install files over to the install drive, create/hide boot and recovery partitions, and unpack the install.wim file onto the main partition. This will take from 15 minutes to an hour, depending on the speed of the target hardware. Just leave the computer alone, and let setup do its thing. If there’s a problem, setup will indicate that.
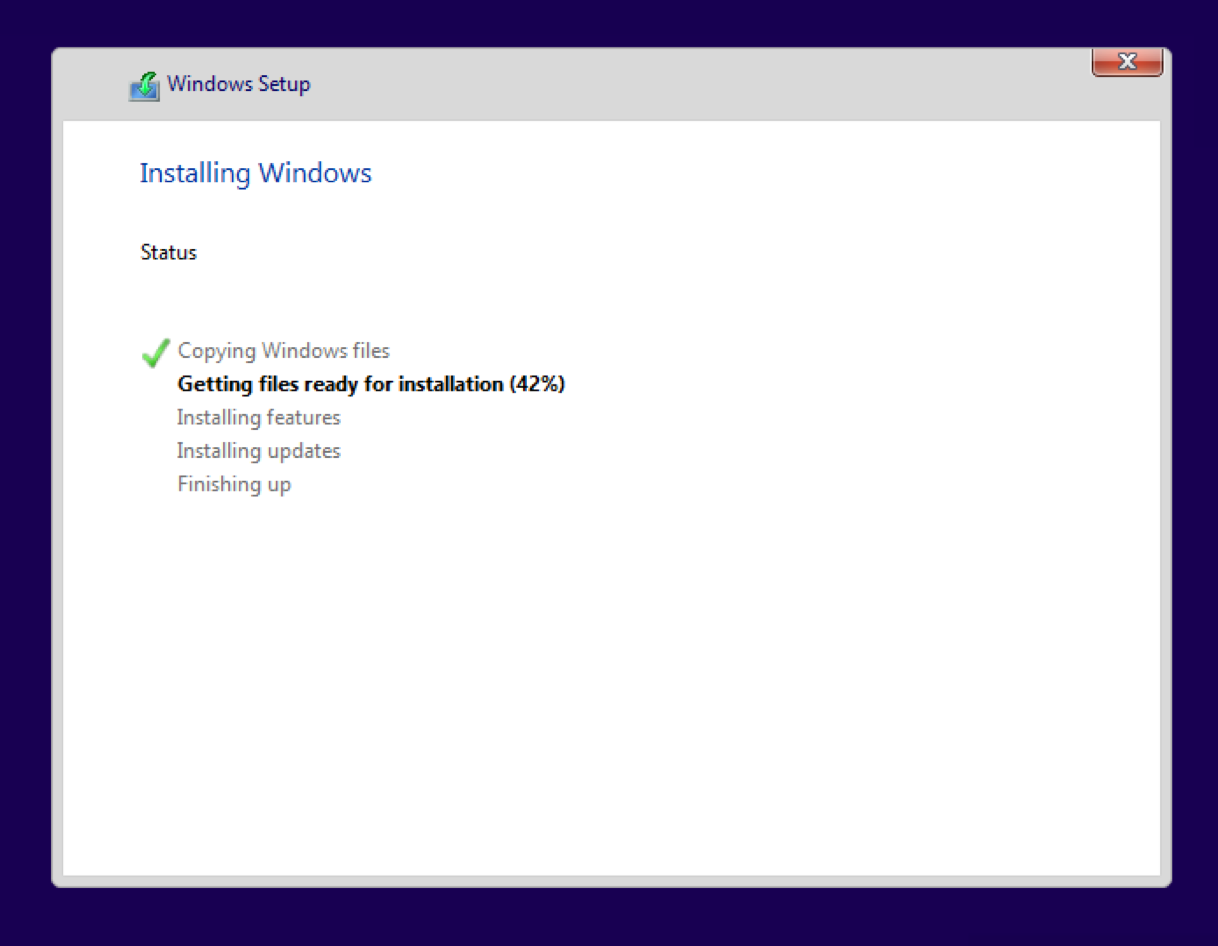
Installing… Be patient, and leave the computer alone during this part.
If the actual installation portion to the disk drive succeeds, setup will reboot the computer and start from the newly-installed image on the internal hard drive, not the USB install drive. Still, leave the install USB drive inserted into the computer, or keep the install ISO attached to the VM. When setup is ready for more user input, a Windows 10-style series of dialog windows will appear. First being whether or not to customize the setup options, or use “Express settings.” I always opt to customize every time.

Optional choice; Use Express settings, or Customize
Microsoft made Windows 10 very net-centric, and defaults to using, and/or prompting people to use their online services like the Windows Store, and OneDrive. These services are nice, but not be appropriate at this time, or for this user’s install. I really have yet to meet anyone that actually uses apps from the Windows Store, but that is me. Some people may use DropBox, or Google Drive to store their files online. I err on the side of caution, and disable every data collection service Windows 10 setup offers. These new features can be enabled at a later time, if desired.

Turn-off all personalization options that send usage data to Microsoft
Disable automatic connectivity behavior, and advanced telemetry data being sent to Microsoft.

Turn it all off. DO NOT automatically connect to open wireless hotspots
Windows SmartScreen only works for Internet Explorer (IE, and yes, it is still there), and the new Microsoft Edge web browser. It will not help with Mozilla Firefox, or Google Chrome, which is what most people use for everyday browsing. Turn it off. DON’T opt to send browsing data to Microsoft for better page prediction. Google does enough of that already. And absolutely, beyond any reasonable doubt, DO NOT receive Windows updates from unknown computers on the Internet. Keeping Windows is very important, but get the updates from Microsoft.

Turn it all off. There’s no need to send browsing data to Microsoft, or get Windows updates anywhere but from Microsoft
With all of that now set, Windows setup will do as instructed, which will take a little while. During this time, you’ll see the progress wheel doing its thing.

Please wait…
When done, setup will ask about how you are going to log in. This part is a little misleading. The two choices are to join an Azure Active Directory domain, or a local Active Directory domain. The time might not be right for either of these choices yet, so what’s the best option? Even if you’re not ready to join a local Active Directory domain, choose that option, and do not join the Azure domain. The process of selecting the local domain will prompt for the creation of a local administrative account. Recall, that the regular built-in Administrator account is disabled and without a password by default in Windows 8-10.
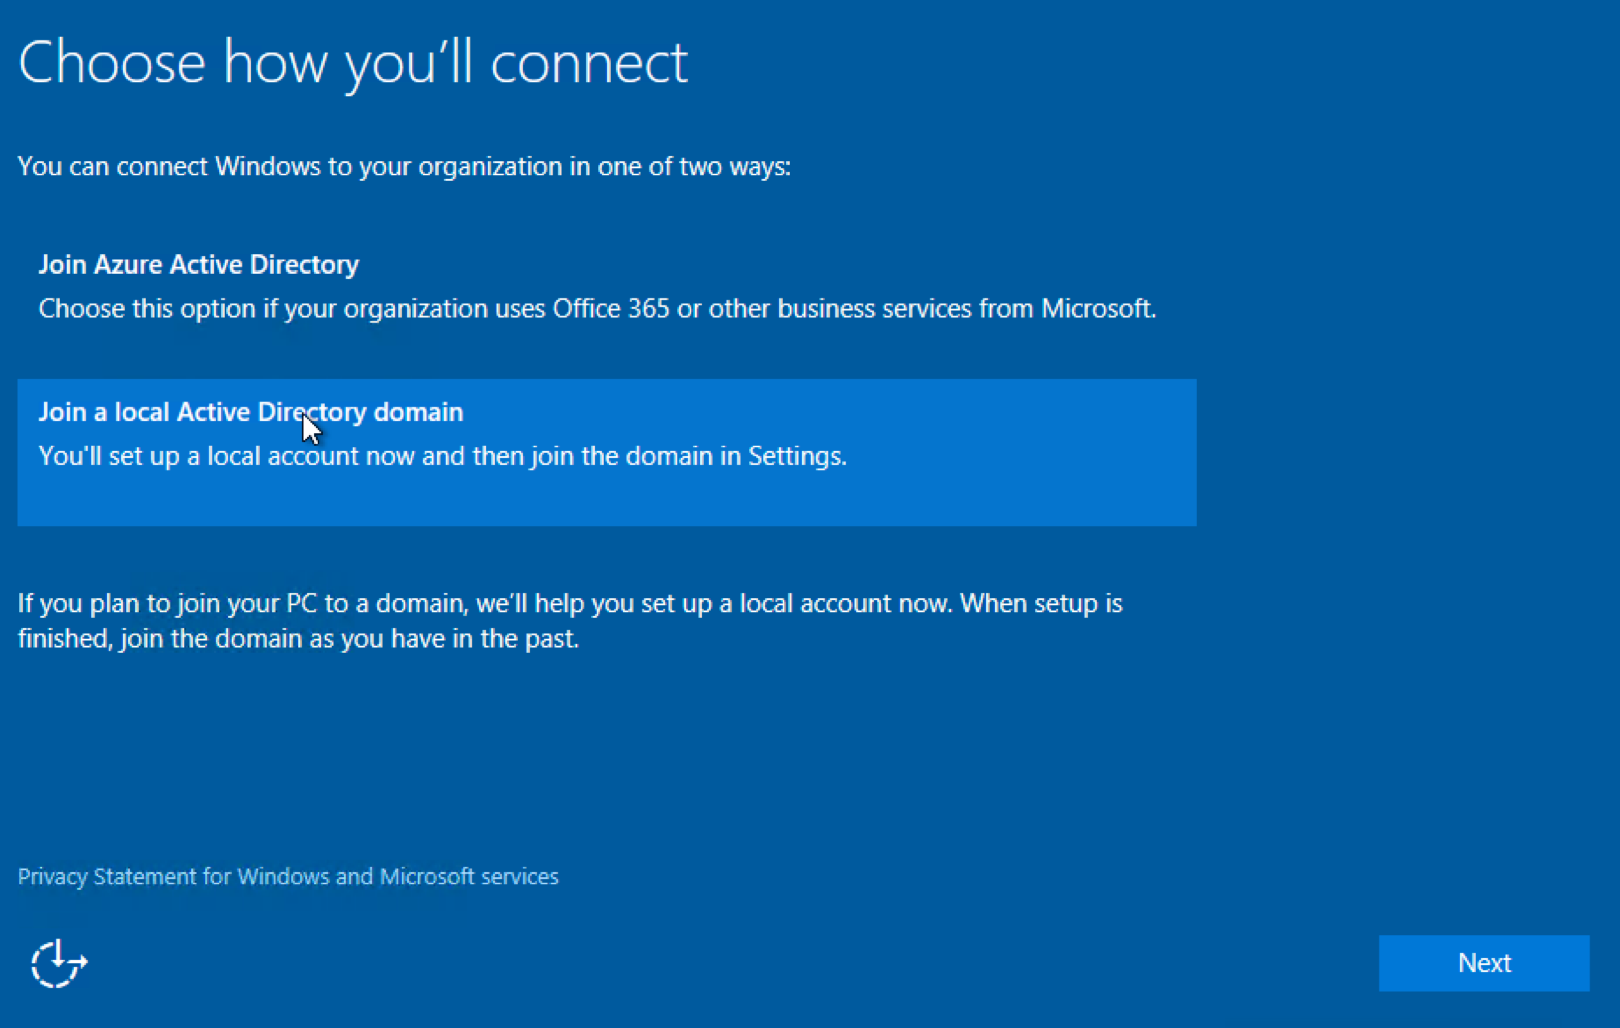
Join a local Active Directory domain for now
Next is that prompt to create a local account, which will have administrative privileges. Choose a good name, and a long, complex password to secure the account. Ideally, this account being created here should not be for every day use.
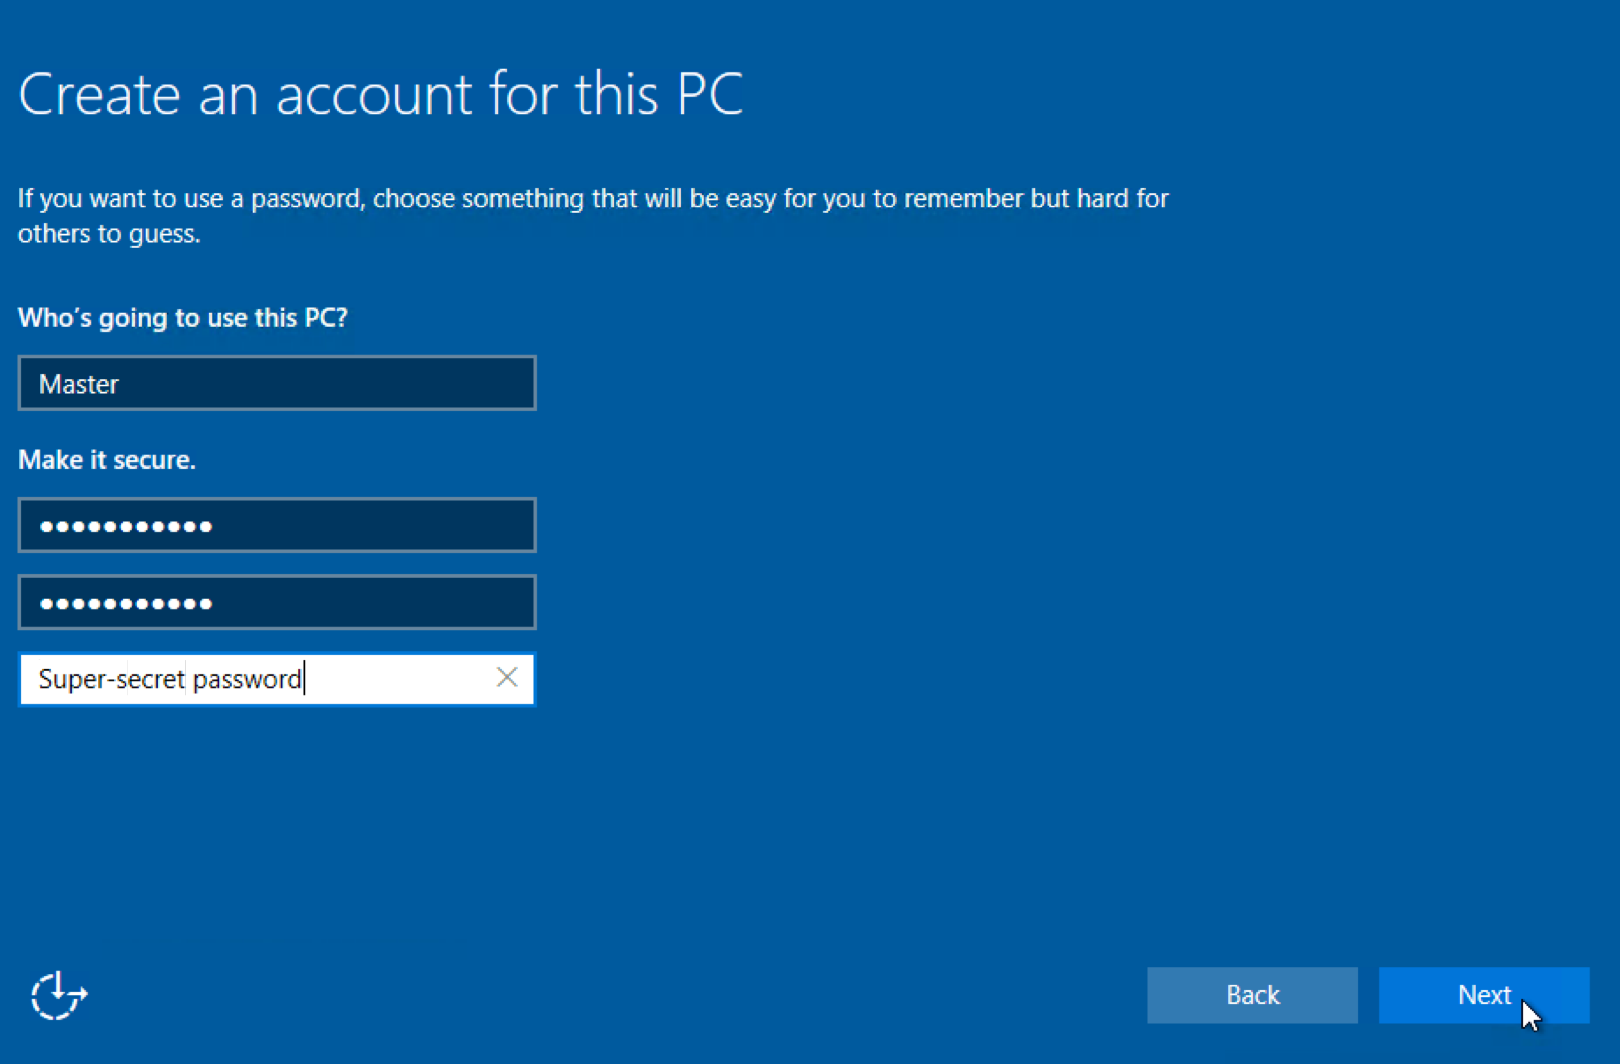
Create a local administrative account here in this step
While creating the account, and installing the new-style Windows Store apps behind the scenes, setup display what Microsoft calls “sign-in animation.” This step is repeated for a user that logs into a specific Windows 10 installation for the first time. Also, if a user decides to participate in early previews of new Windows 10 releases, existing users will go through this step again each time a new build of Windows 10 is installed.

Welcome! Please, wait…
When the animation finishes with the completion of the underlying tasks, a fresh Windows 10 desktop is displayed with the Start menu extended. If you’re connected to the Internet through a traditional ethernet UTP cable (Cat5/5e/6), you’ll see a prompt from the right side, asking if the computer should be discoverable on the network. This is a positive indicator of network connectivity. It is up you, but I would remain isolated until anti-malware software is installed and security settings are in place. Something similar will also appear for any available wireless networks that are detected.
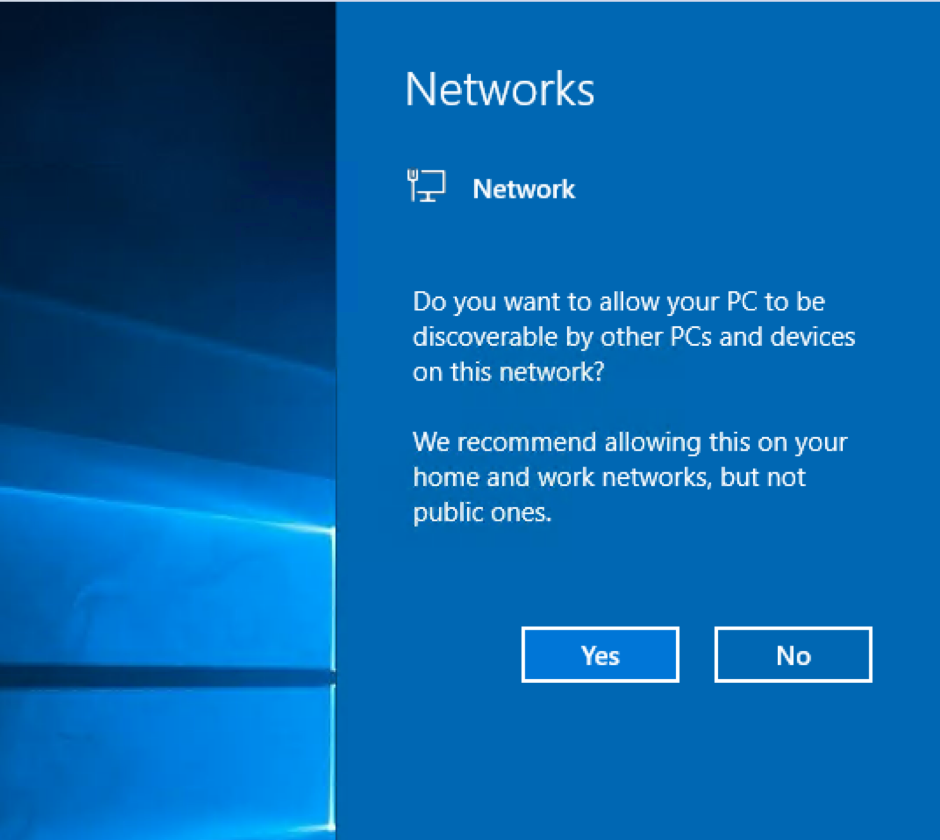
Network discovery? Yes/no?
Once network connectivity is established, the next step should be to bring the new Windows 10 installation up to date with the built-in Windows Update client in the new-style Settings application, not the usual “Control Panel” as in earlier versions of Windows. The Start menu has a gear icon on the very left of the menu, above the power button, and under the user icon. The word “Settings” could also just be typed into Cortana, and found that way.

Go for the updates, and update Windows until there is no more updates needed.
One point to consider is that most computers, Windows and macOS, usually have Microsoft Office installed at some point. Businesses usually have volume licenses along with the agreements that give them access to the Windows operating system. Now, Microsoft opts to provide both Windows and the Office suite as a service, instead of a product. Microsoft Office is available in this manner through the Office 365 subscription plan. If you’re going to install Office, do it now, and then run Windows Update on Windows 10 to bring both products up to date at the same time. By default, a new install of Windows 10 will not update itself automatically, immediately after being installed. That will happen overnight, provided the computer is powered on. Click the “Check for updates” button to get the process started.
Current update status, just after install, finds no updates.
Fortunately, Windows 10 hasn’t been out too long to require a massive set of 400+ updates to bring it current like a fresh install of Windows 7. Microsoft has also decided to package individual updates together in “packs” to make updating easier and quicker. The example version I am using here is Windows 10 Education 1607 (10.0.14393.0) x64, which was released on July of 2016. There aren’t that many updates out for this version, so the process will be quick. If Microsoft Office 2016 is included, there will be more updates downloaded, and installed. If Office 2013 is being updated, there will be even more updates to process.

Updates installing. Rinse and repeat until there are no more available.
One tool that is available online, for free (donations are appreciated), is called “wsusoffline.” The idea is to take the updating capacity of a networked WSUS server, and roll it into a local package which can be run like a regular Windows executable. As of this writing, wsusoffline will download, organize, and install updates for Microsoft Windows Vista through Windows 10, and Microsoft Office versions 2007 through 2016, in x86 and x64 versions for each product. Wsusoffline also includes updates for server operating systems, Windows Server 2008 through Windows Server 2016. I’ve used this product to apply a range of updates quickly to fresh installs of Windows I thought were not patched enough to be on the public Internet.

Choose your products, create a destination folder, and download the updates.
If you’d like to use wsusoffline with Windows Vista and Office 2007 installs, don’t wait. Microsoft and eventually wsusoffline are ending support for Windows Vista and Office 2007 on April 11, 2017.
If Windows 10 was just installed in a VM, and after the updates for Windows and Office are done, now would be a good time to create a snapshot. In any situation, Windows 10 will prompt you to activate your copy of Windows. I’d hold-off on this step. Get Windows 10 to the exact spot and configuration you’d like, with all of your applications installed, run it for a few days, then activate. That way, if you need to repeat the installation on the same computer, not others, you won’t burn through your activations. The same goes for Microsoft Office.
Now comes the fun part of installing all of the applications needed on the new install. I take the sting out of this by installing applications AS I need them, and not all at once, automating the install process as much as I can. To get operational, you’re going to need a few apps to be installed immediately after the Windows 10 installation. Windows 10, by itself, is not very useful. I also go through the process of removing the Windows Store apps that come with Windows 10 through Microsoft PowerShell.
The basics for me are: Google Chrome for browsing the web, the free version of Malwarebytes for protection against web-junk, 7-zip to enhance file compression/decompression, iTunes and VLC for my media content, Notepad++ and Visual Studio Code for my text editing duties, Paint.NET for graphics editing, and Sumatra PDF for reading those types of files. On my personal Windows installs, I leave out the Adobe products and Java until they are explicitly needed. Nothing against either one of those vendors, but those products are common malware vectors. At work, they are all needed. For Adobe Reader, Flash Player, Shockwave Player, and AIR. I submit an online form to Adobe for digital distribution. In return, I get a custom URL, which allows me to download full versions of the latest Adobe products. I place the silent install commands for these applications in a script, and run it all from a network share, or virtual share.
A really cool feature about this set of applications is that I don’t have to go out and hunt down the latest versions of each, individually. A website, called Ninite, will create an install package (EXE) that will go out and download the latest versions of the applications you have selected, and install them in one go. For free too, though there a paid pro version.
That’s it! Windows 10 is installed, with updates, and applications. The next steps should be to create another local account, a non-admin, for daily use, and decide how malware protection software will be implemented and managed.
Enjoy!