Send from Penn Email Address in Gmail / Google@SAS

Deprecated: Unfortunately, using Penn email addresses in Gmail is no longer a supported option.

———-

Step 1: Add Your Penn Email Address to Gmail

Important Note: If using 2-factor authentication (as required by all SAS Google accounts), you will need to generate an “app password” to use for #7 below. Click here to generate one.

  1. On your computer, open Gmail.com and log in (if you aren’t already).
  2. In the top right, click the Gear icon and then “Settings.”
  3. Click the “Accounts and Import” tab.
  4. In the “Send mail as” section, click “Add another email address”.
  5. Enter your name and the Penn e-mail address (e.g. yourpennkey@sas.upenn.edu -or- yourpennkey@writing.upenn.edu) that you use.
  6. Click “Next Step”.
  7. For SMTP server, enter: smtp.gmail.com

    For username, enter the username you used to log in to Gmail e,g.: yourpennkey@sas.upenn.edu –or- yourusername@gmail.com

    For password, enter the password associated with the gmail account entered above –or– the “app password” mentioned at the start of this post.The connection should use TLS and the port should be 587.
  8. Click Add Account.

Step 2: Confirm the address

  1. In a few minutes, you’ll receive an email in your Gmail inbox.
  2. Open the confirmation message you received from Gmail.
  3. Click the link in the email that confirms the email address.

Step 3: Change the “From” address

  1. In the message, click the “From” line. (If you don’t see this, click the space next to the recipient’s email.)
  2. Select the address to send from.
  3. You can also set the default address you would prefer in the Accounts and Import settings area (In the top right, click Settings (the gear icon). Click the Accounts and Import or Accounts tab.)

How To Add Penn Academic Calendar to O365 Calendar

This post is deprecated. Please follow up to date instructions here:

https://www.christopherjmartin.com/notebook/how-add-penn-academic-calendar-outlook-web-calendar-o365


By leveraging the Academic Calendar ICS feed that the Penn Almanac generously hosts (the page itself is here), you can add the Penn Academic Calendar to your O365 Calendar. After adding it, the Academic calendar will appear wherever you use O365 (e.g. O365 Web Calendar, Outlook desktop client, Apple Calendar.)


1. ) Copy this URL to your clipboard:

https://www.google.com/calendar/ical/pennalmanac@gmail.com/public/basic.ics


2. Open your O365 web calendar: https://outlook.office.com/owa/?path=/calendar/view/Month


3. At the top of the calendar, click the link for “Add Calendar”.


4. Paste the URL from step 1 into the field “Link to the calendar”. Type in “Penn Academic Calendar” in the “Calendar name” field. Click Save.

O365 Penn Academic Calendar Subscription


5. The Penn Academic Calendar will now appear as a secondary calendar on the left sidebar.


How to Set Windows AD Password & Connect To Shared Drive

Note that your Windows AD account username is the same as your pennkey username, but since this is a different account, the password will be whatever you set it to be.

1. Set New Password

To set (or reset) your SAS domain account password, please do the following:

* Use your browser to visit https://kite.password.isc.upenn.edu
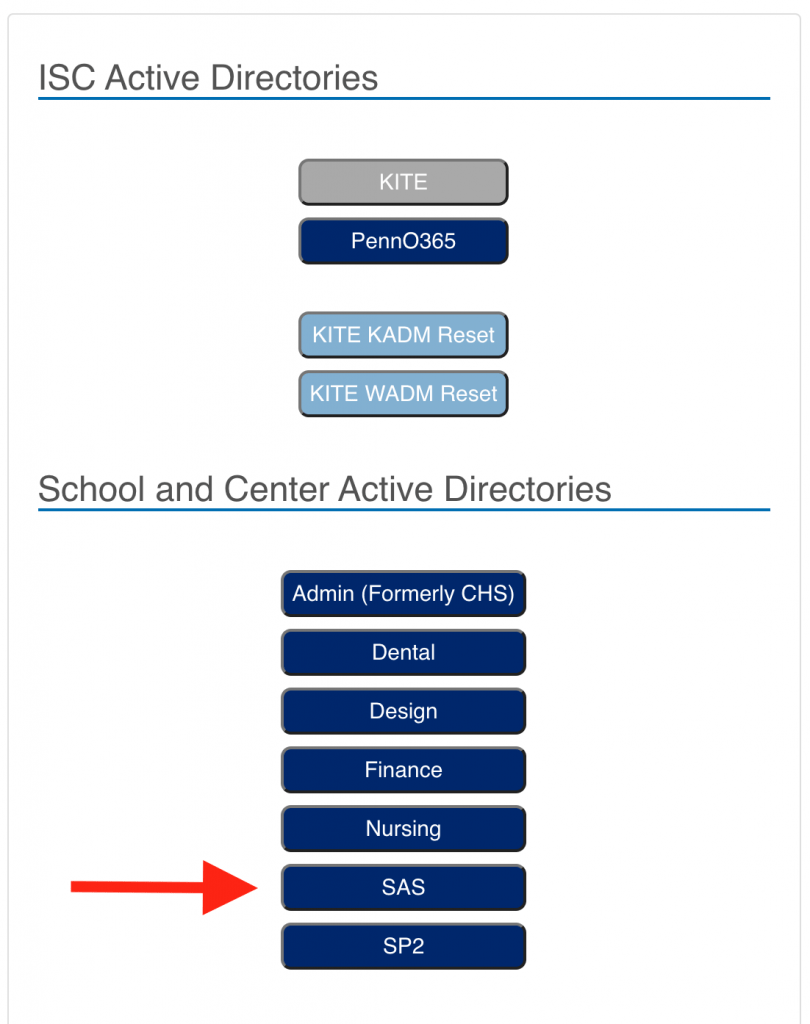
* Select SAS from the list of “School and Center Active Directories”

Select SAS from list of Password Reset Options

* Login with your Pennkey
* Follow the directions for how to reset your SAS domain account password.
* Once you have set the password, check for an email confirming that the change has been made
* Note that this process will reset only your Shared Drive / Filemaker Pro account password — not your Pennkey password or other Penn credentials.

2. How To Connect to the Shared Drive

Note: You must be on a wired campus computer to connect to the shared drive -or- be connected to the Penn VPN.

Click on the desktop of your Mac computer (Finder) and click on the top menu bar: Go -> Connect To Server

To connect to the CPCW shared drive, enter:
smb://hum-files.sas.upenn.edu/hum-shares/cpcw-3808

To connect to the KWH shared drive, enter:
smb://hum-files.sas.upenn.edu/hum-shares/cpcw-kwh

Use your Windows AD account credentials (the account above in Step 1) to log in.

3. How to Connect to Filemaker Pro (if applicable)

Filemaker Pro is available on KWH computers. If you have to connect to the KWH Filemaker Pro database, you can find the latest guide here: Filemaker Pro 17 Configuration Guide

Create a SAS Windows AD Account

Windows AD accounts are used for accessing SAS shared drives, Filemaker Pro & personal ‘U’ Drives.


Click this link to request a Windows AD Account (Note you will need your pennkey and penncard ID number): http://www.sas.upenn.edu/computing/help/faculty_staff/forms/ad_request+


Important: Form Instructions / Clarifications

1. Full Name – Your name

2. Full Email Address – Your Penn e-mail address

3. Pennkey Username – Your PennKey username

4. PennCard ID # – the middle 8 digits of your id number – can be found on your penncard.

5. Status – your role (Work Study Students – please select “other students*” and specify “Work Study.”

6. Department – department you will be using this account with. (ie: CPCW or KWH).

7. Daytime Phone – a number you can be reached at, if necessary.

8. Reason(s) for Account Request – If a new employee, select “I am a new employee and require the account to get started in my position.”

9. Home directories – Work-study students and faculty should select No.

10. Use with a Mac – if logging in to a Mac, select yes.

11. Supervisor Approval – fill in “Chris Martin – chmarti@sas.upenn.edu”

12. SAS Local Support Provider – fill in Chris Martin – chmarti@sas.upenn.edu”

13. Additional comments – only if necessary


When your account is ready, you will be contacted by Chris with instructions to set a password for your new account.

Please note, account requests will take 1-2 business days to process.


Note that if you need to access these services from off-campus or over wifi, you will also need a Forticlient VPN account and connection.

For help with Filemaker Pro, check out the Filemaker Pro 17 Configuration Guide.

If you’ve forgotten a password for your AD account (for accessing Shared Drive / Filemakaer Pro), click here to reset your password.